
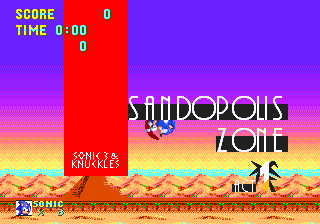
Flying Battery has taken our heroes to a dry, isolated desert region of the island, home to ancient Egyptian buildings and artifacts. Act 1 takes you through the sunset labyrinth of crumbling structures, where sand slides, crushing blocks and quicksand are the order of the day. Act 2 is based solely inside a huge pyramid - keep it well lit to prevent the ghosts from appearing, and doors only open when you press against timed switches, closing slowly while you make your way towards them. One of the most puzzle-based levels ever, with all kinds of traps and tricky features. A long and difficult zone for any player.
Game: Sonic & Knuckles
Stage Number: 3
Level Division: 2 Acts
Boss: End of Act 1. End of Act 2.
Playable Characters: Sonic, Knuckles. Sonic & Tails, Tails (Sonic 3 + Sonic & Knuckles only).
Difficulty Rating: ![]()
![]()
![]()
![]()
![]()
Music: The various components of these tunes successfully capture the appropriate elements of menace, searing heat and mysticism with a melody that's familiarly Egyptian-sounding, and a deadly slow-paced beat underneath. Act 2 reduces the pace and adds considerably to the spooky feel, though remains loyal to the tune.
Typical Length:
Act 1: 4 minutes - 6 minutes
Act 2: 5 minutes - 7 minutes
Available Items:
| Act 1 | 383 | 5 | 22 | 3 | 1 | 2 | 5 | 0 | 3 | 0 | 7 |
| Act 2 | 284 | 4 | 8 | 2 | 2 | 2 | 1 | 1 | 1 | 0 | 4 |
Sandopolis Zone Downloads:
| Level Maps: |
Act 1 map (.png) Act 2 map (.png) |
| Art: |
Official badnik art (.jpg) Official concept art (.jpg) Art found in the Japanese instruction manual |
Top Tips
- If you're looking to cut down on your time for this level, in Act 1 particularly, try to avoid using the long ropes to scale down the walls, because it's usually easy enough to just leap down by yourself and aim for the bottom right side of the area. In Act 2 it can be a bit more complicated, because you need to land at an exact point or you'll have to take a detour or try again. Beginners should probably stick to the ropes though. Hence the expression "learning the ropes"... ha.
- The Skorp badniks are particularly nasty fellas, and among the most deadly accurate of Robotnik's creations, as that spiked tail is very tough to dodge. The top strategy is to try and sneak up on them, made easier if they're on a slightly higher step than you are, then try a quick spin dash before they can react to you.

- Be very careful of getting caught by the many crushing blocks that often move up and down over entrances and exits to passages. If you blast on through, you might not be able to stop if a crusher suddenly appears and catches you in its path. Leave the speed for external sections, and keep it fairly slow when inside enclosed spaces.
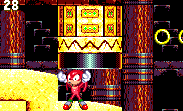
- In Act 2, treat the light switches like you would air bubbles in water levels of other games; always give them a tug whenever you see them, because you don't know how long it'll be until you see the next one. Well, realistically, they are quite regular, and it takes quite a while before the ghosts actually start trying to attack you, but when they do, it is a bit annoying. It's good to keep the place well lit anyway.
- Also in Act 2, push on the black switches all the way to the end in order to allow the maximum amount of time to get through the door it links to, and while you can still hear that switch ticking down, get a move on!
- There are tons of Special Stage rings in this level, and rather than being accessible through hidden tunnels in the walls like they usually are, you're more likely to find them in their tiny rooms, tucked away in normally ignored corners, so don't be afraid to explore this vastly complicated level.
Each section of this page allows users to add their own notes to fill in any missing details or supply additional research etc.
View general notes for Sandopolis Zone (9)
#1. Comment posted by 3ach on Sunday, 14th August 2011, 6:21am (UTC)
#2. Comment posted by 3ach on Sunday, 14th August 2011, 3:16pm (UTC)
#3. Comment posted by andy on Tuesday, 30th August 2011, 4:49am (UTC)
#4. Comment posted by Anonymous on Monday, 17th September 2012, 12:52pm (UTC)
#5. Comment posted by some1 on Saturday, 20th July 2013, 12:28pm (UTC)
#6. Comment posted by Anonymous on Monday, 26th August 2013, 12:41am (UTC)
#7. Comment posted by Anonymous on Saturday, 21st December 2013, 2:50am (UTC)
#8. Comment posted by Teslamania on Saturday, 7th January 2017, 3:14am (UTC)
#9. Comment posted by Creepsterthecreep on Monday, 31st July 2017, 2:04am (UTC)
Hide Notes

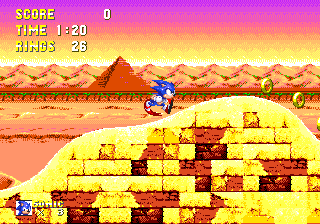
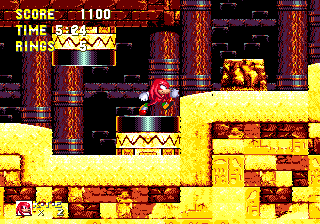
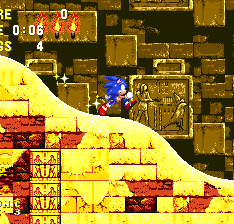
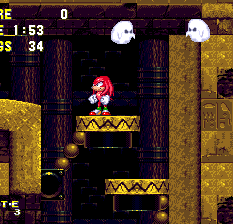
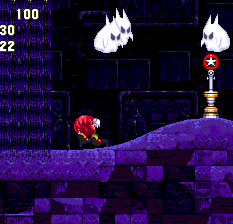
The pyramids of Sandopolis are based in the middle of nowhere. Presumably on a far, remote edge of Angel Island, there's little else but miles of empty desert wasteland around. It's sunset though, which is always nice, and the sky is purple at the very top, gradually turning to bright yellow along the horizon. There are rows of sandy hills far in the distance and an occasional pyramid in front of them. It's hard to make out, but I believe there are some palm trees spaciously distributed just in front of them, and then simply semi-flat, dry land separating all of that from you. One neat graphical feature you may spot is that the whole background shimmers slightly in the hot, desert air. Act 2 takes place exclusively inside a large pyramid, and like Labyrinth Zone, the background is simply a huge wall of blocks, not too far away from the foreground. They're a kind of dirty yellow colour, illuminated by the torches, which are arranged in threes in certain places across the wall. The blocks vary in size and shape, but they're all very old and crumbled and some even have little Egyptian hieroglyphics on them. It's always the same image though - a man on the left and what appears to be a bird on the right, with some other stuff in the middle. Of course, as the lighting dies down and the ghosts appear, the background, and all of your surroundings get darker, and you can see the torches getting less powerful on each phase.
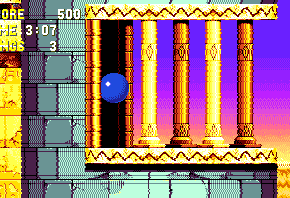
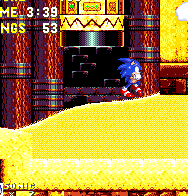
Yellow and brown stone blocks, crumbled and uneven, make up most of the ground surrounding you with occasional Egyptian symbols on some of them. When outside, in Act 1, this ground shimmers a little just like the background does, and thick chunks of solid sand provide for most of the floor and walls. In some sections, you can also find yourself in large pillar structures. Here, the ground is based within a large cylindrical construction of cracked old turquoise coloured blocks and the floor is solid yellow ground, with a zig-zag pattern running through it. It has a high ceiling above it, made up of the same thing, and long thin yellow pillars on either side of the path hold it all up. Other sections in both acts place you inside small rooms, where the walls in the background are of plain black bricks. There are also pairings of dark red-ish pillars supporting it.
View Notes(0)
Go to..
No notes have been posted in response to this section.
Hide Notes

Now this is one big level, so get ready for quite a long experience. At a glance, the map of Act 1 mainly takes place on a series of platforms in a very complex design, some with curved roads on the floors and ceilings and occasionally connected by long diagonal sand slides. There are corridors, often located inside the brief internal sections, but a lot of open spaces as well, usually between huge turquoise pillars that your character can scale their way down using the hanging ropes. Being based mainly on sand, the roads are full of lumps, bumps and steps along the way, and short curves in the road, loop-de-loops and catapult devices regularly send you hurtling through the air. Those loops are always against the wall, by the way, and rather than coming in one side and exiting the other, you have to spin round and round it a few times before it finally throws you upwards. Sand slides occasionally force you the other way, but your main direction is right in Act 1, and each route mostly sticks to its own large horizontal segments of the map.
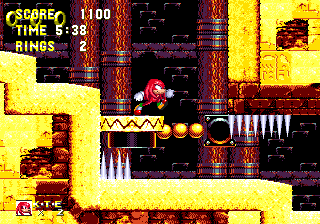
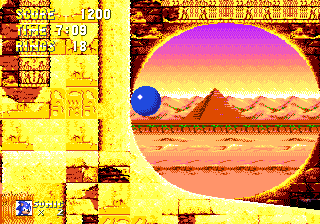
Act 2 is generally more enclosed, with the action all taking place in a series of corridors and rooms, except for large open areas for more sand slides. The pieces of ground seem to be more connected here, with less emphasis on crossing gaps in the path, and more on working your way through trap-filled passageways and figuring out little puzzles at a generally slower pace. This act uses the looping system on several occasions, where a path or drop will carry on at the opposite end of the map when you reach the top or bottom of it, at certain points. This is used to either create a seemingly longer vertical route, or by means of a detour, to get you back onto a previous ledge you may have missed. Most other structural elements are the same as Act 1.
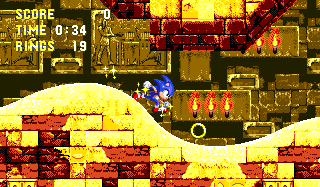
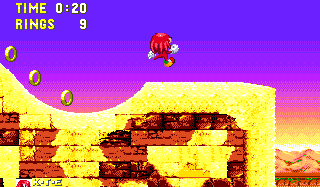
As for routes, the two acts are rather different. Sticking with Act 2, this mostly has one long, single route, except for a couple of occasions where Knuckles is able (or is forced) to break down blocks to find his own brief, and often more difficult path toward the end of the level. He can also access an alternate start of the act (and an exclusive big ring) by simply climbing the wall to the left of the entrance. The other detours mainly occur at a couple of points where you have to scale down between two huge turquoise pillars from the top of the left one to a platform at the bottom of the right one. If you miss this, you'll need to carry on with the route downwards to either find an alternate path, or keep dropping to loop back up to the top and try again. Act 1 meanwhile is a mass of routes, sub-routes, shortcuts and hidden rooms and it'll take you ages before you explore all of them. Essentially, there are two main routes that branch off from each other fairly early on. The top route is quite vast, splitting and rejoining multiple times across most of the map, but with easily missed entrances and connections, it's harder to get on, and as a result most players will remain near the bottom of the act, oblivious to what's going on above them. Knuckles can gain access to the above areas early by climbing the very first straight wall at the start, and as discussed by Point #4, the upper middle of the act splinters confusingly into an array of sand pits, with sub-routes emerging from them at different floors. A few shortcuts or hidden areas at the very top of the stage are designed specifically for Tails' flight ability when playing S3&K, including one of the big rings, and several barriers along the brief upper sub-routes prevent access to anyone but Knuckles.
Finally, this stage is absolutely packed with well hidden Special Stage rings. There are seven in Act 1 (often hidden in secret little rooms to the left of an area, which you don't normally notice while heading right) and four in Act 2, though of course some are only in places accessible to certain characters so I doubt it's possible to pick up all of them in one go by fair means.
View Notes(3)
Go to..
#1. Comment posted by MoDaD on Monday, 1st August 2011, 12:22am (UTC)
#2. Comment posted by Mike on Thursday, 11th August 2011, 4:41am (UTC)
#3. Comment posted by Ratchet 0203 on Tuesday, 23rd December 2014, 11:34am (UTC)
Hide Notes

Thin waterfalls of sand (or, if you will, "sandfalls"), pour from long diagonal sand slides or frequently just edges of platforms or ceilings. If you jump into them, they will move you slowly either up or down. You won't be able to move left or right very quickly, but you can repeatedly jump upwards, regardless of the direction of flow to get yourself to the top ledge. These sandfalls are usually vertical, but you can also find them curving round into horizontal ones across ceilings that carry you along, and you can jump out at any time. When you see a small yellow stone block on the edge of a platform, go up to it and push it off over the ledge, by holding the direction button towards it. It's heavy but it eventually tumbles, and lands on a series of small wheels suspended in the air, which move it along the path. Jump on it to be carried along to the following area, but make sure you jump off when you see the next ledge, because the block usually falls off into the quicksand below.
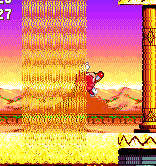
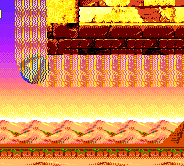
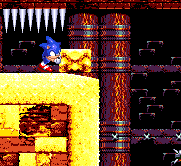
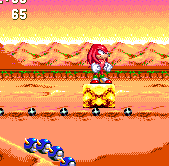
This quicksand works just like the oil in Oil Ocean and the sludge pits in Marble Garden. If you fall in, simply keep jumping to stay on the surface, and then make your way to whatever platform is around. Otherwise, it'll drag you down and one of two things will happen - you'll die, or sometimes you'll actually survive and find a hidden area down there! If you can see a solid piece of ground or some sort of platform below it, you should be alright, so it might be worth just dropping down and having a look. Many sand pits are near the bottom of the level, but unlike Oil Ocean Zone, their method of killing you isn't just about trying to drop you off the stage, you can still die just as easily within large pits near the top of the level too. Even more threatening are the incredibly plentiful long yellow crushing blocks with thick black edges, particularly in small rooms and corridors, so be very wary of them. They move up and down or left and right, often very slowly, and sometimes have sets of spikes on their tops or bottoms. They can easily lurch out on top of you when you least expect it, though they can also be completely stationary on occasion as well.
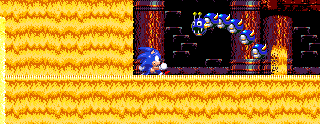
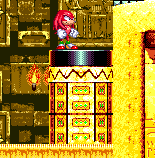
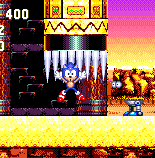
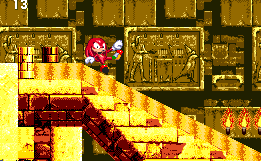
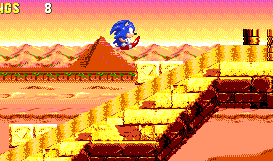
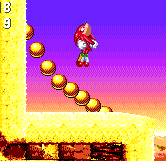
Long, diagonal sand slides are fairly self-explanatory features, and simply drop you down from the top to the bottom, sometimes arranged on opposing sides over a large area. They're difficult, if not impossible to climb back up just by jumping, except for those smaller ones that feature a series of small platforms that are released from the ceiling above the top of the slide. Coming down the sand and dropping away at the bottom, they form convenient stepping stones for you. Catapults are formed from strings of circles that are spread diagonally across some corners of walls. Jump on them and they'll throw you across a large distance or to a higher ledge on the opposite side. In wide, open areas in both acts, you'll be able to take a rope ride across from one wall to the other or to scale down one of them. Simply grab hold of the hanging hook at the top and you'll drop down a little way on it. From there, use the jump button to kick away from each wall until you get to the bottom, where you can jump off.
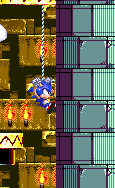
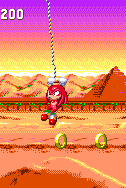
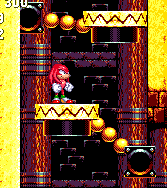
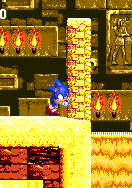
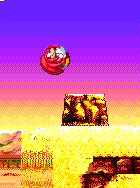
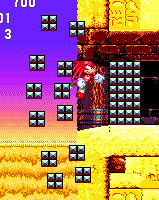
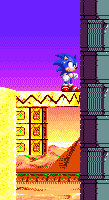
Taking you up and down, platforms on the ends of long arms swing 180 degrees from one point on the wall to the other, with the base of their arm in the middle. Stand on them to make them move, and then they'll swing back when you get off. You can also get horizontal ones suspended in the air that just swing back and forth of their own accord. When walls of solid sand reach up out of the ground and uselessly try to block your path, just simply jump up over them. Jump on brown blocks that stand in your way to crumble them, though some of them may in fact be a badnik in disguise (see the last paragraph for those). When you see a barricade of small silver cubes blocking an entrance to a corridor, that's a Knuckles-only route you've got there, and Sonic is incapable of breaking through it. Also watch out for basic slotting spikes on the ceilings and floors and the good old crumbling ledge trick too.
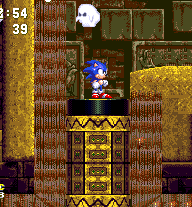
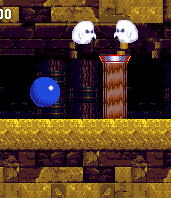
Act 1 is all relatively straightforward and there's not too much to worry about. Act 2, unfortunately, is the exact opposite, incorporating almost all of the above, and adding some impressively tricky ideas. First thing you'll notice is that it's nearly pitch black inside the temple. You'll find grey hanging light switches on the ceilings at regular intervals throughout the act, and you'll need to jump and pull these to fully restore the lights. However, this is not permanent and the lights gradually die down all the time, which is when the ghosts begin to appear. They're harmless to start with, but if you go too long without turning the lights back on, spending time with them won't be a picnic. They'll start appearing halfway through the fully lit phase, when a single, small white ghost will patrol back and forth along the top of your screen, following you wherever you go, but you can't interact with it just yet. Allow another 15 seconds or so and the lighting will drop down to medium, where another ghost will join the party and do the same thing, both looking larger and more evil now. 30 seconds later, and it becomes almost pitch black again, and you should probably start getting concerned now, as a third ghost appears and all three develop mean, pointy ears, though still continue hovering across the top of the screen. After 15 seconds of this, they'll finally begin to unleash their fury by continuously diving at you from either top corner. You'll take damage if you get hit, and if you jump into them, they'll disappear and then reappear back at the top and continue the assault. The only way to relieve yourself of them is to find one of those light switches and quickly. Fully restoring the lights will always make them vanish, no matter what phase they're in. Fortunately, light switches are quite frequent and in obvious places, so it shouldn't be too difficult to ensure that you don't allow them to grow that big. As Sonic, ghosts will only start appearing after Point #6. for Knuckles, they'll be there right from the start!

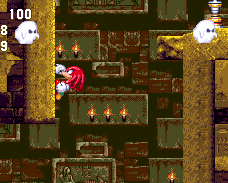
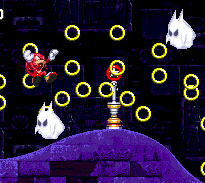
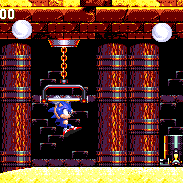
Another regular feature of Act 2 are the heavy black door switches. Push them all the way to the right to fully open up the nearby doorway, but when you release it, it'll move back to the left at a certain speed, which in turn gradually closes the door. The long thin doors open either vertically or horizontally, and after pushing the switch, you sometimes have to quickly make your way through a brief obstacle course in order to get through the door in time, as the switch and the door are not always right next to each other, unfortunately. They can also open more than one door at a time, and have a fairly annoying sound that plays continuously while they close, even after leaving the vicinity completely. Don't get caught too tightly beneath a closing door, or it'll crush you. And then there's the sand-release hatches, which are located on the ceiling in certain areas. Jump to break them and streams of sand will begin to flood the room, which will either immediately create a plain of stable sand to walk on below, or more famously a long, ever-rising bumpy mound of it that'll carry you upwards, and can crush you into ceilings if you don't move fast across it or the corridors that it's chasing you up through. See points 10, 11 and 12 for all the section-specific details.
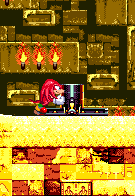
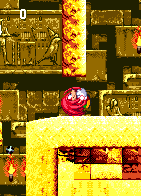
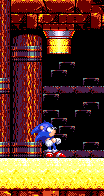
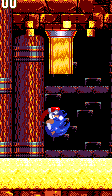
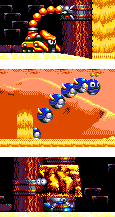
Skorps are scorpion badniks that crawl around a small area. They are particularly evil, because as soon as they see you, they'll throw their long, stinging tail directly at you with pinpoint accuracy, even when you're a fair distance away. By badnik standards, this is a very hard attack to avoid, so if you can't sneak up on them stealthily, make sure you strike before they do. Meanwhile, Sandworm is another robot based on the classic Caterkiller design from Sonic 1. These ones lurk inside pits of quicksand, swimming back and forth close to the surface (you can see the sand splashing just above them), and then periodically leap out, in an effort to catch you off guard. Bop them on the head only, as the other parts of their body are protected by spikes. A badnik apparently named "Rock'n", (though it isn't officially recognised by the game's instruction manual) disguises itself as a standard chunk of rock lying on the ground. When you step near, the eyes at the front open and legs at the bottom lift the block up, and it starts walking around. This odd looking thing doesn't actually hurt you though, it instead simply pushes you along, potentially into danger. You'll stand on it if you attempt a regular jumping spin attack, so only a spin dash will destroy it. I'd hesitate to even call it a badnik if it didn't produce the customary trapped animal upon destruction.
View Notes(5)
Go to..
#1. Comment posted by Mike on Thursday, 11th August 2011, 4:48am (UTC)
#2. Comment posted by 3ach on Sunday, 14th August 2011, 6:24am (UTC)
#3. Comment posted by Anonymous on Friday, 19th August 2011, 12:00am (UTC)
#4. Comment posted by GoldenDelicious on Sunday, 9th December 2012, 3:48pm (UTC)
#5. Comment posted by skittycat on Thursday, 21st November 2013, 11:22pm (UTC)
Hide Notes
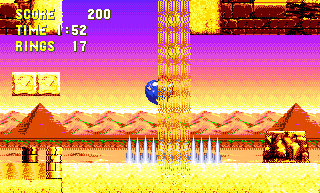
This is an alternate way up to the upper routes, if you miss out on the opportunity in Point #2. From those initial sand slides, carry on over the various sand pits on the bottom of the act. Eventually you'll reach a brief internal section that redirects the route back to the left. If you take the sandfall up, and go left instead of right, you'll find this other sandfall that will take you up, toward Point #4. This whole area is a real junction of different routes, sub-routes and directions, in fact.
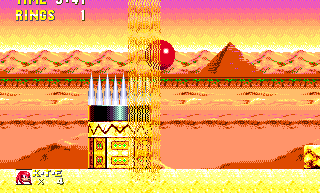
This tricky block moves horizontally along the ground, trying to force you into the sand pit to the left. You won't die in there, but the pit does drop you down to a far more precarious path, so it's usually in your best interest to try and get over it to the right. There's a sandfall in the middle, tumbling from the sand slide above, so you just need to jump up along this, which allows you to essentially jump over the block as it moves past.
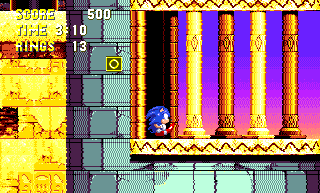
It's worth investigating the hidden corners of these big turquoise pillars, a couple of them actually conceal an item box.
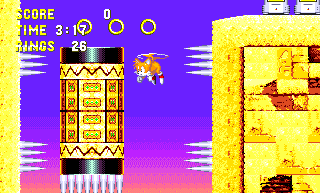
As Tails, in Sonic 3 & Knuckles, it's worth staying as high as you can. Like the one mentioned in Point #3, there are a few shortcuts and interesting hidden areas along the very top of the map that only he can fly to.
View Notes(0)
Go to..
No notes have been posted in response to this section.
Hide Notes
Special Stage Rings
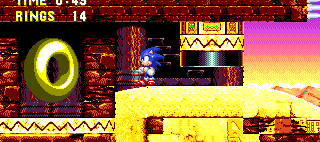
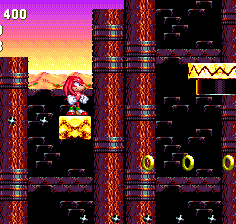
At Point #2, take the upper path from the sand slides, and continue along the bumpy path, past the spikes, and drop to the area below. From here, wander to the left to find the first of a few big rings that are simply tucked away in discreet corners.
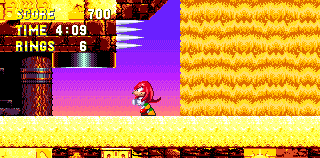
If you go to the maze of sand pits in Point #4, drop down into the very first one, which is just next to the checkpoint, and underneath a swinging platform arm. You'll land safely on the ground below, but instead of going right, explore the area to your left and you'll find this ring in another hidden room, beyond a crusher.
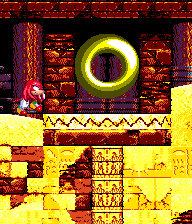
If you follow the bottom route, which takes you underneath the sand pits of Point #4, you'll eventually push another block onto a series of small wheels, where the backdrop is partly based on the internal walls. Here, look out for a platform arm on the right hand side, which you'll need to jump to from the end of the first row of small circles, before it falls. The arm will swing up toward an short alternate sub-route that contains the big ring.
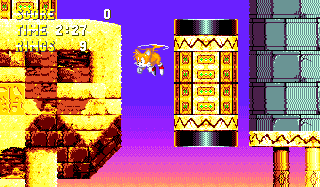
This is only accessible if you're Tails, or have Tails to hand as Sonic. You need to take the highest route and go to Point #4, but don't drop in the sand pits, stay above them. This path takes you toward the top, past a tall turquoise pillar. From there, fly to the right and you should find a route above the pushable block. Fly up here into this room, and keep going up, past all the moving crushing blocks to the big ring, in a small room on the left. Knuckles can also reach this area, but he can't get to the ring.
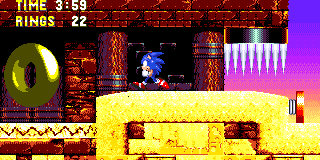
Instead of the last Tails-only ring, you could go for this one on the main part of the upper route, accessible to all. Follow the path above the sand pits as with the last ring, and go to the top of the turquoise pillar. From here, you can drop below, and take the route that begins with the pushable block. There's a high ledge from there that takes you on a bumpy road, and eventually a gap appears. Drop down this gap and head left.
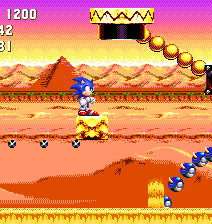
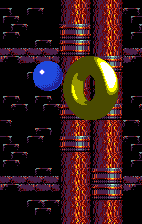
The second to last Special Stage ring is on the lower route, though it can be accessed from any point, beforehand. It occurs after you make your way up a tall pillar on its left side, then drop down the right side of it to a long sand pit. From the upper route, you can drop down here shortly after the last big ring. On this pushable block that allows you to cross the pit, look for the horizontal swinging arm above you, and jump to it before the series of small wheels end. Follow the route, heading right at the top of it to find the ring floating inside a tall internal room. It's safe to drop down from here afterwards.
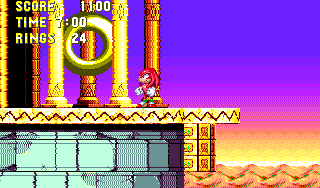
The final Special Stage ring is located at the top of the second to last tall turquoise pillar, which, conveniently is right next to the last tall turquoise pillar, with the final checkpoint being between them. It's very high, just out of Tails' reach in fact, so it's a Knuckles only one this time. Climb the pillar, but you'll find a ledge at the top actually prevents you from clambering onto it. Glide to the right hand pillar from there, climb a bit higher, then glide back.
View Notes(2)
Go to..
#1. Comment posted by Kyle on Tuesday, 19th November 2013, 12:53am (UTC)
#2. Comment posted by Shadow on Monday, 15th January 2018, 2:20pm (UTC)
Hide Notes
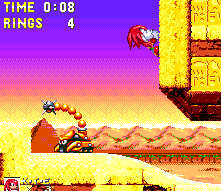
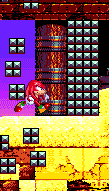
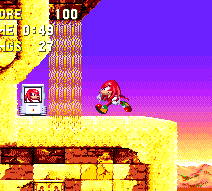
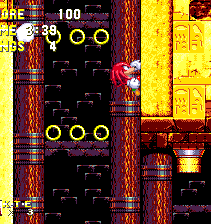
When you kick off Sandopolis, you'll be falling through the sky and land straight in the sand. Leap out and carry on forward, and keep jumping up the first sandfall you come to. Next, Sonic has no choice but to carry on into the passageway, but Knuckles has another, hidden option. He can climb up the wall directly above the entrance and find his way through an exclusive route for the first brief portion of this act. Here, go through a loop and then shortly afterwards, let the catapult fling you as far as possible across the wide gap. You can also get here by taking the normal route, and climbing the walls immediately after the upper route from the sand slides mentioned in the next point. This takes you on one of the many higher paths through the act, and allows you a chance at an extra life as you then pass through a barrier that only Knuckles can destroy. Look for the life hidden on an upper left platform shortly after you come out of a short internal shaft.

View Notes(1)
Go to..
#1. Comment posted by Flamewing on Friday, 12th August 2011, 7:58pm (UTC)
Hide Notes
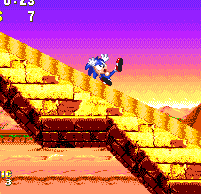
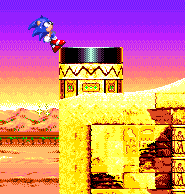
If you carried along the main route at the start, you'll soon find yourself falling down a diagonal sand slide. When you reach the other end, you'll normally fall back down another slide facing the other way, carrying you along the main route on the bottom of the map. If you'd prefer early access to the alternate top routes at this point, use your momentum from the first slide to head on up the curve at the end of it. At the top of this bit is a moving vertical block and if it happens to be low enough at the time, you might be able to land on top of it, and continue the act along the following path instead. If you don't make it, try to stop yourself from heading toward the lower slide and spin dash up the curve where the ground is stable.
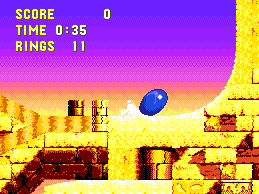
View Notes(0)
Go to..
No notes have been posted in response to this section.
Hide Notes
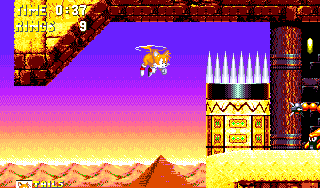
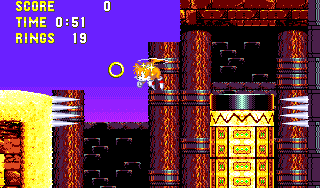
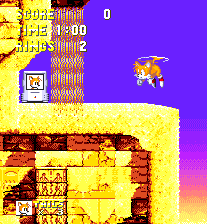
Tails actually has access to a couple of interesting routes of his own along the top of the act, if you're playing Sonic 3 + Sonic & Knuckles. Be sure to make use of them also if playing as Sonic with Tails and you have a friend/lacky to hand. You can actually take Knuckles' hidden route described in Point #1 by flying up the wall instead of climbing. When you're flung across the wide gap shortly afterwards, you may be able to notice a hidden entrance near the top and to the right of the area in which you land, which is guarded by a crushing, spiked block. Get past this and in the room that follows you'll notice another large block moving left to right. It doesn't go all the way to the edges of the room, but it does touch two sets of horizontal spikes on either wall. An interesting trap in itself in that it prevents Knuckles from climbing up here. Fly to the top left of the room above for an extra life! Similar areas for Tails are used a couple of times later along the top route for further rewards and shortcuts, so stay high!
View Notes(1)
Go to..
#1. Comment posted by Anonymous on Saturday, 24th November 2012, 5:44pm (UTC)
Hide Notes
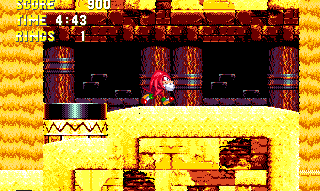
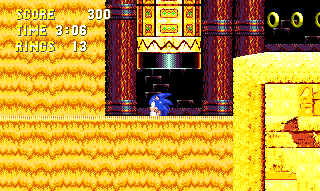
Around the middle point of the act, the upper route brings you to a small labyrinth of sandfalls and quicksand, right after its first checkpoint. Sand from the top floor tips into a series of small rooms, where quicksand forms at the base. Luckily, none of this quicksand actually kills you if you allow yourself to sink into it, you simply drop to another floor below, so in each room you can either just do this, or you can jump to stay on top of it and make your way to the exit on the right. There's a route open on the top if you stay above all the sand entirely, and another on the right of the third floor down. Alternatively one final pit here simply drops you right down to the lowest, main route, running parallel below and rather oblivious to all of this. Along the way, watch out for Sandworms when in these pits, however the threatening-looking block on the second floor that moves up and down in the quicksand won't actually kill you if it presses you into it, but it will force you to drop through.
View Notes(0)
Go to..
No notes have been posted in response to this section.
Hide Notes
Act 1 Boss
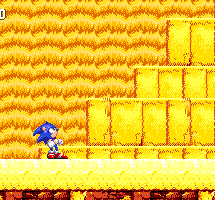
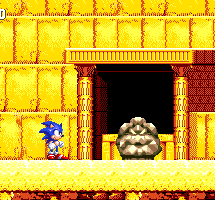
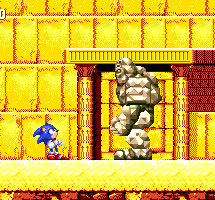
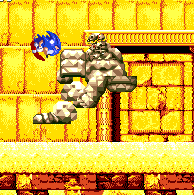
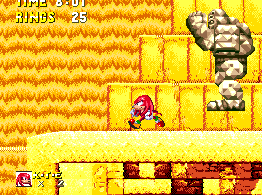
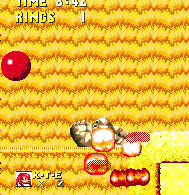
At the end of Act 1, you'll be in a wide, open area at the very the bottom of the level. Sand is cascading down all across the background and there's some rumbling going on. Huge yellow stone blocks are slowly rising out of the sand just behind you, as a great lost pyramid is being revealed! You'll notice a doorway emerges in the center, which then opens and a chunk of grey rock appears from the darkness within. This chunk of rock is actually a large stone guardian, and you quickly notice that he's now got the arms, legs and head to prove it. The guardian's main attack is to jump across the ground towards you, hoping to land right on top of your head. That's easy to avoid, but unfortunately, hitting him will just be a waste of time, as he's impenetrable to any of your normal attacks. Whenever you hit him on the head, he'll be knocked down and backwards a little bit, but he'll just repeatedly get right back up again afterwards and continue chasing you. Hitting him anywhere else will just cause you damage. Over in the far left corner, you'll find a small pit of quicksand however. It probably doesn't take a genius to figure out that if you can't land a successful hit on him, you can try luring him over here. Just hop into it and keep jumping, or stand on the ledge until he gets close enough, and then ensure that you're right up against the left side of the screen, jumping in and out of the pit. He'll foolishly jump right in and get sucked downwards, defeated. Jump back onto the ledge and after your score is tallied up, the door to the temple will re-open, this time allowing you access inside...
View Notes(6)
Go to..
#1. Comment posted by Oobo on Thursday, 15th September 2011, 9:51pm (UTC)
#2. Comment posted by Anonymous on Monday, 19th November 2012, 12:46am (UTC)
#3. Comment posted by Anonymous on Saturday, 22nd December 2012, 5:11pm (UTC)
#4. Comment posted by tom on Wednesday, 24th July 2013, 3:40pm (UTC)
#5. Comment posted by theblackferret on Tuesday, 3rd December 2013, 9:32am (UTC)
#6. Comment posted by Shadow on Monday, 15th January 2018, 2:49pm (UTC)
Hide Notes
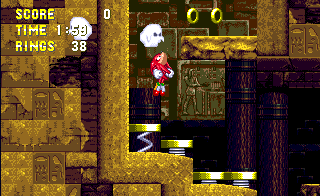
This act has a number of long-term traps, as opposed to simple individual obstacles that are dealt with as soon as they've left the screen. Not only do you have to worry about the ghosts and increasing darkness, but you must frequently open remote doorways with timed switches, and then make a dash for it across a short obstacle course before the door closes. This horizontal one is actually one of the easier examples.
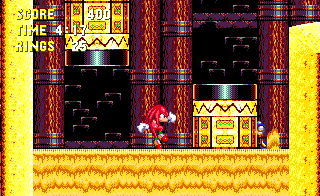
On the way to the third Special Stage ring as Knuckles, the corridor toward it should be taken with caution. Every sand pit bar one in this act will kill you if it sucks you down, and this one is not the exception. Moving blocks and sandworms forcing you down make the situation tricky. Try to use the blocks as platforms and not fall in at all, but if you do, it can be hard for Knuckles to jump up onto that right block, as the window of opportunity to do so is brief.
View Notes(0)
Go to..
No notes have been posted in response to this section.
Hide Notes
Special Stage Rings
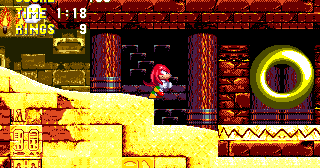
The first of the Knuckles-only Special Stage rings in this act. Simply take the alternate route described in Point #5, in which Knuckles can climb the left hand wall from the start. Keep going, and the big ring can't be missed!
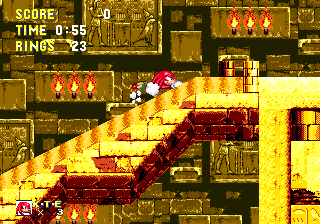
Another one just for Knuckles, although you might be able to get here with Tails as well, however I think it's a bit too much for Sonic by himself. At Point #7, there's a seemingly endless series of alternating sand slides, but in reality, there's only two different slides that go diagonally from top right to bottom left. The one we're interested in here is not the one that has a swinging platform above it (from which you would normally jump to make your way out of this endless cycle), it's the one just below that. If you can get to the top of this slide, by constantly jumping and gliding against the flow of sand, you'll find that it leads to a Special Stage ring.
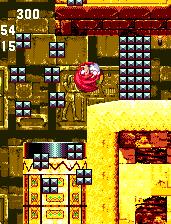
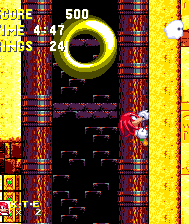
Knuckles only, once again I'm afraid. Following Point #10, you'll find a long turquoise pillar to scale down, using the rope ride. If you successfully find your way to the opening in the pillar below, then a loop will soon drop you off onto a moving block above a sand pit. Look to your right to see another of those barriers that only Knuckles can break. This is an optional route, which rejoins the main one quickly. Climb the following walls and carefully negotiate the spikes and more moving blocks in quicksand, until you come to a long drop in a corridor, beyond a crushing block. Don't drop, glide onto the far wall and climb up to find the hidden ring.
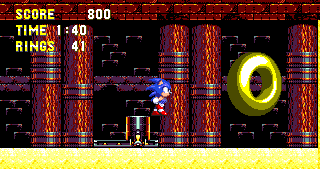
Somewhat slim pickings for Sonic in this act, admittedly, but he does get this exclusive one at the very end. There's a hidden room, just above the area where you drop into the boss, that's guarded by a door. This door is opened by the switch mentioned in Point #11, in addition to the one in Sonic's puzzle room itself. Push the switch, as explained, and hurry through the first door, past a few more obstacles and leap up to the right hand ledge at the end. Another switch next to the ring will allow you to exit.
View Notes(3)
Go to..
#1. Comment posted by Tiddles on Friday, 12th August 2011, 7:17pm (UTC)
#2. Comment posted by Michael on Wednesday, 3rd October 2012, 3:01am (UTC)
#3. Comment posted by Anonymous on Saturday, 22nd December 2012, 5:20pm (UTC)
Hide Notes
Beginning Act 2, you'll find it pitch black inside the temple. Chronologically, Sonic enters this temple first, so there are initially no ghosts until he inadvertently releases them in the next point. As latecomer Knuckles however, you'll be ambushed almost immediately by these three terrifying ghouls, who have been terrorising the temple ever since Sonic was here. They hover around the top of the screen, and when they swoop in for you, make sure you jump, as they'll be able to hurt/kill you otherwise. Look for the nearby switch hanging from the ceiling, past the large moving block on your right, and jump and pull on it. This restores all the lights, and makes the ghosts vanish - for now. Every 30 seconds thereafter the lights will get dimmer and ghosts start to re-emerge, one by one, until they begin attacking you again, and only regular tugs of the light switches throughout the act will keep them at bay. Obviously you have no rings from the get-go, so they are an immediate danger for Knuckles. Curiously however, if they do kill you, when you restart, the lights will be on anyway.
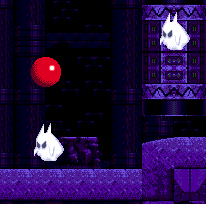
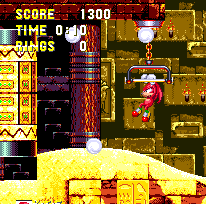
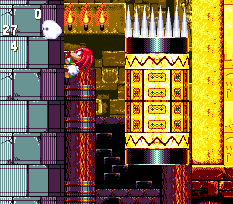
Now that the basics are covered, here's something a little more advanced. Knuckles actually has the option of an alternate start right off the bat, with several extra rewards. Best to switch the lights back on first, but once that's done, return to the starting point and climb the wall to the left. Eventually you'll come to a couple of moving horizontal blocks within the tight shaft above, where you must exercise quick timing in order to climb past them. Keep going, by climbing the walls above, for a well hidden Special Stage ring along the route, and you'll eventually rejoin at the top of one of the long sand slides at Point #7.
View Notes(1)
Go to..
#1. Comment posted by SonicTailsKnuckles on Friday, 31st October 2014, 8:44pm (UTC)
Hide Notes
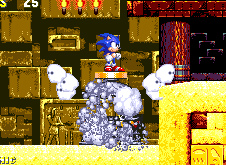
On the main route, which is Sonic's only option, you'll soon roll through a loop and down straight onto the release button of one of Eggman's capsules. This unleashes the ghosts, who promptly fly away, but will return regularly to torment you across the whole act, if you don't keep the temple well lit. It's designed to be unavoidable through normal means, however I do have some vague memory of going through the loop and missing it on one occasion. That was a long time ago now though, if it even actually happened, and I've gone through that loop many times since, so I wouldn't count on such a glitch reappearing too many times. I'd be interested to know if anyone else has ever witnessed that too though?
View Notes(4)
Go to..
#1. Comment posted by Anonymous on Friday, 19th August 2011, 12:04am (UTC)
#2. Comment posted by Green Knuckles on Wednesday, 24th August 2011, 9:25pm (UTC)
#3. Comment posted by AquaRuin on Monday, 29th August 2011, 5:57pm (UTC)
#4. Comment posted by A Name on Monday, 17th December 2012, 12:33am (UTC)
Hide Notes
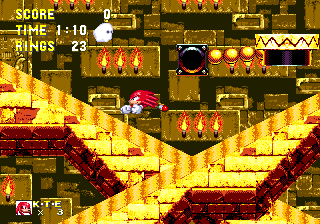
Just after the capsule, you'll find yourself sliding back and forth across a series of diagonal sand slides. They intersect each other and you need to jump from one to the other at the right moment to progress, otherwise you'll just be falling down them endlessly, as the level loops vertically here. Whether you came from the main route or Knuckles' alternate one, look out for a point where the two slides intersect and there's a swinging platform directly above the intersection. You'll be on the slide that leads towards the left at this point - you want to just jump and switch to the one that leads to the right, using the platform to help if you like. This will lead you straight down to the next area. If you miss it, just keep sliding and you'll eventually make your way back there to try again.
View Notes(1)
Go to..
#1. Comment posted by Anonymous on Wednesday, 16th January 2013, 8:30pm (UTC)
Hide Notes
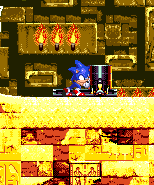
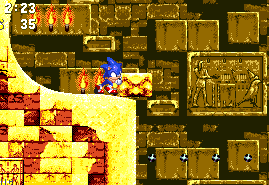
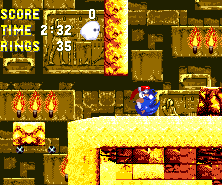
Immediately after that, you're presented with your first tricky switch-based puzzle, which is really more about completing a short course with speed, before the doorway closes at the end, than it is about solving a logic problem. Press the black switch all the way to the right and then (without dordling) run to the right, where you'll be sent up to the top left hand corner by catapult. Push another block off the ledge, down to a line of small wheels that move it along, as usual. Stand on it as it goes, and pull on the light switch en route if necessary. At the end, you'll find the door that you opened with the switch, but by now it's nearly closed, so squeeze underneath it very quickly, perhaps by rolling. If you're not fast enough it can crush you into the floor.
View Notes(3)
Go to..
#1. Comment posted by Anonymous on Wednesday, 19th September 2012, 12:19am (UTC)
#2. Comment posted by Michael on Friday, 5th October 2012, 11:28pm (UTC)
#3. Comment posted by Anonymous on Monday, 19th November 2012, 2:18am (UTC)
Hide Notes
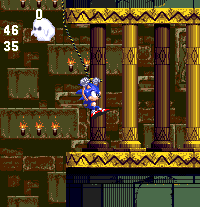
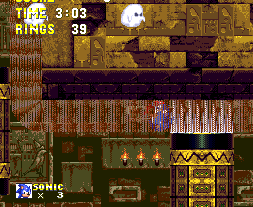
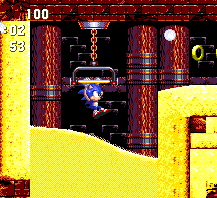
Next, you're presented with the first of two or three situations in which you must use a long hanging rope to scale down a wide vertical shaft, against a long turquoise pillar, or swinging between two of them. Though it can be slow, you need to take the rope to guarantee that you get safely into an alcove on the bottom right. If you just drop down and land at the bottom of the shaft, you may not be able to get into the alcove, as it's positioned too high to jump up to. Knuckles can climb up there, but as Sonic, unless you have a suitable shield, you'll need to head left from there, where a short course will result in you either continuing your descent through the level, in which case you'll simply appear back where you started as it loops round endlessly, or, you can find a completely alternate route down here as well. In this particular instance, a moving block sits between two sandfalls, each of which curve around the walls and across the ceilings of the area below. Step into the right hand one to be carried along with the flow of the sand. A spiked block here will create a crushing hazard - hold the left button to slow yourself down and hopefully not get caught underneath it. Jump off before this to fall and return to the original rope ride, or keep going past the block to find another way. This too has a rope ride funnily enough, which you might want to actually take, this time, in order to avoid spikes at the bottom. The original route, from the alcove, will involve another timed-switch-closing-door scenario, albeit a slightly easier one than in the previous point.
View Notes(0)
Go to..
No notes have been posted in response to this section.
Hide Notes
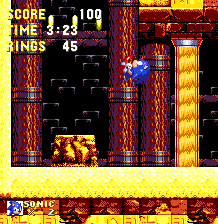
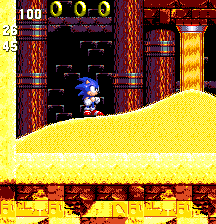
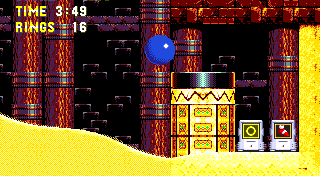
The middle portion of the act is home to a truly challenging and somewhat iconic segment, and one of my favourite "difficult bits" in the early Sonic games - lightweight players, be warned! You'll come to a series of internal corridors and shafts, snaking their way up the level. Early on, you'll happen across a curious small yellow block on the ceiling, protruding from a grey hatch. There's a wall on the left that Knuckles can climb and Tails can fly to, but as Sonic alone, you've no other option but to jump at it and remove the obstruction, releasing a sudden torrent of flowing sand that pours from the hatch. After a moment, it'll begin to build up very quickly, rising up into the corridor, and you'll stay on top of its uneven, bumpy surface as it continues to rise further. You need to use this rising sand to make your way up the following vertical course, through a series of internal rooms, but naturally, the catch is that it can easily crush you into a ceiling or moving block. Of course, this only applies to Sonic, as for once, Knuckles gets off easy because he can just climb all of the walls himself, without having to bother with any of the sand at all. The option to release it though is still there of course, and once you've done that, there's no way to stop it!
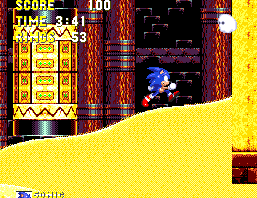
From the start, move over to the vertical shaft on the left and the sand will take you up it. Continue along the corridor at the top until you reach a larger room. Stay up against the right wall here, but don't worry too much about that long block that's moving across in the middle, as it won't go far enough to crush you into the wall. Still, make sure you don't get caught underneath it. You get a quick break at the top, where the sand stops, but continue upwards and press the switch all the way to the left to open the door on the right. Along the next corridor, you'll find another sand release hatch on the ceiling, so hit it to continue upwards, where you'll find a light switch that I recommend you use, as the ghosts won't be taking any breaks during any of this unfortunately. In the next large room, if you think you have enough time, you might like to go and grab a helpful speed-up item in the far right corner, beyond some blocks, though you'll have to be quick about it. I'd say it's unnecessary, but it might make things less stressful for you. Ride the sand all the way up to the top, staying up against either the left or right wall until you clear the large moving block in the middle, then head into the top right corner. Here, you can open two horizontal doors via the black switch, but do so quickly, before the sand catches up with you and squishes you into the bottom one. Also, don't jump onto the top of the switch. Due to a quirk of positioning, the gap between it and the lower door is small enough to fit you in when jumping, but not when standing, so as soon as your character stands in there, he's crushed immediately!
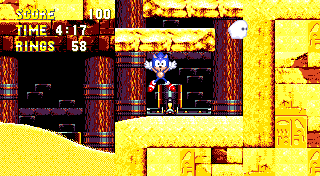
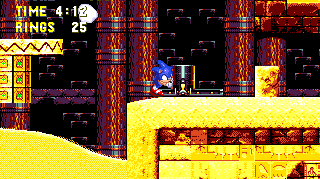
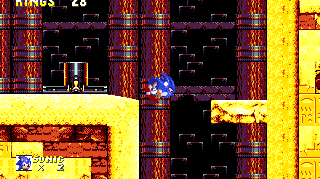
Hurry through the spiked corridor and push the switch at the top of the next shaft. It opens two doors, one next to you on the right, and the other on an upper left ledge. You need to take the one next to you, unless you're feeling daring, in which case you can quickly go through the left one and grab a handy extra life before returning to the right. Through here, you'll reach the final large room, and the sand will stop at the top, ending this fiendish segment. Open the horizontal door at the top, and jump down through it quickly because it closes damn fast. Don't let your guard down completely, because there's a crusher in the lower corridor, which leads back out into the open space of the pyramid. Phew!
View Notes(0)
Go to..
No notes have been posted in response to this section.
Hide Notes
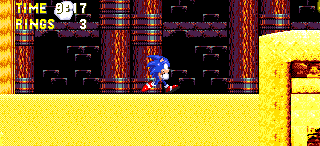
Eventually, a long sand slide leads you to the final series of corridors of the act, and Sonic and Knuckles take alternate routes at this point. Here, the leap between two moving blocks is high enough only for Sonic to jump to, while below, the route is blocked by a barrier that only Knuckles can break. Continue on Sonic's route and you'll come across a fairly large internal room with a door switch by the entrance. When you push it all the way to the right and carry on past it, you'll notice the door that it opens is positioned too high off the ground for Sonic to reach.
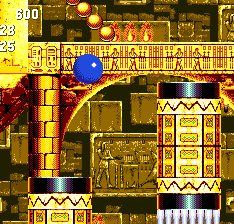
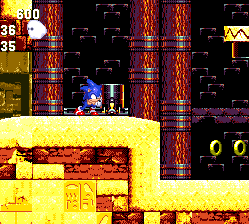
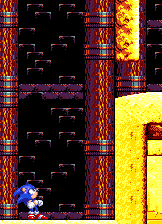
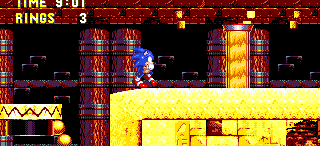
Do a little investigating though and you'll find that a swinging platform by the switch takes you up to an area that has a closed hatch on the ceiling. Break the block to allow the familiar sand to pour out of it, but don't worry, it's nice and easy this time. If you drop back down, you'll see that the sand has immediately flooded the bottom of the room, raising the surface and allowing you to jump from it, through the door before it closes. If you hurry through the following corridor, you'll get a chance at a Special Stage ring, which is in an upper room at the end, whose door is also being manipulated by the switch you just used.
View Notes(1)
Go to..
#1. Comment posted by DigitalDuck on Wednesday, 14th September 2011, 8:47pm (UTC)
Hide Notes
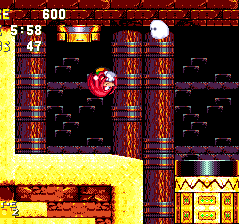
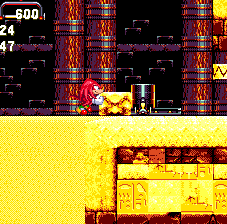
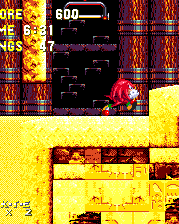
Take the Knuckles option at the split in the last point, and you'll be faced with a similar puzzle to the one Sonic faces, but rather more complicated, even quite clever actually. There are several floors to this room, and as you enter, in front of you is a pushable block. Unlike others in the level though, the few spinning circles just below that would normally catch it and carry it somewhere interesting seem apparently useless in this instance. On the platform next to this, there's a black switch on a central platform, which opens a door across a gap further to the right, but this closes very quickly before you can get anywhere near it.
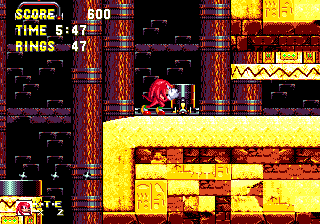
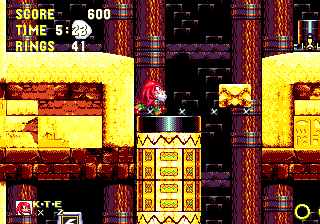
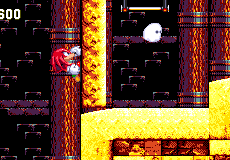
In order to solve this problem you need to head over to the wall with the door and climb up it, where you'll find a vertical shaft and a hidden area above. Here, you'll spot another sand release hatch on the ceiling, so hit it, and then drop back down to the lower area. You'll notice that sand has already filled up half of the room, completely covering the lowest floor, but it doesn't rise any further, so go back over to the switch. You can now push that previously useless yellow block across the surface of the sand (which takes a little while!), and up against the switch so that it actually holds it open for you. Run through the door on the right, which will then close behind you.
View Notes(2)
Go to..
#1. Comment posted by Mike on Thursday, 11th August 2011, 6:17am (UTC)
#2. Comment posted by Adam on Tuesday, 6th September 2011, 3:26pm (UTC)
Hide Notes
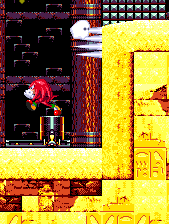
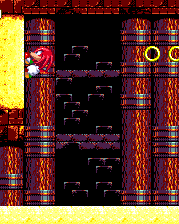
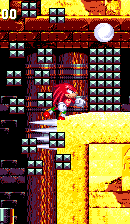
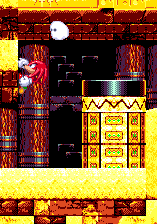
Immediately after this, Knuckles will move into a room with a switch and a high ledge on the right, above it. Move the switch all the way to the right, and you'll need to do all of the following quite quickly, as the switch opens a doorway at the end that will, of course, start to slowly close as soon as you've stopped pressing it. Just under the ledge are some spikes, preventing you from climbing the right wall up, so you'll need to use the left wall, opposite. Stand on top of the switch for extra height, but even from here, you can't jump over those spikes, so jump and glide to the opposite wall. Now, you need to jump and glide off of this so that you land above the spikes, and in order to do this, you need to be in the correct position on the wall. If you climb too high, the ceiling will force you downwards a bit, and you'll glide right into the spikes, so where you actually want to be is just above where the spikes are, putting Knuckles' head just about in line with the rings in the middle, and leaving enough room above you to glide into. Hopefully, you'll sail right into that barricade and break it, opening the corridor onwards. Next, you'll need to latch onto another left wall, in order to get over the big stationary block in your way, and then straight through the door.
View Notes(0)
Go to..
No notes have been posted in response to this section.
Hide Notes
Act 2 Boss
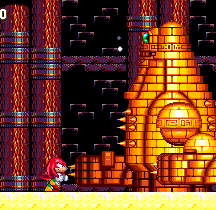
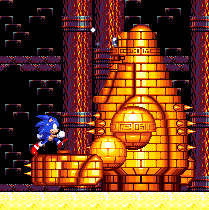
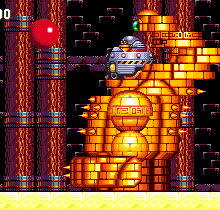
At the end of Act 2, you'll drop down to a wide, open room, and any ghosts that happen to be around will disappear and the lights will be restored. Move over to the right side where you'll find a golden, spiked contraption, with two large arms resting on the floor below it. Once activated, this thing moves slowly from the right side to the left, sliding the huge arms from side to side with each step. Your character stands between the two hands, so you needn't worry about the right one, behind you. You do have to dodge the spikes on the end of the left hand though, but you can use the top of it as a platform, when it stretches out. Before the machine draws the hand back in, you need to jump up over the spikes on the chest and hit the head. This will cause most of the upper shell to fall off backwards for a moment, and surprise surprise, this will expose Eggman/Eggrobo sitting in the cockpit. The hand will stay still for the moment, so use it to jump from, and give him hell. You'd be wise to use Sonic's insta-shield as much as possible, especially when landing the first hit to remove the armour, as the insta-shield damages Eggman at the same time. You only get a couple of seconds at a time to do this before the armoured shell returns and the pattern resumes.
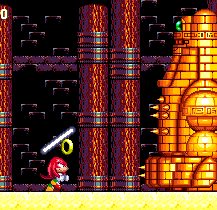
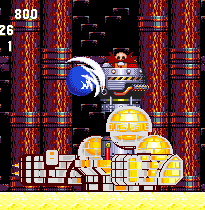
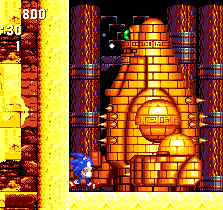
In addition to the hands, an occasional laser beam is also emitted from the green eye at the top of the machine. It fires diagonally downwards at you, but takes a while to charge up and you can hear it. If you remove the shell while it's charging, the charge will cease altogether. Bear in mind you have something of a time limit to beat this boss, because there's a wall at the far end on the left. He's constantly moving towards it, one push at a time, so if you allow him to get all the way over there, he'll crush you into it as there's no way to get up and on the other side of him. Hit him eight times before this happens, and for Knuckles, the whole machine moves a little faster so you'll need to be a bit more careful.
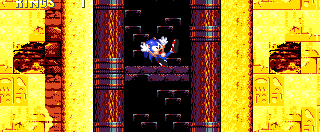
Afterwards, you can walk through the doorway that the machine came out of and open the capsule on the other side. Another doorway can be found on the right, which your character will walk through. Knuckles manages to wander through safely, but Sonic falls straight through the floor for some reason, heading deep down into the volcanic underworld of Angel Island. Lava Reef Zone is where things really start to pick up...
View Notes(7)
Go to..
#1. Comment posted by Hyper_Sonic on Thursday, 11th August 2011, 9:15pm (UTC)
#2. Comment posted by Sonic on Wednesday, 7th September 2011, 5:36pm (UTC)
#3. Comment posted by Oobo on Thursday, 15th September 2011, 10:00pm (UTC)
#4. Comment posted by Anonymous on Thursday, 21st February 2013, 7:40am (UTC)
#5. Comment posted by Anonymous on Friday, 22nd February 2013, 1:48pm (UTC)
#6. Comment posted by SonicTailsKnuckles on Tuesday, 9th April 2013, 2:46pm (UTC)
#7. Comment posted by angelthehedgehog on Monday, 26th August 2013, 12:52am (UTC)
Hide Notes
Each section of this page allows users to add their own notes to fill in any missing details or supply additional research etc.
View general notes for Sandopolis Zone (9)
#1. Comment posted by 3ach on Sunday, 14th August 2011, 6:21am (UTC)
#2. Comment posted by 3ach on Sunday, 14th August 2011, 3:16pm (UTC)
#3. Comment posted by andy on Tuesday, 30th August 2011, 4:49am (UTC)
#4. Comment posted by Anonymous on Monday, 17th September 2012, 12:52pm (UTC)
#5. Comment posted by some1 on Saturday, 20th July 2013, 12:28pm (UTC)
#6. Comment posted by Anonymous on Monday, 26th August 2013, 12:41am (UTC)
#7. Comment posted by Anonymous on Saturday, 21st December 2013, 2:50am (UTC)
#8. Comment posted by Teslamania on Saturday, 7th January 2017, 3:14am (UTC)
#9. Comment posted by Creepsterthecreep on Monday, 31st July 2017, 2:04am (UTC)
Hide Notes
Last Updated
Content for this page last edited:
9th August 2011
Files last uploaded for this page:
9th August 2011
9th August 2011
Files last uploaded for this page:
9th August 2011
Recent Notes
Act 1 Boss
Posted by Shadow on 15th January 2018
Special Stage Rings
Posted by Shadow on 15th January 2018
General Notes
Posted by Creepsterthecreep on 31st July 2017
General Notes
Posted by Teslamania on 7th January 2017
Level Struture
Posted by Ratchet 0203 on 23rd December 2014
49 notes posted on this page in total
Posted by Shadow on 15th January 2018
Special Stage Rings
Posted by Shadow on 15th January 2018
General Notes
Posted by Creepsterthecreep on 31st July 2017
General Notes
Posted by Teslamania on 7th January 2017
Level Struture
Posted by Ratchet 0203 on 23rd December 2014
49 notes posted on this page in total


