
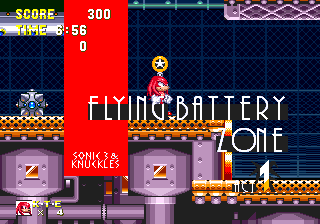
What's this? A flying fortress level so early in the game? Casting a dark shadow over Angel Island, Flying Battery is Robotnik's mighty prison and battleship, and though it has one or two nasty external areas, it mostly takes place inside, where it's actually more of a large, mechanical arena zone. There are an absolute tonne of different traps to overcome and features to use, including the typical end-of-level prison capsules, famously located all over this level and containing various items other than just trapped animals. A mix of speedy, puzzle-based and platform-hopping areas to navigate your way through.
Game: Sonic & Knuckles
Stage Number: 2
Level Division: 2 Acts
Boss: End of Act 1. End of Act 2.
Playable Characters: Sonic, Knuckles. Sonic & Tails, Tails (Sonic 3 + Sonic & Knuckles only).
Difficulty Rating: ![]()
![]()
![]()
![]()
![]()
Music: Dramatic, with an electronic and suitably imperial feel to it. The Act 2 version adds a lot of excellently composed bits and pieces to the existing Act 1 tune, and on a personal note, it is officially my absolute favourite piece of Sonic music ever.
Typical Length:
Act 1: 3 minutes - 4 minutes, 30 seconds
Act 2: 4 minutes, 30 seconds - 5 minutes, 30 seconds
Available Items:
| Act 1 | 317 | 5 | 3 | 2 | 0 | 3 | 2 | 0 | 3 | 0 | 2 |
| Act 2 | 259 | 6 | 2 | 1 | 0 | 2 | 1 | 0 | 1 | 0 | 2 |
Flying Battery Zone Downloads:
| Level Maps: |
Act 1 map (.png) Act 2 map (.png) |
| Art: |
Official badnik art (.jpg) Official concept art (.jpg) Art found in the Japanese instruction manual |
Top Tips
- Whenever you're outside on the bottom of the ship, take extra care. These areas all take place on a series of platforms and other unsafe objects and if you fall anywhere you can kiss another life goodbye. Fortunately only one of these three dreaded sections are mandatory, though it's early on in Act 1.
- There's a lot of stuff that can crush you in this level, particularly in Act 2, so be ready by reading up on them a bit, and make sure you understand how they all work. In sections that involve the huge spiked blocks that are electro-magnetically pulled up to the ceiling, make sure you take it nice and slow and try not to take any unnecessary risks. Don't stand on top of these blocks when in a narrow corridor - only do this in the larger rooms as you'll need to use them as platforms. When you find a series of them between sets of spikes, be patient and wait for them. If you try to hop through the gaps in the spike pits, you might find one of these things will fall back down on you.
- Keep running when in a vertical rotating mesh cylinder. If you don't, you could fall through and wind up taking a detour or having to repeat something you've already done
Each section of this page allows users to add their own notes to fill in any missing details or supply additional research etc.
View general notes for Flying Battery Zone (10)
#1. Comment posted by 3ach on Wednesday, 18th May 2011, 1:08pm (UTC)
#2. Comment posted by Anonymous on Thursday, 26th May 2011, 6:46pm (UTC)
#3. Comment posted by Anonymous on Friday, 10th June 2011, 7:09pm (UTC)
#4. Comment posted by Green Knuckles on Tuesday, 18th October 2011, 9:15pm (UTC)
#5. Comment posted by I Am god on Wednesday, 21st December 2011, 6:52pm (UTC)
#6. Comment posted by Anonymous on Wednesday, 20th June 2012, 11:37pm (UTC)
#7. Comment posted by Anonymous on Saturday, 20th July 2013, 12:24pm (UTC)
#8. Comment posted by SonicTailsKnuckles on Friday, 31st October 2014, 8:11pm (UTC)
#9. Comment posted by Harrison on Tuesday, 25th November 2014, 4:18pm (UTC)
#10. Comment posted by TheYogWog on Saturday, 29th November 2014, 3:40am (UTC)
Hide Notes

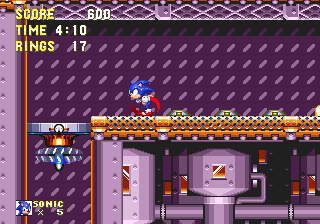
Flying Battery is a huge, heavily armoured military cruiser, but it actually seems to be held afloat by fairly lo-tech propellers and machinery, similar to Wing Fortress, Eggman's previous ship. The sky here is a fine midday blue, and small clouds float by briskly, dipping up and down slightly, as the ship bobs in the air. Most of the time though, you'll be inside, in a large, dark arena, making this more of a mechanical base than a deadly system of air-based structures. A grid of mesh tiles of a very dark blue colour line the background, and they compress in size towards the top and bottom of the screen of Act 1. There are more greenish horizontal beams of varying thickness and shapes going across. Act 2 descends into the ship, where a little more detail is added to this relatively plain and uninteresting background. You can see a row of darkened prison capsules lining one area horizontally and even lower, it seems to get less warehouse-esque and a little more electronic, with various black and green detailed structures, almost subtly resembling microchip architecture. Closer background walls in various small areas carry a basic, but contrasting purple pattern of simple diagonal lines. Though you can see more of the background in Act 2, the general appearance of both acts are pretty much exactly the same.
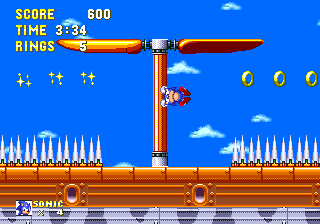
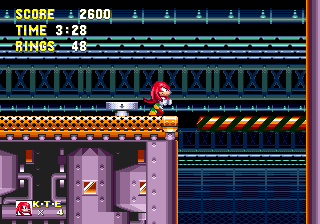
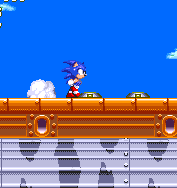
Inside, you'll be walking on a shiny bronze path, neatly punctured with rows of tiny holes. The internal ground is composed entirely of large square blocks and fuel tanks, both light mauve in colour, and with thick purple chunks of metal lining the walls, with orange edges. The fuel tanks come in various shapes and sizes and are connected by complex piping systems, and usually have little orange windows on them. When you step outside, you'll notice that the interior sections are covered up by the outer shell of the Flying Battery; its massive grey shutters, camouflaging the ship with a military/combat pattern all over it. The sturdy pathways out here are more of an impressive bronze structure with small round windows and bolts, very similar to that of Wing Fortress. The thinner, structural walkways that can be mostly found outside are based on less solid frameworks. Like most predominantly mechanical zones such as this, Flying Battery contains no additional decoration or props on the ground, and though its background is pretty boring in most areas, the surrounding ground offers plenty of colour and variety to make up for it.
View Notes(1)
Go to..
#1. Comment posted by Animal Zero on Monday, 12th September 2011, 11:45pm (UTC)
Hide Notes

Both acts are very enclosed, with most of the action taking place in a series of rooms and corridors within the fortress. In Act 1, many of these internal chambers are fairly large and spacious, but less so in Act 2, which relies more heavily on its network of passageways. Flying Battery has a good dose of speed, with some loop-de-loops connecting narrow vertical tunnels built into the ground, and large rotating cylinders in which to spin around and tumble out the other end. Though there are some curved roads and ceilings, most of the pathways are relatively straight, with only gentle slopes, as a rule. Slower areas can be more puzzle-based, forcing you to wait until the right time to make your move, and not get hit or crushed by an obstacle. Exterior sections are surprisingly minimal, but when outside on the bottom of the ship (as you will be early on in Act 1), you'll have to hop across a series of floating platforms, and death awaits any spined mammal careless enough to slip and fall off one of them. You'll be winding your way back and forth in all directions in this long, large level.
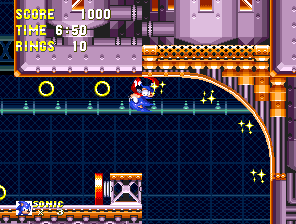
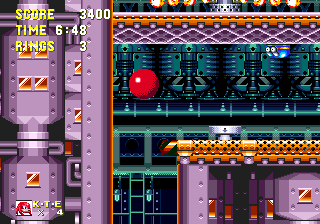

Sonic and Knuckles take the exact same main route across the zone, and start and end at the same places. At first glance, you may think that this is a straight-forward, single-route stage, but there are actually several well hidden alternate routes on offer for those that love to explore, each of which snaking its way covertly across the map, linking two otherwise disparate points. There are three shortcuts in Act 1, all beginning at different points around the middle, and that take you away from the main route. Only Knuckles (and Tails in S3&K) can access the first, and most efficient one which takes you up to the top of the stage, and skips out a huge portion below. These hidden routes are explained in Points 3, 4 and 6. Act 2 doesn't disappoint either. Choosing your exit from an early spiral elevator gives you the option of two separate routes to take on the first portion of the act, one much harder than the other, so choose wisely at Point #8. Soon after these join, two more, somewhat well hidden alternate routes emerge from the main one, all meeting at the same area towards the end, and taking roughly the same amount of time to get there too, although with varying degrees of difficulty and fun! See Points 9 and 10 for more details.
View Notes(0)
Go to..
No notes have been posted in response to this section.
Hide Notes

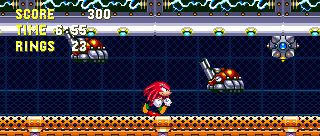
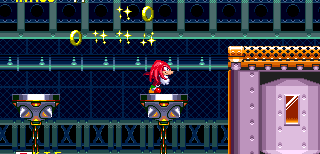
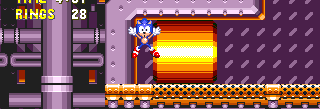
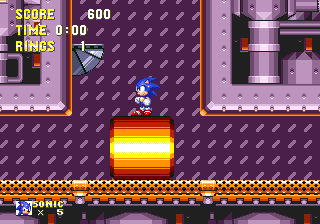
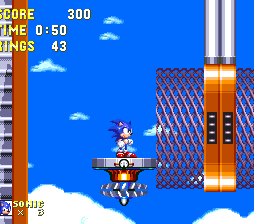
Get ready to interact with one hell of a lot of different obstacles here. All moving platforms have a large fan underneath to keep them afloat, though touching the fan actually causes damage, so stay on the nice flat bit at the top. They can travel in all directions, though some only move when you step on them, then remain at their destination. Others don't really go anywhere at all. When you see a series of white rectangular monkey bars on the ceiling, jump to hang from them, and climb across them using the left and right buttons. One or two handles in the series may drop you down to a lower level when you grab hold of it, so you often have to find one of these in order to progress. Watch out for flame throwers within short grey cylinders on the ground. Most of them have a lick of flame either side of them, each of which flails wildly as the cylinder rotates. A few just have one flame on a single side only, and many can be double stacked in one cylinder. If there's a flat top on one, jump on it and stand there for a moment and it'll act as a spring for you. In one instance, one of these actually act as a button to open up a gate. Such gates, coming in horizontal or vertical flavours, are more commonly opened by a plain old regular grey button next to them, but they do appear an awful lot, especially in Act 2.

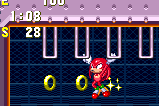
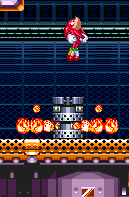
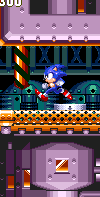
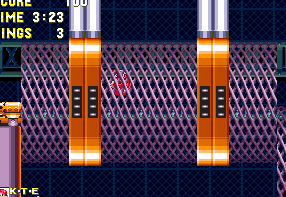
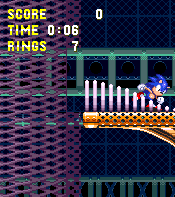
The long horizontal spinning mesh cylinders from Metropolis make an encore appearance in this level, this time in more diverse formations. Step in one and you'll spin around inside it, though make sure you're in the highest position necessary when you reach the end, in order to land on the next platform or another cylinder. Larger, vertical ones work in a similar way, with the character leading downwards as they enter from the top left to the bottom right, except they're not always spinning and if you don't run fast enough you'll just fall straight through it.
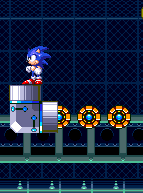
Small, solid orange and blue circles feature in a variety of traps and tricky situations, and you often need to be careful about getting crushed between them and other solid objects. At a couple of points in Act 1, strings of them will travel around in square formations, using an arrangement of tube bends to change their directions. You need to use these platforms to get up to a high ledge, but don't get caught between the circles and the bends! See Points 2 and 5 for more details. Other times, lines of them will closely orbit one large circular object, also solid, so you'd need to time your movements so that you can use the whole collection of objects as a platform, without getting pushed off by the small circles as they come around.
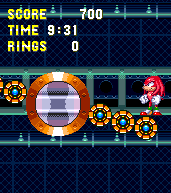
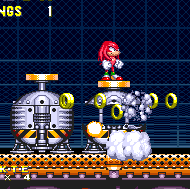
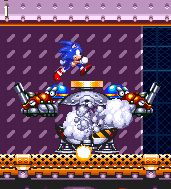
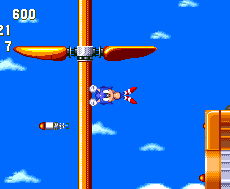

One of Flying Battery's most well-known traits is the prison capsule - exactly like the regular animal capsules that you open at the end of every level, but they can be found all over this stage. As usual, hit the yellow button at the top to open them, in order to free either a bunch of animals, rings or even the booby prize - badniks! Others can't be opened, and instead the button acts as a spring, but there's no visual cue as to what is in each one. It's never random though, so you just have to learn them on a case-by-case basis. Outside, at the top of the ship, you'll find long, spinning bronze poles that you can grab on and spin around with. Use the up and down buttons to move along it, and then jump to release your grip and fly forward. On them are propellers that harm you, so leap from one pole to the other carefully, and also beware of missiles that shoot out of the walls at you. Use small speed-up launchers on the floor for a quick horizontal boost and be careful of small grey mines, arranged along a section of the ground. If you step on one of them, it'll explode in a small puff of air after a brief moment, but it's enough to do you some damage. Often leading up to shortcuts, look out for small black fan ledges that span out from the walls of a vertical passageway, leading upwards. Use them to leap from side to side, though be quick before they disappear.
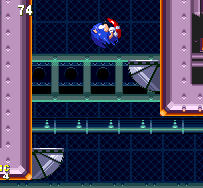
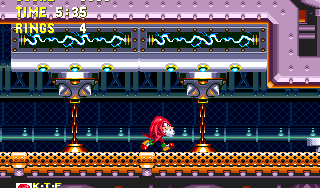
After a certain point in Act 1, you'll encounter large metal bars on the ceiling that produce electricity inside them at regular intervals. These last for a few seconds at a time, and causes the bar to be magnetised, which pulls up the heavy metal blocks that lie underneath it, attached to the ground by chains. When in corridors, the blocks make contact with the bottom of the bar and they can either crush you there, or between the ground, when they fall back down afterwards, and you can also find large spikeballs resting on the ground that work in the same way. When in an open area, the large blocks on chains only go up to a certain point, as much as the chain will allow, so you can actually use them as platforms there, to get to a higher ledge. On the ground between the blocks and in many other places you'll often find rows of spikes - special Flying Battery brand spike sets that is, in which each of the spikes sort of jut up and down a little bit. This is, perhaps, only to quietly suggest an alternate property that a couple of specific ones in Act 1 possess - you can actually push them! See the Special Stage rings section of Act 1 to find out how you can push them aside in order to access two different big rings, hidden below them!
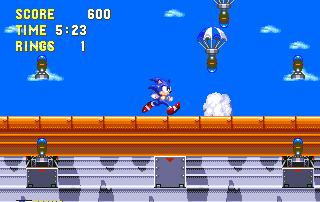
On two occasions (one being a shortcut) on the upper outside of the ship in Act 1, missiles shoot out vertically in threes from square hatches in the ground. They then drop down by parachute, landing and exploding on certain areas of the floor. Dodge these and go to the far right end of either of these two sections, where, after taking six missile hits, a small part of the floor will open up and allow you to drop through. To be safe from them, stand directly above the missile hatch.
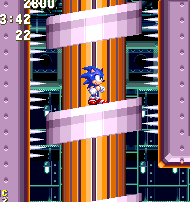
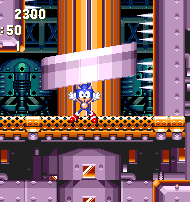
In Act 2, you'll encounter another type of crusher - a continuous stream of mauve spiral platforms slowly move up or down a long rotating orange cylinder. Step on one of the gently sloping platforms to go along with it, but get off quickly at the exit, because these things will crush you into the ground or ceiling without hesitation. These are always found in narrow vertical passages, with small spikes lining the walls, and you frequently have to press a button to open a gate to them. On a couple of rare occasions, you may start out on one side of the corridor, wanting to get directly to the other side, but one of these things is in the way, moving up into the ceiling so you have to get through it very quickly so that you don't get crushed. Timing is crucial there, especially given their awkward shape.
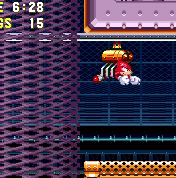
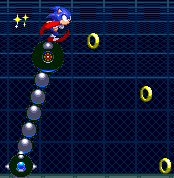
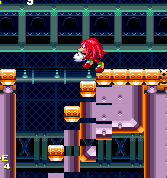


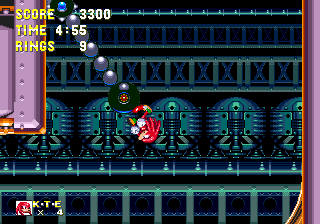
If you remember the Grabber badnik from the Chemical Plant Zone, you'll recognise a similar thing here, only it's not a badnik, it's a harmless bronze contraption that drops down from the ceiling and grabs you. Let it, and it'll pull you back up and take you horizontally across a rotating vertical mesh cylinder (which you can't cross by yourself at that point) and drop you off safely at the opposite ledge. In speedy sections, use a line of black orbs, mounted in the middle of a ledge, to take you in a semi-circular direction from one side to the other. Probably the funnest thing in the level! There are a couple of collapsing portions of some floors, dropping you in on a separate route rather than causing any particular inconvenience, and some very narrow vertical gaps in the ground are obstructed at the top end by a block that can be broken by jumping on it. Other examples of these narrow tubes are designed to be sprung up through from below, and there may be one or two red springs inside mounted on flippable circular hatches. These spin as you pass them, allowing the spring on them to propel you further up.

After all that, Flying Battery thankfully only features two badniks. Technosqueak is a mouse badnik (resembling a mixture of the mouse animal, and a computer's mouse), that scuttles quickly back and forth across a set area, either on the floor or ceiling. Blasters, on the other hand, trudge around very slowly. They're tank robots equipped with a large, diagonally mounted cannon which they use to shoot out gravity-prone projectiles. While underneath the long electrical bars, they too can be magnetically drawn to them, where they'll be easy to defeat.
View Notes(1)
Go to..
#1. Comment posted by Anonymous on Saturday, 19th January 2013, 6:23pm (UTC)
Hide Notes
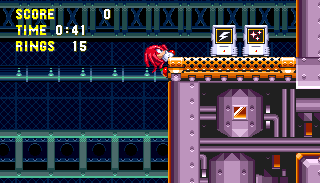
After a speedy start, you'll stop at a moving platform which will lower you to the area below. Knuckles can climb the tall wall at this point and find a helpful treat of invincibility and lightning shield items at the very top.
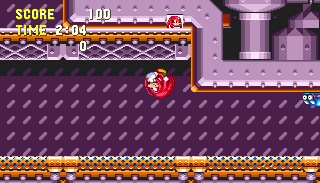
As you meander your way through the first internal portion of the act, just before heading outside into Point #1, aim to jump at the very top right corner of this ceiling - there's an extra life hidden there!
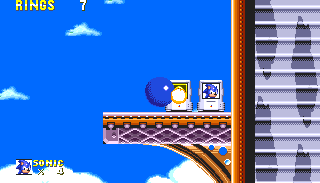
After Point #2, you're lead outside and onto the top of the ship, where you must dart across tall propeller poles. If you get to the last two, you'll see that they carry on upwards. Jump between them, avoiding the propellers and make your way up so that you're swinging around above the lowest propeller on the furthest right pole. Jump off to the right, and you'll find this extra life on a far platform.
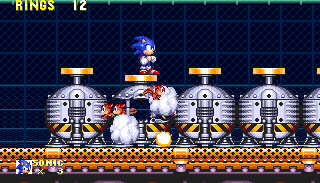
If you grab the second Special Stage ring, near the end of the act, your exit will lead you out to this hidden route straight to the end. It contains a whole row of capsules, containing animals and rings, though most of them are just over-sized springs. Don't open the single one on the other side of the rising platforms however - it's got nothing but more badniks in it for you!
View Notes(5)
Go to..
#1. Comment posted by Anonymous on Saturday, 1st September 2012, 12:10am (UTC)
#2. Comment posted by Anonymous on Sunday, 9th December 2012, 3:03pm (UTC)
#3. Comment posted by SonicTailsKnuckles on Friday, 31st October 2014, 8:18pm (UTC)
#4. Comment posted by Anonymous on Wednesday, 29th March 2017, 9:17pm (UTC)
#5. Comment posted by Anonymous on Monday, 22nd May 2017, 7:56am (UTC)
Hide Notes
Special Stage Rings


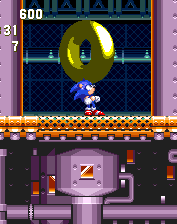
Here's something you may not have known - you can push certain spike sets! You can use this knowledge to access both hidden Special Stage rings in this act, the first of which can be found in the large room of Point #6. Go to the single set of spikes on the floor, just at the bottom of the slope before the extra life, and push these spikes to the right, by holding the right button up against them. They'll slowly be forced aside, opening up a hole in the floor for you to fall through, straight into the ring! Exit via a corridor to the right, leading back to the main route. This can alternatively act as an entrance too, for Knuckles at least.
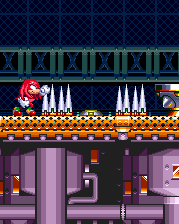
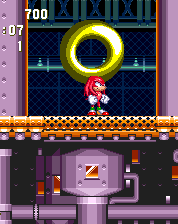
The second Special Stage ring can be found just a stone's throw away from the exit of the last. Taking that will drop you off in a large room with some blocks on chains, pulled up by an electromagnetic bar on the ceiling, between spikes. Take these blocks to the next ledge up, on the right, and then push against the first individual spike set you come across, surrounded by mines. Drop down the hole and into the ring, and then once again you can exit via a passage on the right (which, again, could also be an entrance). This leads to an alternate route straight to the end, with many different mystery capsules to open!
View Notes(3)
Go to..
#1. Comment posted by Monty Eggman on Wednesday, 25th May 2011, 7:25pm (UTC)
#2. Comment posted by Anonymous on Sunday, 8th January 2012, 8:44pm (UTC)
#3. Comment posted by angelthehedgehog on Thursday, 22nd August 2013, 2:36am (UTC)
Hide Notes
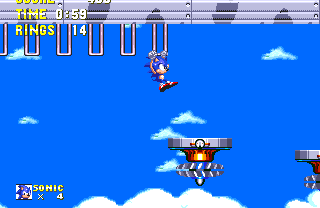
Not far into Act 1, and you'll be thrown outside into a brief but difficult challenge not unlike one found at the start of Wing Fortress Zone. This hangs at the bottom of the ship, starting on a long ledge with three mines. In order to get to the other side way over to the right, you'll have to cross the following; Two platforms that move in circular formations around each other, a platform moving up and down, followed by a row of hanging hooks with rings. From the end of those, there's an up/down platform underneath, next to another circling pair, and a final up/down platform. Be extremely careful because one slip and you'll probably fall to your immediate death, and have to start over.
View Notes(2)
Go to..
#1. Comment posted by flamewing on Saturday, 28th May 2011, 3:48am (UTC)
#2. Comment posted by Bluewonderpowermilk on Monday, 29th July 2013, 6:30am (UTC)
Hide Notes
In this area, you'll find two strings of four circles moving slowly along a square path in the air, going through four small tube bends, one on each corner. You can stand on the circles and let them carry you along, and even when they move vertically you can still stand on the top one. You can also stand on the tube bends if you need to. However, you can get crushed between the first circle and a tube bend when it enters it, so get off before it does so. In this instance, there is a platform hovering up and down inside the square. Jump onto it and go to the top, where you can hop on a string when it comes out horizontally from the top right hand corner bend. Use it to get over to the top left bend and stand on top of that.
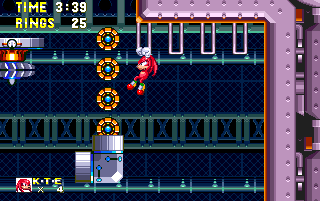
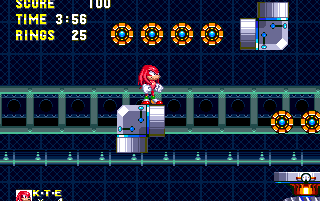
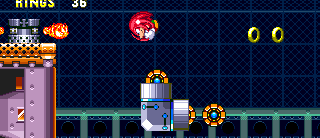
As you get up here, you'll notice there's another circuit just above you, this time more rectangular and through which the strings of circles move clockwise. Wait for one of the strings to come along, and use it to get to the bottom left bend of this upper circuit. From there, the ledge you want to aim for is to your left, but watch out for the rotating flame thrower on it. Oh and by the way - DON'T open that following capsule, it's full of badniks.
View Notes(1)
Go to..
#1. Comment posted by Anonymous on Saturday, 24th November 2012, 2:13pm (UTC)
Hide Notes
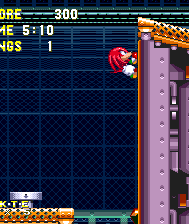
The best shortcut is only available to Knuckles (or with the use of Tails), and begins shortly after you step outside and swing across the set of propellers. Back inside, avoid the large spiked blocks that get pulled up to the ceiling, and next to the checkpoint at the end is a button that opens up the gap in the floor for you to drop down and carry on with the regular route. Instead, you can jump and climb the wall on the right, next to the gap, then use the nearby red spring on the ceiling to catapult yourself around the curved floor. You'll go up to a secret route along the top of the level that cuts out a decent chunk of the main route, and is quite a bit easier too. Much of it is based outside, where you'll be pelted with parachuting missiles in one extra section that occurs just before the one described in Point #7. The tactics used against them though are the same however, just stand directly above the hatch on the far right edge and wait for the parachuting missiles to blow a hole in the floor, which you can then drop through. Consult Point #7 for more details, and then to find out about the following area.
View Notes(3)
Go to..
#1. Comment posted by Xxaqz on Thursday, 9th June 2011, 1:32am (UTC)
#2. Comment posted by AvRhCo on Thursday, 21st July 2011, 3:14am (UTC)
#3. Comment posted by Anonymous on Thursday, 28th February 2013, 4:45am (UTC)
Hide Notes
If you didn't/couldn't take the shortcut described in Point #3, there is another that occurs right after, but it's not as convenient and quite a bit tricky too, so it's not really worth experimenting with unless you're looking to explore more of the level. Open up the gap in the floor mentioned in the previous point and drop down, but hold the left button while falling so that you land on a waiting platform when you reach the bottom of the drop (oddly, sometimes you may take a hit even if you land on the top of the platform and don't touch its deadly fan at the bottom, so stock up on some rings first). Give it a moment and this platform will descend below the floor into a secret vertical shaft. Use the platforms here to go down to the bottom where you'll be on the outside of the ship again.
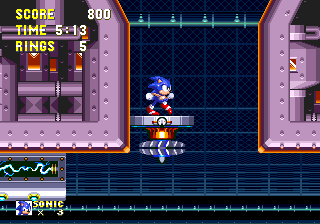
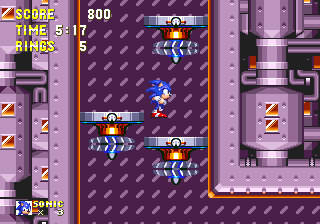
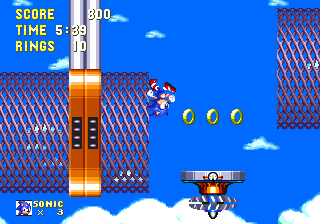
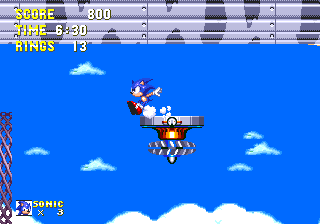
Now comes the tricky part. There are three large rotating mesh cylinders hanging from the bottom of the ship, each with a platform between them. While they spin you round and round, you need to exit each cylinder at the top of it so that you can either carry on into the next one or land safely on the platform, otherwise you'll fall to your death. The platforms move up and down slightly, so it's probably best to wait until they're at their lowest point before proceeding. The third cylinder is positioned higher than the first two. When you get back on sturdy ground at the end, hit a spin dash up the curved wall on the right and land on a platform above that will take you directly up into the ship, where you'll rejoin the main route at a later point.
View Notes(0)
Go to..
No notes have been posted in response to this section.
Hide Notes
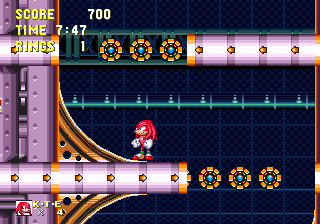
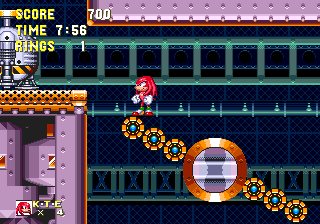
If you didn't go for either of the shortcuts described in Points 3 and 4, you'll have landed on the floor at the big drop. Go left from here, past all the badniks and electro-magnetic ceilings. The strings of small circles that make up moving platforms will return in this section. This time, they travel through more complete tubing, which you can use as ledges to stand on. There's a row of three of these tubes stacked on top of each other, placed on opposite sides, and with curved walls above and/or below them. Use spin dashes to go up the curved walls, but the strings of circles travel through the gaps, trying to get in your way, and can crush you into the straight portion of the wall if you go at the wrong time. You may need to use the circles for support after you've gone above them, or have good control over your movement, so that you don't fall off the next ledge. At the top, there's a large, stationary circular object with two lines of three smaller circles closely orbiting it. Stand on the smaller circles as they move up and try to stay on the furthest one until you can leap off to the next section at the top left.
View Notes(0)
Go to..
No notes have been posted in response to this section.
Hide Notes
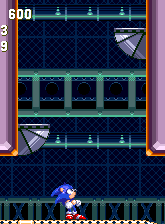
Here's yet another hidden route that's not so much a shortcut as it is interesting. Having taken the main route, look up into this gap above shortly after Point #5, and you'll notice that every once in a while, a small black fan-like platform flips out from the left wall. Knuckles can climb up these walls, but as Sonic, jump on this platform and another will appear higher up on the opposite wall, and so on. Keep jumping up these until you get to the top. Go along into the large room, which has another circuit of moving strings of circle platforms, this time going through a rather more intricate layout of corner bends. After grabbing the extra life in the bottom right corner of the room, hop on the moving string of circles and follow it around the circuit. When it starts heading upwards for the first time, leap off onto the nearby platform to the left to avoid getting crushed. The string will be directed to the right where it is intercepted by three other bends in quick succession that divert it upwards again. Stand on the top of the string as it travels upwards here, and carefully jump onto a series of white hooks on the ceiling of this large room, as soon as they come into view.
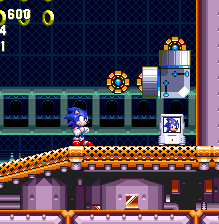
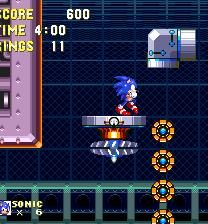
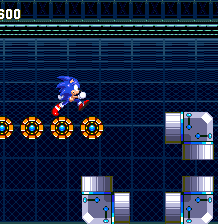
At the next left hand ledge here, you'll find a one-off object; a rather jerky moving gold block that goes back and forth along a narrow corridor that has an open gap above it, in the middle. In this gap, stand on the block and make your way up more black flipping platforms on the side walls, but DON'T go into the narrow space to the left of the block. It's a dead end, and you'll get crushed into it. At the top, go right to the outside of the ship where you'll join with the first shortcut I mentioned in Point #3.

View Notes(0)
Go to..
No notes have been posted in response to this section.
Hide Notes
All routes eventually meet up at this area outside, straddling the top of the ship. There's a sequence of three large circular objects that each have a single, short string orbiting them, made up of one small circle platform and a spikeball. They're embedded inside curve-bottomed gaps in the floor, all very reminiscent of similar traps back in Spring Yard Zone. The first couple of them orbit in an anti-clockwise direction, meaning that you could probably get away with rolling down each of the curves after the spikeball passes the opposite, right side. The last of the three attempts to catch you out however by travelling clockwise, in which case this trick would be more difficult to pull off. Instead, perhaps just carefully use the big circle in the middle as a platform. Knuckles could climb the surrounding walls here and glide over them all in the air above, where he will also find a vast sum of rings, by the way.
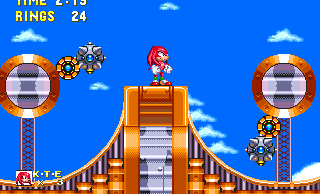
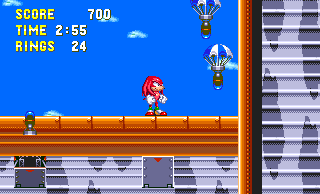
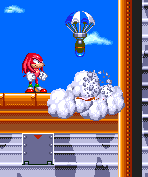
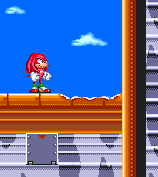
Next, there's a long flat piece of ground, though note the small square hatches below. They'll each begin to hurl three missiles at a time upwards, which then float back down by parachutes, landing and exploding along the floor, just to the right from where they were launched. It's easy to stay clear of them though - just stand directly above any of the hatches themselves and you'll be fine. This is a dead end though, right? Wrong - allow the final hatch to throw two sets of three missiles. This will be sufficient to break a big hole in the floor, allowing you to continue (be quick though, as the missile assault will carry on regardless!)
View Notes(1)
Go to..
#1. Comment posted by Bluewonderpowermilk on Monday, 29th July 2013, 6:56am (UTC)
Hide Notes
Act 1 Boss
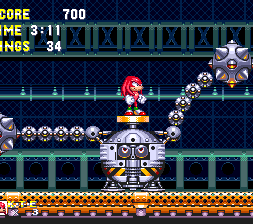
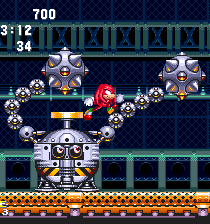
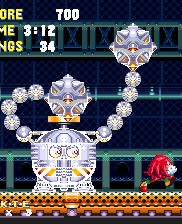
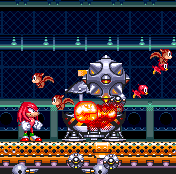
Reach the end and you'll find an animal capsule. Hmmm.. aren't these normally only at the end of Act 2? Touch the button and you'll find that you're actually standing on the Act 1 boss - a capsule with flailing arms, giant spikeballs for hands and menacing eyes, and he's not too happy that you've gone and woken him up. When his eyes flash and one of the arms stops flailing, he's about to strike you with it in the position you're standing in at that time, so step out the way. Fortunately, he's incredibly stupid. Stand on his button until he's ready to strike, then simply step off before one of the spikeballs come down and he'll whack the button instead, which registers as a hit. Keep jumping back on the button and get him to hit himself a total of six times to beat him, at which point he'll open up and the animals trapped inside him will be free. This boss is identical for both characters.
View Notes(2)
Go to..
#1. Comment posted by Hyper_Sonic on Sunday, 22nd May 2011, 11:35am (UTC)
#2. Comment posted by KingmanIII on Saturday, 14th January 2012, 8:02pm (UTC)
Hide Notes
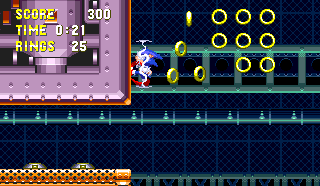
An early lightning shield in Act 2 allows you to pick up this large bundle of rings below the big spinning vertical cylinder, as you struggle to regain control whilst running up and down the sides of a tall, round-bottomed room.
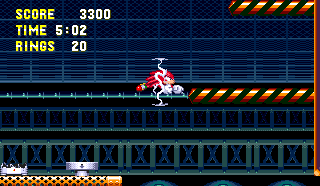
Take the higher sub-route that splits from the one mentioned in Point #10 by running up the curve below with speed, and you'll need to open up these horizontal gates on the right wall with the button, so that they may act as platforms.
View Notes(0)
Go to..
No notes have been posted in response to this section.
Hide Notes
Special Stage Rings
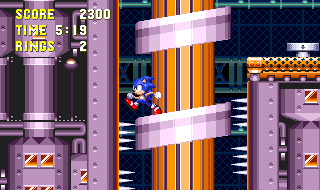
If you're after Special Stage rings in Act 2, you'd do wise to take the alternate route described in Point #10 (and not the one in Point #9). This take you on a brief, speedy route, but maintain your speed, as when you're thrown up into the air, avoid the temptation of the checkpoint on the ground and instead go for the high ledge on the left up here. The button opens up horizontal gates on the opposite wall that take you to this spiral elevator, at the top of which hides a big ring, in a corridor on the left.
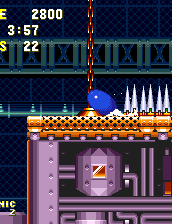
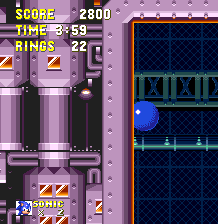
The last ring can be found just before the "pre-boss" boss in Point #11. You'll find a pair of chained blocks drawn upwards by the magnetic bars as usual. When they're up, stand underneath the left one, facing the left, and then fire up a spin dash. You must then make a jump at the end of the ledge, which needs to be relatively gentle, as you're aiming to land neatly into the corridor on the opposite wall, containing, of course, the hidden ring. Just tap the jump button lightly, but it may take a few tries. Obviously, Knuckles can just climb up there.
View Notes(1)
Go to..
#1. Comment posted by Tim333 on Friday, 8th July 2011, 7:37am (UTC)
Hide Notes
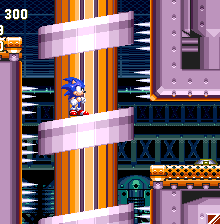
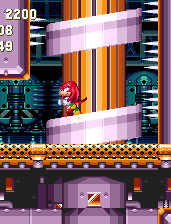
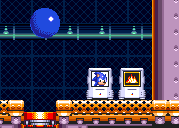
Early on in Act 2, at the second spiral elevator, there's an exit on the right hand side as it takes you down. Hold your horses though, you actually have a choice of two routes here, both roughly the same length. One is much easier than the other, but then the harder one also has an extra life with it that you might be interested in, so I'll leave it to you to decide. If you want to go for this harder route, take the first exit on the right. If you'd rather play it safe, remain on the spiral elevator until it reaches the bottom, then quickly depart through the left corridor on the floor before the spiral above crushes you into it. If you took that harder route, you'll have to deal with a couple of external rotating cylinders that hang from the bottom of the ship, over the abyss just like those described in Point #4. Be sure to try and depart from the cylinders at a high enough position that you'll land on the following platform or ledge. Another task shortly after will be to quickly spin dash through a small corridor without getting crushed by a spiral elevator that's moving upwards through it. Pretty scary stuff, though as I say, there is a 1-up, plus a fire shield with it, along the way.

View Notes(2)
Go to..
#1. Comment posted by Andrew on Thursday, 19th May 2011, 6:58am (UTC)
#2. Comment posted by Andrew on Thursday, 19th May 2011, 7:00am (UTC)
Hide Notes
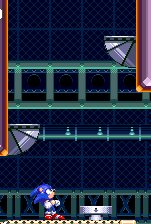
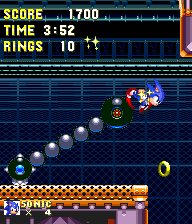
Right after the point where those two alternate routes in the previous point merge back together again, you'll notice the start of another route leading up into the ceiling, just before you open up the gap in the floor on the main route. Once again, you can use the spanning black platforms that pop out of the alternate sides of the wall to hop your way up to the top. After that, get ready for a speedy ride as you'll swing from long lines of black orbs and across a series of curves in a very fun feature. Especially if it happens to be in time with the exquisite climax to the music. Not necessarily a much quicker route than the usual one, but probably a bit easier, and my personal preference.
View Notes(1)
Go to..
#1. Comment posted by 3ach on Wednesday, 18th May 2011, 1:04pm (UTC)
Hide Notes
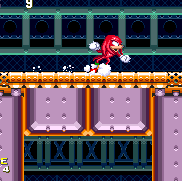
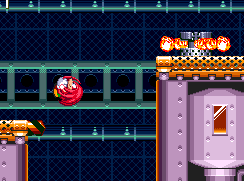
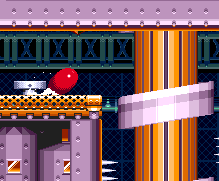
Deciding against that alternate route in Point #9, you'll instead drop down through the gap in the floor and go through a loop. If you want another route that's easier than the main one, though not quite as quick, grind to a hault immediately after coming out of the loop. Instead of carrying on up the vertical cylinder as you would usually do, stand on the collapsible floor in the middle of this road and allow yourself to fall through. Continue down this way and you'll be able to avoid a couple of small, fairly tough bits and pieces that were along the main route. One of them being another closed gap in the floor which only opens when you press on top of the flame throwing device on the ledge just above. It can be slightly tricky to get up there without being hit. Later on, you'd have to contend with another crushing hazard as you must spin dash through one of the spiral elevators as it moves up through the corridor. Taking the easier route, you would actually be coming up using this elevator, so it isn't as much of a problem.
View Notes(0)
Go to..
No notes have been posted in response to this section.
Hide Notes
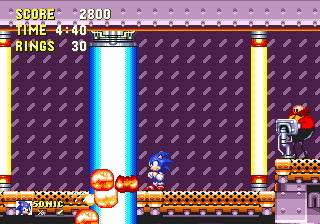
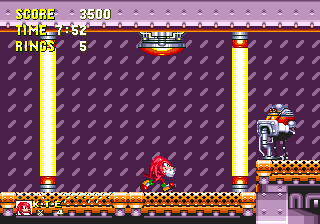
Before you contend with the actual Act 2 boss, Flying Battery has a kind of pre-boss for you. You don't actually have to hit it at all, just avoid the attacks up until a certain point. There are long beams of yellow light on either side, trapping you in a wide space, and Eggman/Eggrobo stands behind the right beam, working a control panel. A wide flashing laser gun emerges from the ceiling and begins moving across it, belatedly following your movements. Sound familiar? If you've played through Sonic 2 then it should do, because this is just like (once again) the Wing Fortress boss, only without the spiked platforms, thankfully. It'll charge up, emitting a high pitched sound, and then stop just before it produces a large blue laser that goes straight down, but it's easily avoided. After every blast of the laser, the left yellow beam that traps you in will move inwards a little bit, compressing your space little by little. You can hit him as much as you like if you're playing as Sonic with the lightning shield, but it'll only stop at a certain point, when you have very little space to move around in. For some reason, the machine starts to explode by itself at this point, and your egg-shaped villain makes his escape. Wait for the yellow beams to disappear and then follow him...
View Notes(2)
Go to..
#1. Comment posted by theblackferret on Tuesday, 26th November 2013, 2:34pm (UTC)
#2. Comment posted by Tent2 on Monday, 26th January 2015, 5:17am (UTC)
Hide Notes
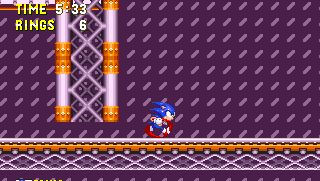
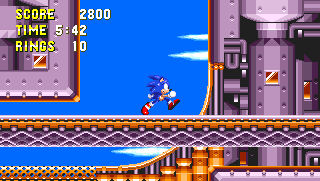
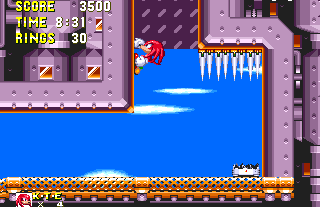
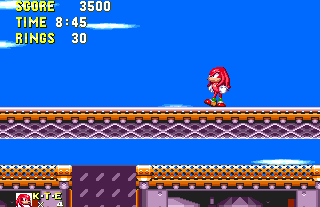
Next, you have to make your way up to the very top of the ship, outside, in order to meet the proper Act 2 boss. However, you'll have to do so while being chased by a long, thin piece of ground that is forever moving up and to the right, trying to squish you into ceilings, similar to segments in Hydrocity and Marble Garden. After the checkpoint, a barrier will drop behind you that prevents your escape, so the only way is up. As the long platform begins to follow, hop up the steep steps (Knuckles may need to climb), quickly run through the narrow corridor and make a powerful-but-quick spin dash up the curved wall to the upper area. This is quite tall, so if you don't give it enough power, you'll roll back down straight into the ever-closing gap between the floor and the ceiling. Use the spring to send you through the corridor on the left, round the curve, then continue on the rightward path as quickly as humanly possible. At the end, you'll be in a small room with a 10 ring box and a vertical path in the ceiling, next to some spikes. Knuckles can climb the wall up, but Sonic will have to wait for the platform to carry him up there. Remember that it moves right as well as upwards, so you'll need to walk left to ensure that it doesn't push you up against those spikes. After that, just wait as it moves up through the narrow vertical passage and up into the air above it, where the battle will commence...
View Notes(0)
Go to..
No notes have been posted in response to this section.
Hide Notes
Act 2 Boss
The long platform sits along the middle of the screen, so you can only move around along the top half. Stand on one of the far sides of it, and let Eggman swing into the middle, in a monkey-like machine with long arms and spiky hands that grip the platform. Oddly, even if you're playing as Knuckles, who fights Eggrobo in every other boss fight, you'll still face Eggman here. After a couple of swings (where you can jump and hit him if you're timing's up to scratch) he'll hang underneath the platform where you can't attack him, and slowly shift along it towards you. Jump back and forth over the spiky hands as they shuffle along, but don't stay between them, directly above Eggman, because then the flamethrower on the top of his machine will send a blast of fire upwards. As Knuckles, he'll do this at regular intervals anyway regardless of your location, so jump and glide over him at the right moments. When he stops, he'll begin the second phase and start swinging up and down over the platform, which is your opportunity to attack. Carefully jump at the right time to hit him on each swing. For Sonic, it's four swings at a time, but for Knuckles it's only two, and he uses the flame thrower at the same time, so hit him on the side only. Eight pretty easy hits.
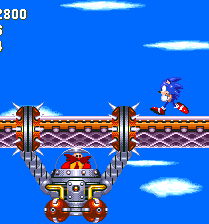
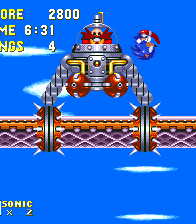
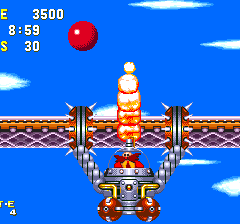
Afterwards, Sonic or Knuckles simply run off to the right, through a small, windowed interior corridor of the ship before spinning through the exit hatch to fall back down to Angel Island, into its deadliest domain...

View Notes(7)
Go to..
#1. Comment posted by Anonymous on Wednesday, 18th May 2011, 3:38am (UTC)
#2. Comment posted by AquaRuin on Wednesday, 25th May 2011, 7:32am (UTC)
#3. Comment posted by mikey1980 on Wednesday, 25th May 2011, 9:20pm (UTC)
#4. Comment posted by 3ach on Friday, 10th June 2011, 9:12pm (UTC)
#5. Comment posted by Anonymous on Tuesday, 19th July 2011, 10:35pm (UTC)
#6. Comment posted by Anonymous on Saturday, 19th January 2013, 6:45pm (UTC)
#7. Comment posted by Tent2 on Monday, 26th January 2015, 5:21am (UTC)
Hide Notes

- Flying Battery is the second of Robotnik's grand flying fortresses over the series, well armoured and loaded with weapons but also seemingly designed to transport imprisoned animals from A to B. It also serves as another trap for Sonic, while the doctor is desperately throwing everything he has at him, in order to once again relaunch the Death Egg. It's unclear whether or not, storyline-wise, Sonic actually defeats Flying Battery, causing it to crash, and if so, how. It's probable that Eggman caused the explosions himself, during the pre-boss laser trap. Then again, if Knuckles' game is supposed to take place after Sonic's (as there is a good amount of evidence to suggest so), that means the ship must have survived, or would have at least been revived for it.
- In the Act 2 boss, Knuckles will fight Eggman rather than Eggrobo. This is the only time throughout Sonic 3 and Sonic & Knuckles that Eggman even appears in Knuckles' game, so why here? Why not as part of the final bosses, or something? I've always had my suspicions that it was a mistake on the developers part, and it was supposed to be Eggrobo all along. Consider though that Eggman's sprite is facing front-on in this boss, and as far as I'm aware, Eggrobo has no front-on sprite. Perhaps someone was just too lazy to make one? All rather strange to me.
- Flying Battery was originally designed to be a Sonic 3 level, linking Carnival Night to Icecap. If you access the hidden sound test menu in Sonic 3, which also contains a level select, you'll find its name in the list, but you can't access the level.
View Notes(8)
Go to..
#1. Comment posted by Indigo Rush on Wednesday, 18th May 2011, 3:49am (UTC)
#2. Comment posted by Andrew on Sunday, 29th May 2011, 4:06am (UTC)
#3. Comment posted by BSonirachi on Friday, 12th August 2011, 9:14pm (UTC)
#4. Comment posted by Green Knuckles on Wednesday, 24th August 2011, 9:33pm (UTC)
#5. Comment posted by Green Knuckles on Saturday, 17th September 2011, 9:37pm (UTC)
#6. Comment posted by Anonymous on Sunday, 8th January 2012, 8:52pm (UTC)
#7. Comment posted by Anonymous on Sunday, 8th January 2012, 8:55pm (UTC)
#8. Comment posted by angelthehedgehog on Thursday, 22nd August 2013, 2:40am (UTC)
Hide Notes
Each section of this page allows users to add their own notes to fill in any missing details or supply additional research etc.
View general notes for Flying Battery Zone (10)
#1. Comment posted by 3ach on Wednesday, 18th May 2011, 1:08pm (UTC)
#2. Comment posted by Anonymous on Thursday, 26th May 2011, 6:46pm (UTC)
#3. Comment posted by Anonymous on Friday, 10th June 2011, 7:09pm (UTC)
#4. Comment posted by Green Knuckles on Tuesday, 18th October 2011, 9:15pm (UTC)
#5. Comment posted by I Am god on Wednesday, 21st December 2011, 6:52pm (UTC)
#6. Comment posted by Anonymous on Wednesday, 20th June 2012, 11:37pm (UTC)
#7. Comment posted by Anonymous on Saturday, 20th July 2013, 12:24pm (UTC)
#8. Comment posted by SonicTailsKnuckles on Friday, 31st October 2014, 8:11pm (UTC)
#9. Comment posted by Harrison on Tuesday, 25th November 2014, 4:18pm (UTC)
#10. Comment posted by TheYogWog on Saturday, 29th November 2014, 3:40am (UTC)
Hide Notes
Last Updated
Content for this page last edited:
17th May 2011
Files last uploaded for this page:
17th May 2011
17th May 2011
Files last uploaded for this page:
17th May 2011
Recent Notes
Act 1
Posted by Anonymous on 22nd May 2017
Act 1
Posted by Anonymous on 29th March 2017
Act 2 Boss
Posted by Tent2 on 26th January 2015
Point #11
Posted by Tent2 on 26th January 2015
General Notes
Posted by TheYogWog on 29th November 2014
50 notes posted on this page in total
Posted by Anonymous on 22nd May 2017
Act 1
Posted by Anonymous on 29th March 2017
Act 2 Boss
Posted by Tent2 on 26th January 2015
Point #11
Posted by Tent2 on 26th January 2015
General Notes
Posted by TheYogWog on 29th November 2014
50 notes posted on this page in total


