
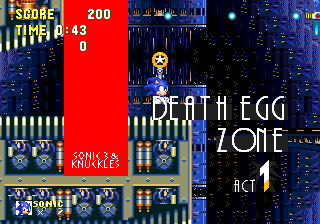
Leaving new ally Knuckles behind, Sonic climbs aboard the revived Death Egg one more time, alone, for the final dramatic scenes of this game. The difficulty is brought up a great deal, as Sonic explores the huge, trap-filled internal arena of the huge orbital satellite, now a fully-featured final level, before defeating the core machine and taking the fight outside into space. This is where we first see the often-repeated gravity reversal system that has Sonic running around on the ceiling, as well as the floor. A tough stage, with unstable streaming pathways and conveyor belt elevators over dangerous electrical fields, all before the final confrontation with Dr. Eggman himself. Can Sonic retrieve the Master Emerald and destroy the Death Egg once and for all..?
Game: Sonic & Knuckles
Stage Number: 7
Level Division: 2 Acts
Boss: End of Act 1. End of Act 2. Final Boss.
Playable Characters: Sonic. Sonic & Tails, Tails (Sonic 3 + Sonic & Knuckles only).
Difficulty Rating: ![]()
![]()
![]()
![]()
![]()
Music: Electronic and fairly fast-paced, though also quite brief and repetitive. The Act 2 version of the tune is exactly the same as Act 1, just with a slightly higher pitch.
Typical Length:
Act 1: 5 minutes - 7 minutes (Sonic) / 3 minutes, 30 seconds + (using Tails' Shortcut)
Act 2: 4 minutes - 7 minutes
Final Boss: 2 - 3 minutes (not including deaths!)
Available Items:
| Act 1 | 278 | 3 | 9 | 1 | 2 | 5 | 2 | 0 | 0 | 0 | 0 |
| Act 2 | 198 | 4 | 12 | 1 | 2 | 4 | 0 | 0 | 2 | 1 | 0 |
Death Egg Zone Downloads:
| Level Maps: |
Act 1 map (.png) Act 2 map (.png) |
| Art: |
Official badnik art (.jpg) Official concept art (.jpg) Art found in the Japanese instruction manual |
Top Tips
- The missiles that are constantly being thrown at you from the walls can be a pain. If you keep the launchers off of the screen before they let one loose, they will cease to exist as far as the game mechanics are concerned, and no missiles will be fired from them - as long as you can't see them. Very useful when dealing with the long conveyor belt elevator sequences.
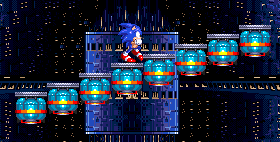
- The strings of small blue platforms that tilt according to the weight you place on them need to be handled with some precision. In most cases, you want to use them to go from the left to the top right, so stand on the far left side for around 2 to 4 seconds to get the far right side to begin to go up as high as it can go, then quickly hop along the platforms before they all come down in a heap. Take particular care with them, because in Act 2, you can fall to your death if you screw up, and in other places where they can drop you to the ground, avoid landing underneath them, because, surprisingly, they can crush you.
- The orange electricity generators around the place can be an annoying trap if they spark regular electricity bolts at you. Be sure to avoid jumping while passing underneath or above them unless it's absolutely necessary, or you'll put yourself at risk. If you stay on the ground, they can't touch you. Don't forget that if you have a lightning shield, you can walk right across the generators without them hurting you, though if they produce lightning bolts, these will still be a problem regardless!
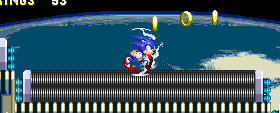
- The reverse-gravity system, introduced in Act 2, can be a bit disorienting if you haven't played it before. Remember that all the directional controls remain the same despite the change (so for example the right button still makes Sonic run toward the right of the screen), but certain obstacles can still seem harder to deal with. Spend a little time getting used to it.
Each section of this page allows users to add their own notes to fill in any missing details or supply additional research etc.
View general notes for Death Egg Zone (6)
#1. Comment posted by Anonymous on Sunday, 19th August 2012, 2:22am (UTC)
#2. Comment posted by Anonymous on Wednesday, 19th December 2012, 7:29pm (UTC)
#3. Comment posted by Oobo on Tuesday, 19th March 2013, 2:23am (UTC)
#4. Comment posted by Anonymous on Saturday, 8th June 2013, 7:58pm (UTC)
#5. Comment posted by Anonymous on Saturday, 21st December 2013, 5:15am (UTC)
#6. Comment posted by Anonymous on Wednesday, 21st February 2018, 2:22pm (UTC)
Hide Notes

Surprisingly, the Death Egg is actually rather hollow on the inside. Act 1 is based entirely within, and you can see the massive far inner wall of the 'Egg in the background, so it appears to be set inside this huge, hollow space, making for a massive and open mechanical arena. The wall gets darker as it leads in towards the centre of the screen, to shown the curvature of this spherical behemoth, and there's a seal along the middle where the two halves of the shell join. Most notable however, is the long blue vertical core in the centre, cylindrical and segmented. This and the walls are filled with tiny flashing lights and almost alien-esque architectural detail. In fact, it almost resembles the inside of an alien mothership of some form. This small piece of background occupies the screen only, so there aren't really any high or low areas to see, based on where you are in the level. The same goes for Act 2 which, by contrast, is set entirely outside the Death Egg, in space, on some of its external platforms. Here, the background is basically a large portion of the planet below (whatever particular planet you may consider that to be), which goes across most of the screen, curving slightly at the top, and leaving some black emptiness in the space above. It looks rather dull coloured, with dark greenish ocean and grey clouds.
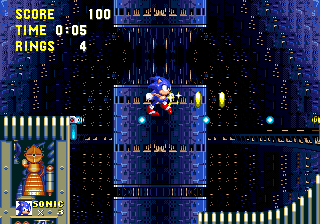
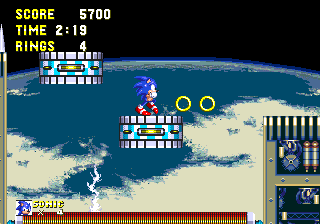
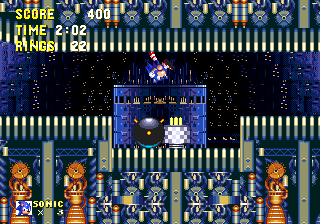
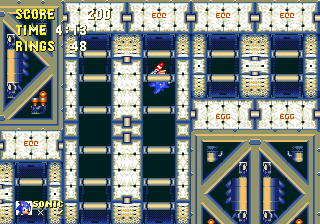
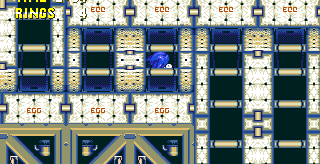
The foreground remains consistent through both acts and is fairly detailed. The roads and ceilings are pathed with thin vertical lines, alternating between shiny silver bars and black spaces of an equal width. The ground beneath is often buzzing with activity, full of small cogs and generators vibrating very quickly and glowing from one shade of bronze to another. All this gubbins is segmented into a grid of large square windows across the whole board, made up of strips of bolted down metal to form the edges of the squares, and sometimes diagonal pieces to go across. Once again, Eggman goes for the more old-fashioned clockwork method of cog systems and so forth to help power his mighty machine of death. It looks considerably more advanced than the design of Metropolis Zone though, for example. The large white chunks of cylindrical transport tubing are made up of a series of white shutters, with the word "EGG" printed on them at the tops and bottoms, and the conveyor belt/elevator sequences are controlled by a large, thin spiralling contraption going down the centre.
View Notes(2)
Go to..
#1. Comment posted by Anonymous on Wednesday, 19th December 2012, 7:30pm (UTC)
#2. Comment posted by Anonymous on Monday, 15th July 2013, 2:54pm (UTC)
Hide Notes

Unlike the original Death Egg Zone in Sonic 2, which was no more than a small arena for the game's final battle, this Death Egg is most certainly a proper zone, with two massive acts and all the trimmings. The structure, save for a few large areas for platform hopping and twisting, twirling light beam transportation, is very much an enclosed affair with corridors and rooms, and ceilings of varying heights, and the layouts are fairly long and complex. Most pathways are straight, with only gentle slopes here and there, though you'll also regularly find large pits, sometimes fairly deep ones, along the path. Falling in them is usually more of a setback than it is helpful, though they don't always contain harmful objects in them. Some have curved bottoms, so that you can spin dash back up, while for others, you may need to go back through an exit, and try again, without falling in. There are only a couple of bottomless pits where you'll die instantly (Points #4 and #8), but beware of them anyway. Use various platforms to cross dangerous electrical fields and open gaps, and there are several sections where you need to use a long moving conveyor belt platform to go up or down a wide vertical shaft, avoiding the obstacles along the way. Not a particularly fast zone, as the design is more based on forcing you to negotiate through the many obstacles, though there are some small bursts here and there, sometimes thanks to the speedy transportation systems.
Multiple routes are an interesting topic here. Act 1 offers two alternate routes (plus a huge shortcut for Tails, in Point #1) in the first portion of it, which intertwine once just before they meet, and form one path for the remainder of the act. Act 2 meanwhile has two massively different routes that eventually join about two thirds of the way through, and they depend on whether you go through either the left or right tube, at a crossroads in a transportation system, early on in the act (Point #6). Unlike the Act 1 routes, which mainly stay near each other as they lead you in fairly straightforward right directions, these Act 2 pathways tangle up with each other, without joining, leading you in all directions and to various different places in the level. Also, there are a number of objects in Act 2 that reverse the gravity, allowing you to walk on the ceiling instead of the floor, and the level design is constantly switching between the two. When on the ceiling, the directional controls remain the same, so right and left are still right and left, and despite the adjustment, the down button is still crouch and up is still the "look up" button.
View Notes(1)
Go to..
#1. Comment posted by Oobo on Tuesday, 19th March 2013, 2:25am (UTC)
Hide Notes

Death Egg's obstacles are a noisy bunch, each emitting their own spacey sound. Over wide gaps, there's often a very thin blue light beam bridge going across, emitting high pitched noises. This bridge is safe to run on, but do so very quickly, because it disappears and reappears at very regular intervals, and if you don't make it, you'll usually fall down one of the many bottomed pits in this stage. The small black gravity ball that swings around a white checkered box won't hurt you, but will reduce the gravity a bit, so that you float over it when you pass by. Large green-ish platforms with a red horizontal stripe sit stationary in the air. Jump at the bottom of one and you'll be able to grab onto it, at which point it floats upwards and across to another section, usually over an electricity field, and you can jump down safely at the end. These dangerous orange electricity fields can be found on floors and ceilings and are harmful to touch at all, unless you have the lightning shield, which will allow you to walk along them safely. You still need to be careful though because some of them produce bolts of lightning that jump out a fair distance, which your shield cannot protect you from. In fact, when there's one of these on the ceiling, it's usually best to avoid jumping at all while walking under it, otherwise a bolt may reach out and hit you at that distance.
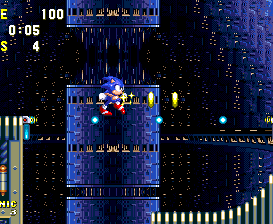
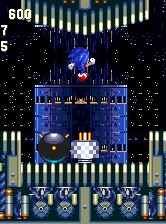
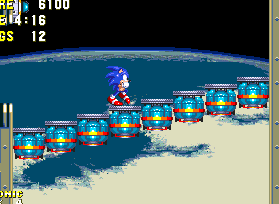
Blue and orange balancing platform blocks, arranged in horizontal strings can be tricky, and feature in both acts. They begin stable, in a neat line but are very responsive to the weight you place on them. When you step on them, they'll begin to tilt in favour of the end you're standing on, so that landing on the left side will cause the blocks on the left to drop, while the ones on the right will rise up, and the further you are to the edge, the more severe the tilt. Even though you don't need to, you can jump over to the right ones to try and restore the balance, but getting them back in a straight line seems to be more or less impossible. When they reach a far enough tilt in either direction, they'll all just drop down, and at one point in Act 2, you'll fall to your death if you stay on them. In most instances, you'll come in from the left and need to use the platforms to get up to a higher ledge on the far right. Jump on the left side to get the tilt going in your favour, and then head on over to the right when they begin to tilt a reasonable distance, so that you don't accidently re-balance them when you get over there. Hopefully, the tilt will push the far right block up high enough that you can make it to the next ledge, but you may need to be careful of further hazards, such as a missile shooter in the wall, nearby.
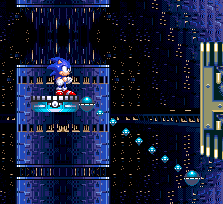
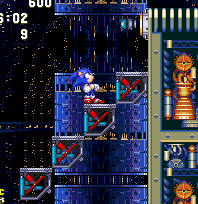
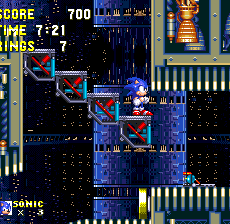
Small turquoise platforms on long swinging arms made of a string of small spheres will swing up or down by 90 degrees when you step on them, similar to platforms from Sandopolis. Each will only go in one particular direction, and it'll return to its original state as soon as you leave it. Meanwhile, reminiscent of Star Light Zone, groups of four staircase blocks arranged horizontally will move up or down when you stand on them to form their steps. While Star Light also had balls of flame coming out of the walls in these sections, Death Egg has small missiles here, and in many other places too. They're lined up in groups on either wall of a long vertical passage, where you need to use the steps to get up, and you can tell when one missile is about to be fired when it pokes its head out of the hole. When you find a red barricade blocking a doorway, it usually means that the route is one-way only, so if it opens when you get near, it'll seal behind you when you step through, so there'll be no turning back. These are commonly found either end of large white tunnel tube systems, which Sonic will run around inside, similar to the rotating cylinders earlier on in Flying Battery. These ones, however, are made up of a number of segments of varying sizes, and you'll need to use the right and left buttons to travel through the winding paths they create. Use speed-up devices on the ground to get those legs moving instantly in one particular direction, and there are conveyor belts across some areas of the ground, though theses ones make little difference to anything really.
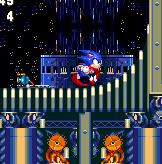
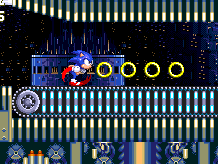
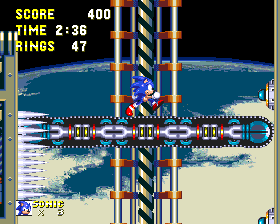
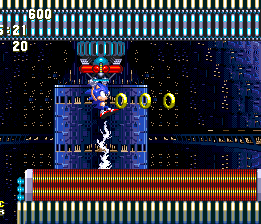
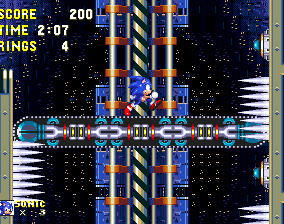
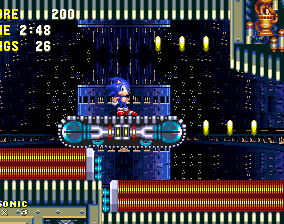
Very influential though are a number of conveyor belt elevator sequences throughout the stage. They're fairly self explanatory, but you can easily lose lives on them without enough rings to hand, and there are two different types. The first is a long conveyor belt platform that spans the whole width of the vertical shaft they're in. Step on it to get it to start moving up or down, but beware of spikes on the side walls, as the conveyor belt will continually force you into them, so you'll need to be on the move all the time. If you're in the wrong place at the wrong time, you can get crushed into the sides of them too. The main annoyance in these sections are the missiles that fire from the walls while you're on the way, and there are electricity fields at the top and bottom of the shaft. Top tip for the missiles: They won't fire from the opposite wall if you try and hold your position on one side of the conveyor belt, so as long as you try to keep the opposite wall off of the screen, no missiles will be fired from it. Otherwise they can be damn hard to dodge. You can also reverse the direction of the conveyor simply by jumping. When you land, it'll force you in the opposite direction. In Act 2, you may also have to tackle these things upside down. The second type is a smaller conveyor belt platform that only fills half of the shaft's width, and while the bottom of it treads along, the top part is perfectly stable to stand on. It bounces from side to side of the shaft as it goes down, and there are only missile shooters on the sides of the walls for this one. The key difference is that it actually continues to move along on top of a series of electricity fields at the bottom, bouncing off of walls and dropping down gaps in the floor to take you safely along to the next area. The fields don't spout dangerous electricity sparks here, so if you have the lightning shield, you can run along them safely, yourself. Not that you really need to at all, but you can also change the direction of these as well, by jumping, and landing back on. There's one of these in each act.
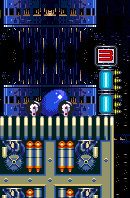
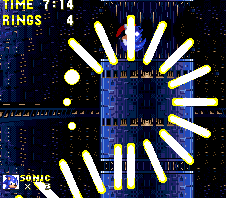

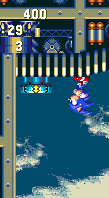
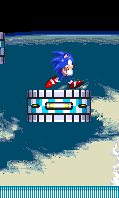
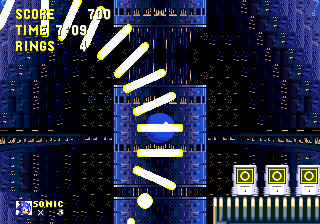
At the half way point and towards the end of Act 1, you'll find a really wacky light beam transportation system. Simply stand just in front of a turquoise post with a small screen on top and two wheels will get you spinning, building up speed, while the screen begins counting down; 3, 2, 1. At 0, Sonic blasts off inside a kind of snake made up entirely of circles of yellow light. This "light snake" twists and turns madly over a huge open room, going through a bizarre, looping route all the way around before finally taking you to the next ledge and throwing you along with speed. In Act 2, the reverse gravity system will kick in, moving Sonic back and forth from the ceiling to the floor, and there's more than one object that you can use to change the gravitational direction. First of all, long vertical tubes have a right side up entrance/exit at the bottom, and an upside down one at the top, usually. Step inside one of the entrances to start spinning around increasingly quickly, and then get zapped up or down to the other end, where you'll find yourself in the opposite gravitational pull. You can also press on a blue button to flip yourself around the other way, and small patches of the white tunnel tubing will do the job too. Act 2 also adds simple grey and blue moving platforms that hopefully by this point require little explanation!
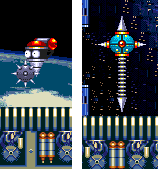
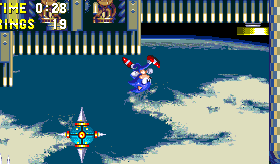
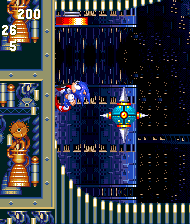
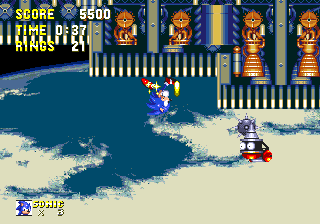
Death Egg's security system features two pretty annoying robots. The amusingly named Spikebonker is a floating spike badnik that hovers over a set area. It has a small spikeball swinging around it, and it's usually inclined to throw it in your direction as soon as it lays eyes on you, but only in a straight, horizontal line. Spikechain is a nasty piece of work. It often hangs around in the curved pits of the level, and sometimes narrow corridors, and moves from side to side quick as lightning, often locking onto your position and following you. It's surrounded by four sharp spikes and when the eye in the centre begins to flash, it means it's about to drop the bottom one on you, which extends and recoils by use of a chain. Best bet is to use your insta-shield to destroy them without fuss, if you're quick enough, or at least aim between the spikes. If you roll into the spiked chain in the brief second when it's out, you'll bounce away from it.
View Notes(2)
Go to..
#1. Comment posted by Anonymous on Saturday, 1st September 2012, 3:48pm (UTC)
#2. Comment posted by angelthehedgehog on Sunday, 10th November 2013, 12:49am (UTC)
Hide Notes
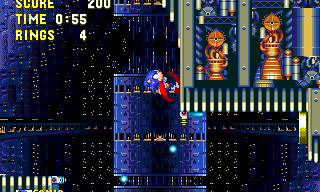
Early on, Act 1 introduces a unique curved light bridge. Running around it quickly while it's activated brings you to a platform with a hanging handle underneath it. This will take you on one route while just running through when the light bridge is deactivated sets you up on an alternate route. They rejoin at around a quarter of the way through the act.
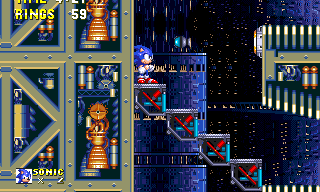
Missiles being launched from small hatches on walls are a constant issue, and you will get hit regularly. They're often positioned at the most precarious of sections, so are most dangerous when combined with other features and formations.
View Notes(0)
Go to..
No notes have been posted in response to this section.
Hide Notes
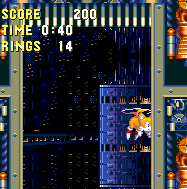
Act 1 has a massive, and very secret shortcut that literally bypasses the whole middle of it. The catch is, of course, that you can only make proper use of it with Tails, when you plug Sonic 3 into Sonic & Knuckles. To get there, go from the start of the act and continue as normal until you reach the curved light bridge, just after the string of platforms. Instead of using the curved light bridge to go up, go right through it when it stops, through to the lower route. Continue until you reach an open space with three swinging arm platforms, but don't use them to go up. Instead, go down to the bottom right corner of this room, between a set of spikes and a lightning shield. You'll be in a smaller room with a horizontal spring against a right wall. Jump and fly up against this wall until you find a hidden passage in it.
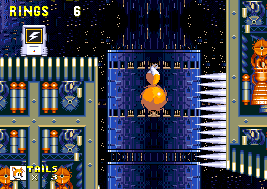
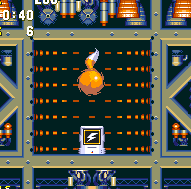
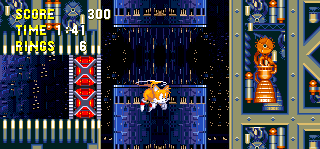
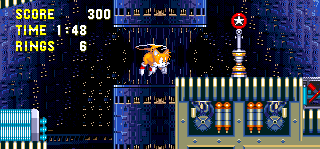
Continue through this until you reach a small room with a lightning shield box, which you should break and then fall through the gap underneath. Navigate through this short course, flying over the electrical field, until you come to the end, which is a narrow vertical passage. Using the lightning shield to jump up to the entrance, Sonic can also go through this hidden route, but he won't be able to get any further than this by himself, because there's an instant death drop at the bottom of this long shaft. With Tails handy, you can fly straight up it though, and at the top on the right, you'll reach a checkpoint and can then move straight on in to the gravity puzzle (Point #5), near the end of the act. Excellent!
View Notes(3)
Go to..
#1. Comment posted by Anonymous on Tuesday, 1st January 2013, 2:49pm (UTC)
#2. Comment posted by JT on Friday, 4th January 2013, 9:39pm (UTC)
#3. Comment posted by JT on Tuesday, 5th February 2013, 1:44am (UTC)
Hide Notes
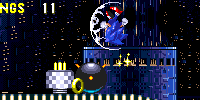
There are a couple of oddly placed items in this act. Just under the very first gravity sphere (the weird black ball object that swings around a short distance and allows Sonic to float above it fairly pointlessly), there are three rings only accessible if you come back there with the lightning shield a bit later, to attract them out of the ground.
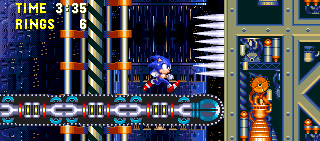
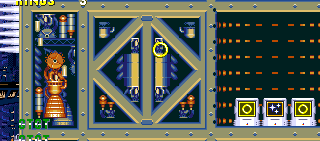
An even weirder one though is that there is a small room containing two ten ring items and an invincibility. It's located at the top of the first wide conveyor belt elevator sequence, the bottom of which you can get to by carrying along the main route from the start of Point #1, as opposed to taking Tails' shortcut. The secret room has a hidden corridor leading from the right hand wall of the top of this shaft, but this corridor is completely blocked by horizontal spikes pointing outwards from the entrance. There doesn't appear to be any way around them, or any other way in, and without debug mode enabled (see cheats section), I would say this room is completely and utterly inaccessible by any fair means intended by the designers. And therefore pretty useless. Perhaps I'm wrong though? Please enlighten!
View Notes(3)
Go to..
#1. Comment posted by Anonymous on Saturday, 1st September 2012, 12:17am (UTC)
#2. Comment posted by Anonymous on Wednesday, 10th October 2012, 3:55pm (UTC)
#3. Comment posted by theblackferret on Friday, 27th December 2013, 8:25pm (UTC)
Hide Notes
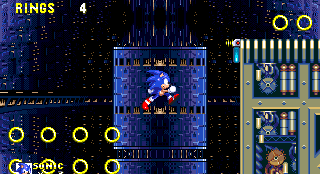
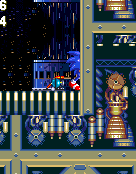
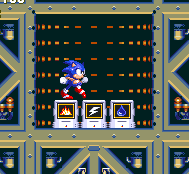
If you take the lower route just after the first checkpoint, you'll probably fall into this pit filled with rings, due to a light beam bridge above that, like all of them, switches itself on and off. In order to get back up there, you have to go left from the pit, as hinted by the speed-up device on the right hand side, which sends you through a doorway that closes behind you and then back up to the top, where, having not learned, you'll probably fall into the pit again. Don't worry, I do it too. Just try to remember to wait on the side of the bridge and charge up a spin dash, then release as soon as the bridge turns on. What you may not know however is that it might be beneficial to fall in just once. If you jump over the speed-up device, you'll find a secret passage in the right hand wall of the pit. This leads to a small room with one of each of the elemental shields. You're spoilt for choice, but of course the electric-resistant lightning shield in the middle is the ideal candidate for this shocking zone.
View Notes(1)
Go to..
#1. Comment posted by theblackferret on Thursday, 26th December 2013, 10:30pm (UTC)
Hide Notes
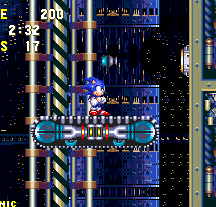
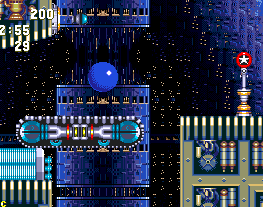
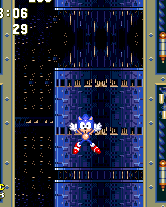
You'll soon find yourself standing on one of these smaller conveyor belt platforms as it knocks against the sides of the walls while slowly trundling downwards. If you don't move at all while on it, you should avoid all the missiles that fire at you, and you should try to avoid jumping because when you land back on it, you'll send it in the opposite direction. What you need to watch out for in this sequence is the end, because the platform will drop down a bottomless pit (the very same one that Tails can fly up from the end of his shortcut in Point #1), and it'll take you with it if you don't jump off to the ledge that awaits you on your right. Just be careful to avoid the missiles that fire from the left directly above. If you've got the lightning shield, you can of course complete this segment much quicker by running along the orange electricity generators below.
View Notes(1)
Go to..
#1. Comment posted by Sonic the Nanobot on Friday, 14th September 2012, 12:17am (UTC)
Hide Notes
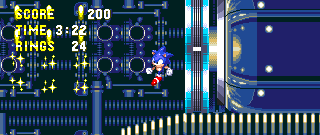
Immediately afterwards, you'll encounter this one-off puzzle segment, in a similarly one-off internal room with a dark background of wires and tubes. Oddly enough, this is a "bouncy" style puzzle, and has you knocking around all over the place. The gravity seems to be tugging you to the right in a fairly loose way, but your path is blocked by a huge metal plate that bounces you off of it. To remove it, you need to hit all six buttons on the long bar that moves up and down the middle of the room. This thing has three buttons on either side, and they all start out yellow, but touching each button turns it red. There are arrangements of rings everywhere, as well as orange bouncy plates resembling springs along the right walls, and a couple of stationary grey bars on the left that you also bounce off of. You essentially just need to bounce back and forth between these to try and hit all the buttons, and use your up and down controls to help guide Sonic.
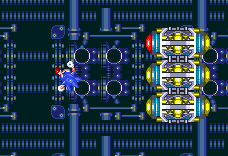
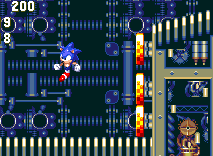
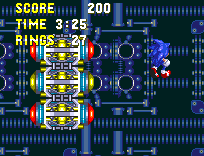
Use the far upper or lower orange plates to get on the left side of the bar, and the loose gravitational pull to get on the right. Sod's law is that the moving button bar tends to be out of your way when you're trying to hit it, and in the way when you're trying to get on the other side of it. When you've turned them all red, you'll be able to continue right, through the white tube tunnel on the other side, and then back to regular gravity.
View Notes(0)
Go to..
No notes have been posted in response to this section.
Hide Notes
Act 1 Boss
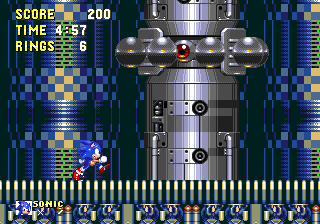
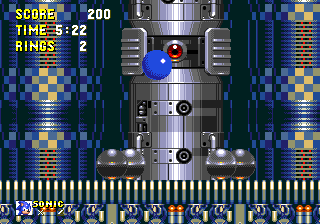
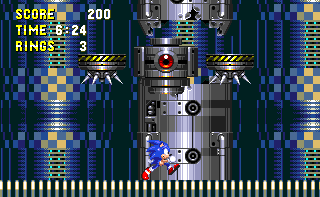
This is arguably the toughest of all the Act 1 bosses of S3&K. It has two whole phases, requiring 8 hits each, and good timing and accuracy is crucial. Sonic seems to make his way into the very core of the Death Egg, and ends up inside an internal room with a blue checkered background and flashing lights. The core is in the centre of the arena, in the form of a large metal column, and near the top is a big red eyeball that follows your movements. This, ladies and gentlemen, is your target, but don't jump at it yet - instead, head for one of the far sides of the arena and stay there for a moment. Similar to the boss of Metropolis Zone, which also reappeared earlier on in Sky Sanctuary, the core will summon eight spheres from above that spin around the eyeball, protecting it from harm. Wait until the spheres move to the bottom of it, where they will begin to circle the base. Now, from your corner position, you can run towards the core, jump just before you reach the spheres and aim right for the eye. Now this is the tricky bit; every time you hit the eyeball, one of the spheres will rise up from the ground a little way, and then burst, sending out eight tiny spikes that fly out in all directions. In order to avoid these, make sure that you land back in your original corner of the screen, when you bounce off the eyeball after hitting it. They'll miss you completely there, but otherwise, these can be a real pain. You may have just enough time to repeat this attack once, as soon as the tiny spikes have passed by, but if you're going to attempt it, then do so quickly.
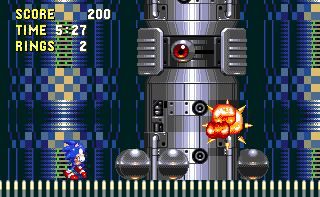
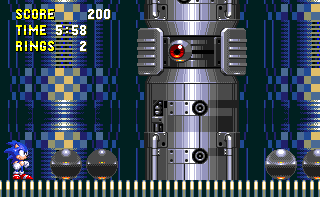
After that, the ring of spheres will expand across the arena floor, but only for a second. At this time, make sure you're well up against the side of the screen. When they go back to the centre, you have enough time to land a third hit, though don't try to be a hero and aim for a fourth, because the core then brings the spheres back up again to protect the eyeball, and you will not make it. It'll repeat this whole sequence until you knock out all the spheres, and then things get serious. In summary though, this first phase is basically just a case of staying in the corner, and waiting for the right moments to come out and attack, unless of course you want to live dangerously and don't mind losing rings repeatedly for the sake of getting it over with more quickly.
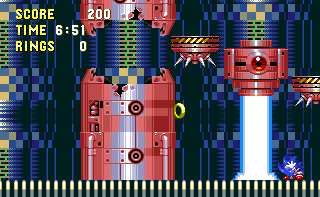
The core begins to explode, but it's not done yet. The eyeball detaches itself from the rest of the column and begins to float around the arena, spouting two spiked-bottomed platforms that swing around it. There are probably a number of strategies for this phase, but personally, I tend to ignore the platforms and just stick to the ground. During their swing, stand close to it and when the platforms aren't in your line of fire, jump up and hit the eyeball. This will cause it to get angry, and you won't like it when it's angry, so immediately run away and take refuge in the nearest corner of the screen, once again. It, and the column will begin to glow red and start swinging the platforms around incredibly quickly, so whatever you do, ensure that you're not standing on them at the time. Most dangerously, it'll blast a thick, consistent laser beam directly downwards, and will sweep the floor with it, moving slowly towards you. This tantrum lasts a little while, but doesn't really allow it long enough to cover the entire floor though, at its relatively slow speed, and even if you're standing right in the corner and it's still heading towards you, it won't be able to reach that corner spot with the laser beam. That said, the orbiting platforms initially flail out quite wildly before being drawn in further, so you're not necessarily entirely safe there. Best bet is to try and draw it towards one side, make your hit, then dash to the other side and it shouldn't have enough to time to catch you up all the way. Repeat for all eight hits.
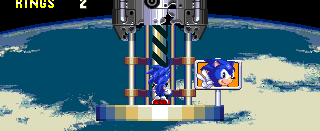
After the score is tallied, Sonic, if you haven't put him there already, automatically steps into the middle because he somehow knows that the ground is about to fall through, and that there's a sturdy platform below it in the centre. It turns out to be a thin bar on the outside, and when he lands on there, he'll start spinning round increasingly quickly. He'll then zap up to a higher external section, where Act 2 shall commence!
View Notes(6)
Go to..
#1. Comment posted by Adam Unknown on Thursday, 30th August 2012, 9:04pm (UTC)
#2. Comment posted by Brady Meyers on Tuesday, 25th September 2012, 5:01am (UTC)
#3. Comment posted by Anonymous on Monday, 19th November 2012, 3:17pm (UTC)
#4. Comment posted by Anonymous on Saturday, 17th August 2013, 8:52pm (UTC)
#5. Comment posted by theblackferret on Wednesday, 25th December 2013, 11:09pm (UTC)
#6. Comment posted by SonicTailsKnuckles on Friday, 31st October 2014, 9:45pm (UTC)
Hide Notes
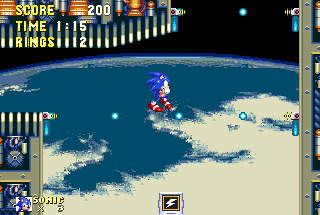
These stacked light bridges can be tricky. You need to jump from one to the other while they're activated in order to progress.
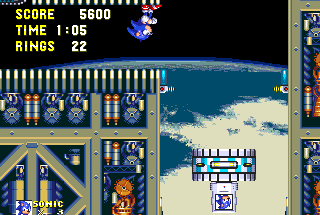
Gravity regularly reverses in Act 2, creating all sorts of interesting situations! Don't miss this upside down extra life on a high up (or should that be low down?) platform shortly after the beginning of the right route, described in Point #6. Use the light bridge to reach it.
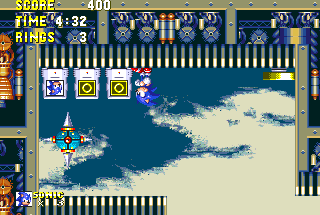
Another upside down 1-up can be found, with rings, later on the right route, soon before the two routes join at Point #8. A staircase will open, allowing you to continue, but if you then return to it after going down the following corridor a little way, it will have receded, and you can explore this area that it would normally block off.
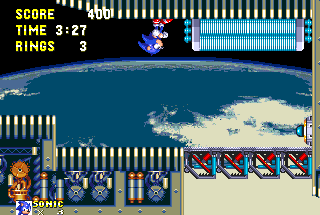
On the left route, this area occurs just before the two routes meet. With gravity reversed, you'll spring up here, but you need to flip the gravity back again in order to proceed. Just take a jump to the left to find the button you need to press on a small ledge.
View Notes(0)
Go to..
No notes have been posted in response to this section.
Hide Notes
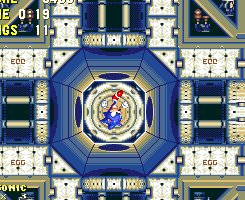
After briefly giving you a little taster of the reverse-gravity system in the first phases of Act 2, you'll reach this crossroads in some white tunnels. Use the corresponding directional button to take the path of your choice. Up is the direction you just came from, and down contains only a lightning shield, which then bounces you back up here. Whether you choose left or right will determine which of the two different long routes you'll go on for the majority of this level, so it's a fairly important decision to make. I usually take the right route, which is a somewhat quicker option, though it does contain a particularly tricky part, as detailed in the following point, so you might want to go left in order to avoid it, if speed is not an issue for you. Up to you. Oddly, those gravity-reversal buttons can only be found in the left route.
View Notes(1)
Go to..
#1. Comment posted by Ashton Withers on Tuesday, 19th January 2016, 1:03am (UTC)
Hide Notes
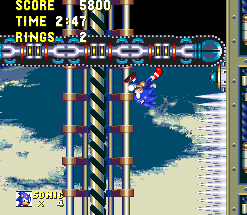
Just after the first checkpoint on the right route, you'll be sent upside down and onto a long conveyor belt platform which heads downwards with you underneath it, this time. This makes avoiding the usual missiles and spikes all the more challenging, and to make matters worse, if you die, there isn't a single ring anywhere near the checkpoint, so you might find yourself in a deadly cycle of getting hit by the missiles repeatedly, as your lives dwindle away before your very eyes. Use the strategy I've already mentioned several times for avoiding the missiles - stick to the very right side of the conveyor belt, keeping the missile launchers that are on the left out of view, and they won't be able to fire at you. There, you just need to worry about the belt forcing you into the spikes, so keep a skilful hold of that left button at the same time. It's tricky, but you can do it!
View Notes(0)
Go to..
No notes have been posted in response to this section.
Hide Notes
Here's another nasty bit that occurs where the left and right routes finally meet each other. There are two consecutive sets (if you come in from the left route, you only have to deal with the second one) of these blue, weight-sensitive platforms again, but this time, there is a big fat bottomless pit at the bottom of both of them, so if you don't get the balance right in time, you're pretty screwed. As always, stand on the left side for two or three seconds to get the tilt going and then hop on over to the right side as it tilts up towards the next ledge. The second one is especially tough because there are two missile launchers nearby. One directly above the left side and the other, higher, just on the edge of the top right ledge you're heading for, and this can really screw things up for you.
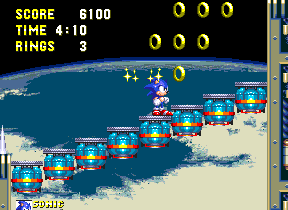
Make sure you get the tilt just right so that the far right platform goes high enough, and do your best to dodge the missiles. If you fail, you'll have to go back to the checkpoint in Point #7, if you came from the right route!
View Notes(0)
Go to..
No notes have been posted in response to this section.
Hide Notes
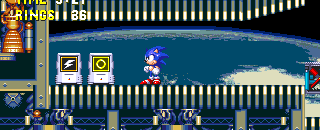
There's a lightning shield here in this little dead end passage to the left, not far from the end of the act. It's not particularly hidden, so ordinarily I wouldn't really bother highlighting it, but this happens to be the last one before the end, and if you want to survive the final bosses coming up very soon, I'd highly recommend picking it up. It's going to be difficult to hang onto it, but if you can, it'll pay dividends, I promise!
View Notes(0)
Go to..
No notes have been posted in response to this section.
Hide Notes
Act 2 Boss
At the end of Act 2, you'll launch into the boss arena through a vertical tube from below, but unlike most, it won't reverse the gravity. When you get up there, you'll immediately see Dr. Eggman standing to your right, behind the tube, and he's controlling something. The gravity tube you came in continues on up to the top, and there's another on the far left side, so you can use either to head up to the ceiling and walk around up there, with gravity reversed. In the middle of the gap between them appears the boss, and it's a large purple spherical bot with eyes and an opening compartment at the bottom, and he floats back and forth in the air.
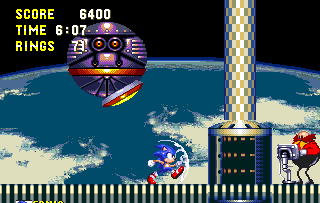
Protecting the boss is a bumper plate, which is constantly moving so that it always faces you (there's one for each character if you're playing as Sonic and Tails), meaning that you can't attack this robot using the conventional jumping onslaught, as the plate will always be there to deflect your attack. The only possible strategy is to backfire his own attacks against him, using one of the gravity tubes. This is a complicated boss, but just try not to get hit, as you'll need all the rings you can carry for the final boss of the game, which occurs immediately after this, and you won't get any more from here on out. As Sonic, if you have the lightning shield, then try your best to hang onto it especially, because it really does become very useful for the final fight.
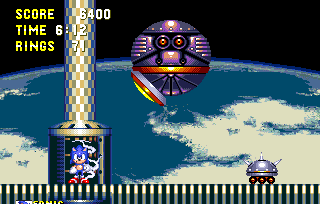
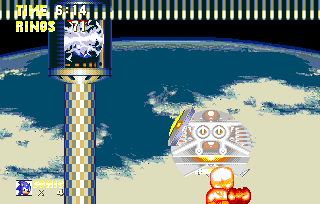
At regular intervals while he's floating back and forth, the robot will drop little spiked shells down to the floor from his opening compartment, one at a time. The shells are on wheels and will move along the ground, knocking against the side walls, but at a slower pace than the movement of the robot. What I recommend you do is step into and out of the tubes at the right times, going from top to bottom, which switches the gravity back and forth. When the gravity is reversed to upside down, the spiked shells will fall upwards and land either on the ceiling (which they will be lodged into by their spikes and become immobile) or hopefully collide with the robot, which registers as a hit. Of course, it takes a second or two for Sonic to spin around inside the tube before the gravity is altered, so you need to try to account for this as you attempt to line up the robot and a shell. If one of them collides with the top of the robot when it falls, as a result of you changing the gravity back to normal, it will explode, but won't count as a hit; it only works if you make the ones on the floor hit him. Otherwise, when you reverse the gravity back to normal, all the shells will land back on the ground on their wheels and continue to trundle about, allowing you to repeat this method.
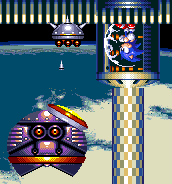
Aside from the aggravation of having to get your timing right, there's another catch. The shells will explode by themselves after a while, and whenever they explode, their three small spikes go flying upwards, and diagonally up. Because of this, I would recommend only sticking to one of the tubes throughout the fight, as you're putting yourself in unnecessary danger by crossing the area in the middle to switch between them at any point. That way, when one of the shells goes off nearby while you're in the doorway of the tube, a diagonal spike coming towards you is the only danger you'll have to worry about, there. They can be hard to avoid sometimes though, so dodge as best you can. If it makes contact with Sonic after he's begun spinning in the tube though, he thankfully won't take a hit, as you'd be unable to move him.
This strategy might take a while, but it's probably the safest option. There is an alternate one however, which complicates things further and there tends to be a higher risk of taking damage, but it may be much quicker. If you spin dash into the spiked shells when they're stuck on the ceiling, they'll flip around in the air and land back on the ceiling on their wheels. They will land a hit on the boss if they happen to touch him during this time. If you spin dash into a shell while it's on its wheels, it'll just bounce you backwards, so you will have to reverse the gravity again. This will then cause the shells to land spikes down on the floor this time, at which point you can spin dash them again down there, to the same effect. If you want to be daring and don't mind taking the damage, it's worth a try.
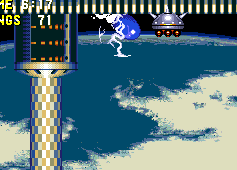
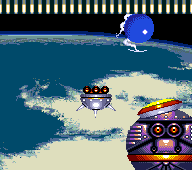
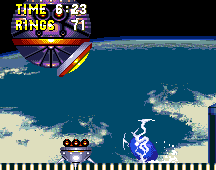
Either way, You need to make the shells hit him eight times to defeat this boss. If you're going for the first strategy, this battle can take quite a while, depending on how well you can line up the spiked shells with the robot. And of course, you only get ten minutes for the whole act, so if you took your time with the level, you may find yourself losing a life anyway because of a time out. On the other hand, because there are rings near the last checkpoint, it's better to run out of time here than during the final boss, where there are no rings for you if you die. By the way, if that constant whirring sound the robot makes gets on your nerves, just jump and hit his bumper, which, for some reason, usually stops it.
When you beat him, the gravity goes back to normal and the robot starts to burst into flames, and drops to the ground before exploding. Eggman looks shocked, and he'll run away as his control panel and the wall of the tube that was protecting him from you begins to explode too. Drop down and get after him!

View Notes(2)
Go to..
#1. Comment posted by Tim on Saturday, 15th June 2013, 10:29am (UTC)
#2. Comment posted by Anonymous on Monday, 28th December 2015, 5:55am (UTC)
Hide Notes
Final Boss
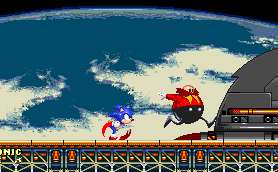
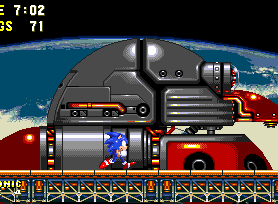
And thus begins the final battle. You've made it all the way to the mad scientist himself, but he's not going to give up the Master Emerald so easily. The screen fades to black and a new section begins, though your ring count and timer remain the same. There are no additional rings to collect here, so if you've lost all the ones you had, then.. well, tough. If you die at any point during this final boss, you'll restart here, with no rings, but your timer will also reset too. Since Act 2 and the previous boss probably took quite a while to complete, you may get a "time out" during this fight, when you reach your 10 minute time limit. So ideally, you'll want to have completed Act 2 as quickly as possible, while still holding rings and preferably a lightning shield in order to stand the best chance of survival here. A bit unfair I know, but then again, the deck is supposed to be stacked against you in any final boss. Sonic's chasing Dr. Robotnik down a long, external road until the Doc eventually clambers into a massive grey orb thing sitting on the path. Sonic stops outside, as the door to it closes. The floor to your left is beginning to give way, and there's nothing but instant death awaiting directly below, so run for your life, all the way to the right. As you run past that orb, you'll see that it's actually the back of the head of Eggman's brand new giant mech, similar to the one in Sonic 2's final boss, but a whole lot bigger and badder.
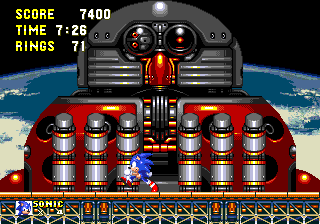
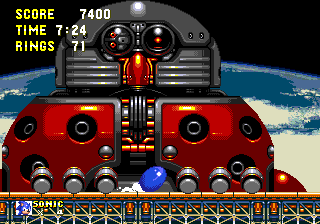
When you get out of danger, the floor will begin to shake as the mech makes its way towards you, coming from the left. You'll see that it's now behind the path though, facing us head on while slowly inching its way to the right. It has its hands resting up against the path, each with three fingers pointing upwards. This is the first of three phases of this boss, but it shouldn't be too difficult for you, as long as you dodge swiftly and attack efficiently. These six fingers require three hits each in order to move onto the next phase, but you can land several of these at once. Basically, Eggman's plan of attack here is for the hands to move across the ground, trying to follow you as you run along. When they stop and lift up a little, they'll immediately come down, hoping to catch you underneath, just like the Lava Reef Act 1 boss (which is actually a very similarly designed hand). This is where you can take them out, but jumping on each one for each hit will take quite a while, as they're only down for a second or two. The more effective strategy is to stand between the two hands, and use your spin dash to bounce from one finger to another across the ground, which is a lot quicker. Between each time the hands clamp down, the mech takes one step in your direction, and the nearest hand moves as close to you as it can get. There will always be at least a small gap between the two hands for you to stand in though, so get in there each time and then let loose with the spin dash, which should allow you to get three or four hits in each time, on different fingers.

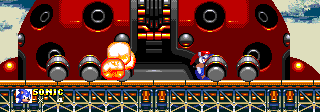
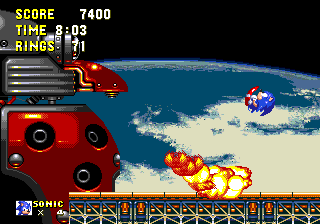
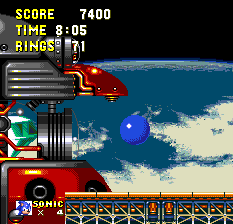
With the easy part out of the way, things are about to get a great deal tougher. He may not have any fingers left, but that's not going to stop the mech from cooking up a hedgehog-flavoured meal out of you, if you give him even a fraction of the chance. He'll move downwards, causing the ground to rumble. Stay on the right, because he's about to reappear from the left, with the massive mech head poking up through the floor, in profile. The floor will begin to crumble as he walks forward and begins to chase you, but the screen will scroll at the same rate, so you won't be able to outrun him. You do need to keep on the move though, because if you go too far left at any time, you'll fall through and die. While chasing you, the big red nose of the mech will snort out a small blast of fire every 5 seconds or so, which comes down and moves right along the ground, so jump over it while on the move. Immediately after it passes, you ought to drop back a little way, and jump and hit the nose, which will pause that flame attack pattern for the moment, and lower the mech's body, while keeping the head in the same position. In the space between, you'll see the Master Emerald! Surrounding it with machinery, Robotnik is using it to power a massive laser beam cannon from inside the mech. It begins to charge up, but before you attempt to evade it, you have just enough time to land your own attack. The Master Emerald is actually the weak spot of this machine, and you need to jump back and hit it, and then bounce off and run to the far right side, as quickly as possible. If you're playing as Sonic and Tails, with Tails being controlled by the computer, I find that he tends to hit the Emerald for you, just after you bop the nose, which is rather handy and leaves you to focus on the following part.
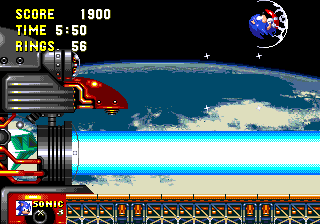
Now pay close attention. The laser beam, though it lasts for less than a second, blasts right across the whole area in front of the mech, horizontally, and there is no safe place to stand from it. Therefore you need to jump over it, but you'll have to do so at exactly the right time just before it fires, so that it disappears by the time you begin to fall back down. This is not easy. What you need to do is use the sound effect of the laser beam charging up as your guide. Jump as high as you can, as soon as you hear it stop. You'll have just enough time to launch upwards before the beam fires, but you have to be very precise. This is particularly tricky, but if you've managed to hang onto that lightning shield I told you to get earlier (though I wouldn't blame you if you got hit by one of those darn spikes in the Act 2 boss), it's more use here than ever, because Sonic can use the double jump ability to sail over the laser with ease, and good timing isn't necessarily required.
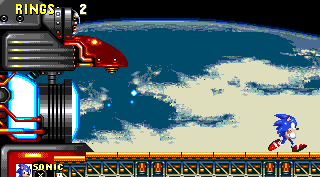
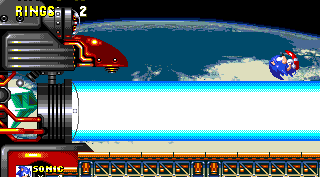
Same goes for Tails, who of course can just fly right over it, but if you're playing as Sonic without that shield, you need to jump at exactly the right time. Also, DON'T press pause while the beam is charging, because this will stop the sound effect prematurely when you unpause, and you won't know when to jump. After a moment, the body part rises again, and the whole procedure repeats, starting with another flame blast. As per usual, you'll need to hit the Master Emerald, and then dodge that massive laser a total of eight times to defeat this phase. It's one of your biggest challenges, but I believe in you..!
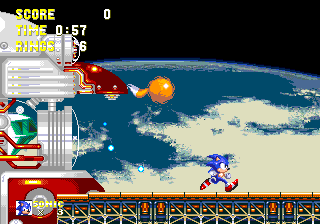
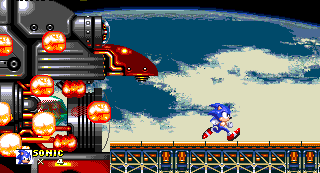
When you land that last hit, the mech will burst into flames and start to slowly topple downwards. The screen stops scrolling, so bounce off over to the right. The mech goes off screen and Dr. Eggman rises up out of the wreckage in his Eggmobile, desperately clinging on to what little hope he has left, as he clutches the Master Emerald in the grabbing attachment underneath. The ground is rumbling and the Death Egg is falling apart, with flying debris all over the place! You have one more phase to complete, but it's straightforward. Eggman doesn't attack at all, he flees to the right, taking the huge stone with him. All you have to do is chase after him, and jump and hit him a further eight times. This time the screen follows you, but you still have to keep running, as the left side of the long platform is collapsing again, and the only danger here is falling through it. Every time you jump and hit Eggman, you'll fall back towards it, so keep that right directional button held down nice and firm. Eggman will go off screen a little way, so keep running to catch him up. On your last hit, the Eggmobile explodes, and the Master Emerald will finally be dropped on the platform. The left side stops collapsing immediately, but there will still be a large gap there, so make sure you don't fall in (because that would be REALLY annoying). Eggman darts off, a defeated man, as the whole area starts to burst and explode, and the screen turns to white. Congratulations!
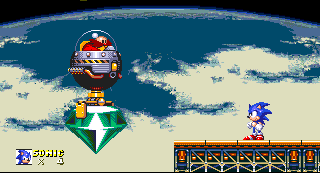
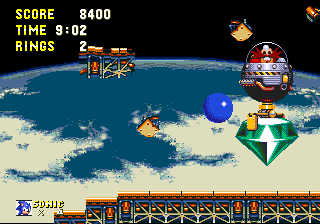
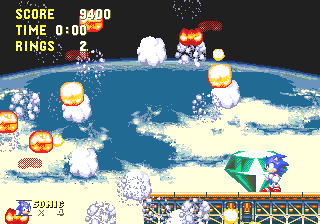
If you didn't collect all the Chaos Emeralds, you can now sit back and watch the ending. If you did, you've got one more mission to complete, in order to finally reclaim the Master Emerald. That's right, it STILL isn't over. Either way, go back to the Stages and Stories page to read up on the first ever "extra boss", in the form of The Doomsday Zone!
View Notes(6)
Go to..
#1. Comment posted by LOFC_Ed on Monday, 3rd September 2012, 9:34am (UTC)
#2. Comment posted by Brady Meyers on Tuesday, 25th September 2012, 5:05am (UTC)
#3. Comment posted by Anonymous on Saturday, 22nd December 2012, 6:57pm (UTC)
#4. Comment posted by Brady Meyers on Tuesday, 16th April 2013, 12:37pm (UTC)
#5. Comment posted by Michael on Monday, 14th October 2013, 6:47pm (UTC)
#6. Comment posted by El'endia on Wednesday, 27th August 2014, 12:40am (UTC)
Hide Notes

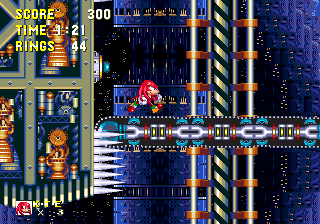
- Though Knuckles has no hope of accessing this level by honest means, it is possible to play it as him via use of the level select cheat, though you also need to enable debug mode as well, both of which can be found in the Cheats section. When you return to the level select menu after enabling debug, use the C button to change the number to 03, so that you'll be playing as Knuckles, and then you can select either Act 1 or Act 2 of Death Egg. Even though they aren't designed for him, he can actually make his way through both acts (including either main route in Act 2), but the only thing he can't do is defeat the Act 1 boss. The eye is positioned far too high for Knux to reach with his much weaker jump, and it's impossible to complete. It is possible to defeat the final boss, but you'll need even more careful timing when jumping over that laser!
View Notes(1)
Go to..
#1. Comment posted by afolita on Saturday, 1st September 2012, 1:26pm (UTC)
Hide Notes
Each section of this page allows users to add their own notes to fill in any missing details or supply additional research etc.
View general notes for Death Egg Zone (6)
#1. Comment posted by Anonymous on Sunday, 19th August 2012, 2:22am (UTC)
#2. Comment posted by Anonymous on Wednesday, 19th December 2012, 7:29pm (UTC)
#3. Comment posted by Oobo on Tuesday, 19th March 2013, 2:23am (UTC)
#4. Comment posted by Anonymous on Saturday, 8th June 2013, 7:58pm (UTC)
#5. Comment posted by Anonymous on Saturday, 21st December 2013, 5:15am (UTC)
#6. Comment posted by Anonymous on Wednesday, 21st February 2018, 2:22pm (UTC)
Hide Notes
Last Updated
Content for this page last edited:
19th August 2012
Files last uploaded for this page:
20th August 2012
19th August 2012
Files last uploaded for this page:
20th August 2012
Recent Notes
General Notes
Posted by Anonymous on 21st February 2018
Point #6
Posted by Ashton Withers on 19th January 2016
Act 2 Boss
Posted by Anonymous on 28th December 2015
Act 1 Boss
Posted by SonicTailsKnuckles on 31st October 2014
Final Boss
Posted by El'endia on 27th August 2014
35 notes posted on this page in total
Posted by Anonymous on 21st February 2018
Point #6
Posted by Ashton Withers on 19th January 2016
Act 2 Boss
Posted by Anonymous on 28th December 2015
Act 1 Boss
Posted by SonicTailsKnuckles on 31st October 2014
Final Boss
Posted by El'endia on 27th August 2014
35 notes posted on this page in total


