
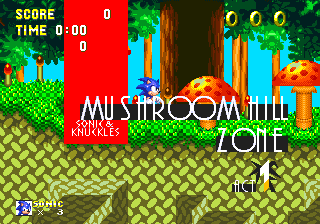
After the events of Sonic 3, Sonic falls back down to Angel Island, finding himself in the hidden underworld of the island's deepest woodland forest. Massive wild mushrooms and colourful plants grow plentifully and there are long, twisting tree-vine pathways to speed across and occasional strong winds to endure. Different areas of Act 2 are magically themed on different seasons of the year in this classic stage.
Game: Sonic & Knuckles
Stage Number: 1
Level Division: 2 Acts
Boss: End of Act 1. End of Act 2.
Playable Characters: Sonic, Knuckles. Sonic & Tails, Tails (Sonic 3 + Sonic & Knuckles only).
Difficulty Rating: ![]()
![]()
![]()
![]()
![]()
Music: Act 1 music is delightfully cheerful and bouncy, its "instruments" somehow reflecting the round, wobbly shapes of the mushrooms and light floating buds and leaves in the air. Act 2 is very similar, almost identical in tune, but with a slightly more autumnal kind of flavour.
Typical Length:
Act 1: 1 minute, 30 seconds - 2 minutes
Act 2: 2 minutes, 30 seconds - 3 minutes
Available Items:
| Act 1 (S&K) | 346 | 5 | 9 | 3 | 1 | 2 | 3 | 1 | 2 | 1 | 3 |
| Act 1 (S3&K) | 360 | 5 | 11 | 3 | 1 | 2 | 3 | 1 | 2 | 1 | 5 |
| Act 2 | 338 | 4 | 8 | 3 | 2 | 3 | 4 | 1 | 1 | 0 | 6 |
Mushroom Hill Zone Downloads:
| Level Maps: |
Act 1 map (.png) Act 2 map (.png) |
| Art: |
Official badnik art (.jpg) Official concept art (.jpg) Art found in the Japanese instruction manual |
Top Tips
- Like many first levels, Mushroom Hill is a gentle introduction to the world of Sonic, and the badniks are prime amongst the small number of worries within this large forest. Mad Moles and Cluckoids will constantly knock you far away from them using wind or mushroom projectiles, though good timing will overcome them. Try and hide on a step underneath and in front of the moles to wait and then take them by surprise, and try your best to get behind the Cluckoids to avoid the wind. The real pests though are the Dragonflies, as you can jump onto their spiked bodies very easily if they're hovering downwards. Always attack when the head is the highest part of it.
- Beware of large internal rooms with spikes on some areas of the walls and along pits in the floor. They're rare, but most common to Knuckles-only areas in Act 2. You'll start on the top left and and have to go down to the bottom right to exit. If you don't mind losing rings, then you could just drop, but to get down safely, you might find a nearby floating mushroom on the ceiling that you can use to glide down.
- There are 9 Special Stage rings in this level (11 in the S3&K version), all of which found in the usual secret rooms hidden in the walls, sometimes on the main routes, and sometimes hidden away in tough to reach spots. Such rings start to become more and more scarce in this game, and the latter few levels have none at all, so my advice would be to stock up on Chaos Emeralds here where they're relatively easy to come by!
Each section of this page allows users to add their own notes to fill in any missing details or supply additional research etc.
View general notes for Mushroom Hill Zone (10)
#1. Comment posted by Beau on Monday, 16th May 2011, 4:00pm (UTC)
#2. Comment posted by LiQuidShade on Monday, 16th May 2011, 7:46pm (UTC)
#3. Comment posted by flablar on Sunday, 12th June 2011, 5:26pm (UTC)
#4. Comment posted by o78g on Friday, 1st March 2013, 2:45pm (UTC)
#5. Comment posted by angelthehedgehog on Thursday, 22nd August 2013, 2:03am (UTC)
#6. Comment posted by Anonymous on Saturday, 13th September 2014, 3:11pm (UTC)
#7. Comment posted by Ratchet 0203 on Saturday, 4th October 2014, 3:23pm (UTC)
#8. Comment posted by I.M.2R on Wednesday, 21st February 2018, 2:01pm (UTC)
#9. Comment posted by I.M.2R on Wednesday, 21st February 2018, 2:03pm (UTC)
#10. Comment posted by Anonymous on Wednesday, 21st February 2018, 2:04pm (UTC)
Hide Notes

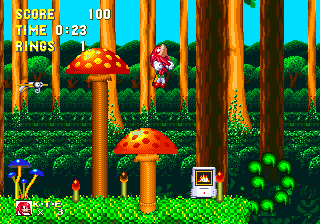
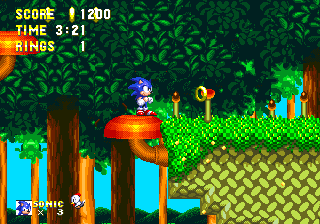
Going for something other than the standard tropical paradise for a change, the first level of Sonic & Knuckles follows the surprisingly uncommon location of a deep woodland forest, characterised more than anything else by its colourful, animated mushrooms of varying sizes. In the background, extremely tall and thin, light brown tree trunks reach high up to the top of the level, with the light clear sky between them, and moss growing at their bases. The thick, green leafy canopy at the very top is supported by thicker, darker brown tree trunks. The forest floor in front of them is lined with bushes growing darker as you go further down, and there are rows of smaller trees behind them. The pathways are of bright green dewy grass, and as you run along them, a great little graphical touch throws tiny little yellow buds in the air, gradually floating back down. As grassy paths curve into speedy loops they begin to constitute thick vines, with much thinner ones wrapping around them. Like Green Hill Zone, the ground follows a simple pattern, and with blocky extrusions and intrusions all over it, of various shapes and sizes. The pattern is a kind of oval-based one, of brown and a dull yellow colour.
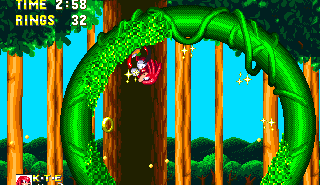
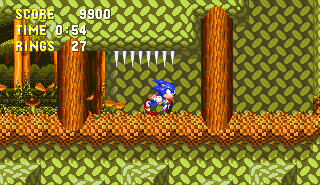
If you consider Act 1 to be based in the Spring and/or Summer, then Act 2 moves you into Autumn and Winter versions of this location. They appear the same, only with certain colour palette changes made. The level changes to Autumn very early on in Act 2, where the sky becomes darker and the leaves on the trees and bushes become much less bright and more olive green. Predictably the once lush green grassy paths and thick curving vines are now a bright and crisp brown colour, and running along them upheaves fallen leaves rather than little floating buds. Reach a certain point and each route will briefly delve into an internal area, allowing the environment outside to shift entirely to Winter upon your exit out the other side. The sky now is nearly white, as are most of the leaves, some of which look rather frosty. The tree trunks are also discoloured, though there's no snow, and pathways and floating leaves are a duller brown colour. Note that the extruded, patterned ground on which everything sits remains the same throughout all seasons.
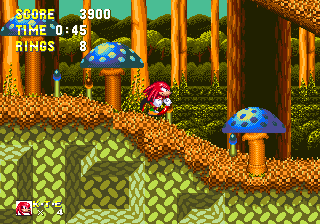
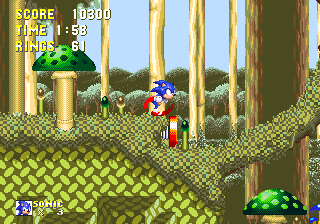
On top of these pleasant, magical transformations, Mushroom Hill is one of the most decorated zones, with pathways lined with a variety of funky fungi, some of which act as interactive objects such as trampolines or collapsing platforms off of ledges, other smaller ones are purely decorative. The colours of mushrooms are usually orange in Spring/Summer, blue in Autumn and green in Winter. The big bouncy ones charmingly tilt back and forth on their stems, while smaller decorative ones periodically switch from thin to fat, while the skinny medium-sized ones are motionless but stay blue all year round. Where sections of the level become more enclosed, a darker chunk of the ground connects floor to ceiling in the background, and tree trunks support narrow passageways in the foreground.
View Notes(5)
Go to..
#1. Comment posted by Xxaqz on Wednesday, 11th May 2011, 2:37pm (UTC)
#2. Comment posted by Bombitty on Sunday, 25th December 2011, 8:22am (UTC)
#3. Comment posted by afolita on Saturday, 14th July 2012, 12:12pm (UTC)
#4. Comment posted by Anonymous on Sunday, 2nd December 2012, 2:00am (UTC)
#5. Comment posted by Discomusic on Friday, 25th January 2013, 4:04pm (UTC)
Hide Notes

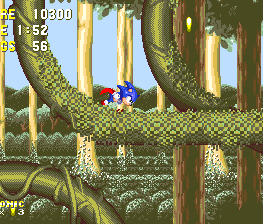
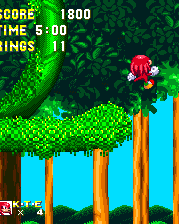
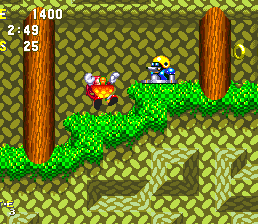
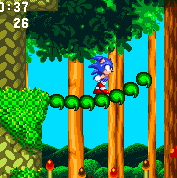
For a first level, this feels like a slightly larger zone than normal, and it makes the most of its space with an array of interchangeable multiple routes stacked up on top of each other. The lower paths tend to span across large, stable pieces of ground, while the further up you go in the stack, it seems, the more sparse and smaller the platforms and ledges become, allowing ever more easy drops to the routes below. These gaps are often crossed with powerful diagonal springs or by getting your timing right on the wooden swing objects, but most frequent are the long speedy vine pathways built into the layout to connect everything together. They provide the level with its main source of pace, filling the map with loops and curves darting in all directions - somewhat unusual compared to the traditional first levels before it, which tended to favour their loops to be included in the ground structures themselves. Many end before they reach the next ledge in fact, instead flinging you, using your momentum alone, through the air with a short ramp. Back to the patterned, grass-topped structures themselves, and pathways here are rarely straight, except for within the occasional tight internal corridors between large platforms supporting different routes. All manner of slopes, steps and curves give the valley its characteristic hills and bumps in all other areas.
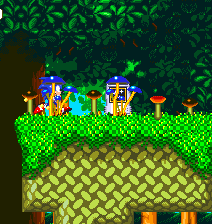
Most of the branching pathways across this somewhat rigidly tiered structure don't last long before they converge back with others, but you can cross them in a number of ways, using the large pump devices in tighter corridors to move to the next one above, launch a powerful jump upwards off of the wooden swings, or simply drop carelessly into the wide gaps between the high up precarious platforms. There are usually three or four stacked routes in operation at any one time. The highest platforms are smallest and therefore the trickiest to remain on consistently, although they tend to reap the most rewards, with hidden items and fewer enemies to concern yourself with. Sonic and Knuckles begin their journey on separate paths, Knuckles on the lower. Interestingly Mushroom Hill is the only level in either Sonic 3 or Sonic & Knuckles that offers an extra bit to the beginning of Act 1, revealed when the two games are locked on. More about that in Point #2. The two starting routes converge pretty soon in Act 1 however, and for the most part, the two characters share routes throughout this level thereafter, aside from a couple of Knuckles-only exceptions near the start and end of Act 2 respectively.
View Notes(2)
Go to..
#1. Comment posted by Anonymous on Saturday, 12th January 2013, 11:22am (UTC)
#2. Comment posted by Anonymous on Saturday, 13th September 2014, 2:38pm (UTC)
Hide Notes

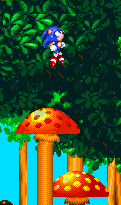
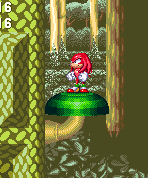
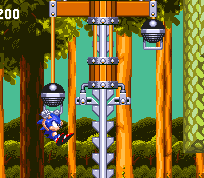
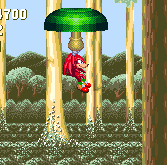
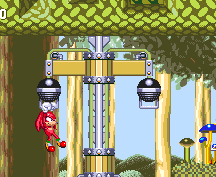
Loads of unique, interesting objects in this level, most notably the large mushrooms that are wobbling endearingly on the ground-based pathways. Leap on their tops to spring right off, getting more height, up to a certain point anyway, every time you bounce back on them (not to mention creating that classic "bwoaa" sound effect at the same time). Most large mushroom platforms that grow out from the side of ledges fall when you try standing on them, though a few in Act 2 remain reliable. Both of these mushroom objects are seasonally coloured in Act 2 - red for Spring/Summer, blue for Autumn, green for Winter. When you find large pump devices, with handles hanging from either side, grab hold of one of them and your character will hang there from it. Press down to pull it, which makes the pump go up a little along the vertical grey line, and repeat until you reach the next ledge above you, usually going through a hollow portion of the ground with holes in it. In S3&K, bring Tails with you, controlled by a friend, and the pump moves more quickly with two people pulling it on either side. Large curled-up plant stems that sit on the edges of steps or ledges uncurl and stretch out when you walk across them, curling back up quickly the moment you step off.
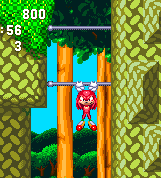
Sonic and Knuckles take on a bit of acrobatics with thin grey poles, both horizontal and vertical, used for swinging around once, and propelling them forward. Best used when you hit them with speed, from the direction you're heading from, otherwise you'll just hang from the horizontal ones. On high ledges, there are sometimes two brown posts with a rope handle hanging between them. Run through with speed and you'll start swinging around on that handle. You can jump off at any time, and you'll be sent with a boost along the angle of your swing upon release, so you usually need to try and jump off as the handle starts swinging upwards, to reach the best possible height.
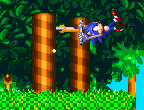
Often, hidden behind wooden posts in the internal areas are sometimes long bits of sticky sap that attach themselves to your usually speeding character, holding onto him like elastic. Only a spin dash will allow you to escape! There are also see-saws that spring you upwards, made up of a pair of mushrooms that act like scales. There's a small square weight on the left one, so jump on the right to send it up, but unlike most other Sonic see-saws, the weight actually comes down on the same side it took off from, so there's no need to switch this time, and even if you do, it doesn't actually crush or even harm you. Some mushrooms hang from the ceiling, and you can grab hold of the bottom and use it as a glider to float downwards, controlling its direction with the left and right buttons. If caught in a windy updraft, you'll be blown upwards to a higher route, and you can jump off at any time.
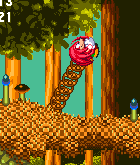
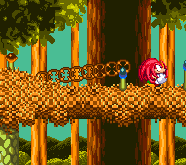
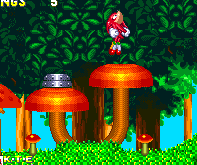
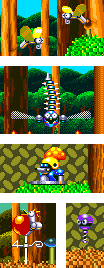
Mushrooms aren't the only things infesting these woods - a whopping five different types of badnik are here too. Butterdroids are simple butterfly badniks that hang out in pairs and steadily approach you when you step into their vicinity. I may be wrong, but I believe that Mushmeanie is technically the first badnik that you actually have to deal more than one hit to, in order to defeat. An early case of enemy-with-health-bar-itis. They're little spheres that bounce around an area (usually a narrow corridor) on a pogo stick, and are protected by a seasonally-appropriate coloured mushroom on their heads, which you must hit to remove before you can then kill it on your second attack. Dragonfly hover up and down over a set area, with a long stinging tail that quickly becomes a real pain in the arse for you. Hit their heads only. Getting into more obscure territory, Mad Moles are mole bots that periodically pop out of little metal stumps in the ground, and throw mushrooms at you. The mushroom doesn't harm you, but it can take you with it as it bounces around the area for a bit, possibly causing you to collide with a harmful object. Depending on where you are, they can throw them either straight forward, or diagonally downward so that they then start bouncing off of the floors and ceilings. Curiously, they seem to reappear out of their metal stumps even after defeat, if you return to the same area after leaving. Lastly, Cluckoid is a rooster bot that sits perched in one spot, and facing one direction. Act 2 gets considerably more windy, thanks mostly to these guys, who suck in wind and blow it out with force in periodic bursts, forcing you away from them and possibly into something that hurts. If you get behind them, their wind will no longer affect you.
View Notes(4)
Go to..
#1. Comment posted by Xxaqz on Wednesday, 11th May 2011, 11:33pm (UTC)
#2. Comment posted by Andrew on Friday, 27th May 2011, 6:33am (UTC)
#3. Comment posted by afolita on Saturday, 14th July 2012, 12:30pm (UTC)
#4. Comment posted by Anonymous on Thursday, 29th September 2016, 3:49am (UTC)
Hide Notes
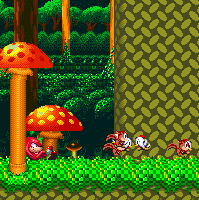
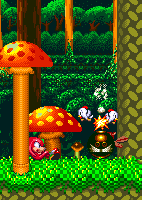
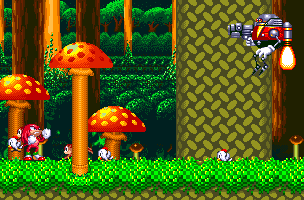
For Knuckles only (and playing Sonic & Knuckles only - not with Sonic 3 locked on), we begin with a short scene. Adding evidence to the theory that his whole adventure in this game actually takes place after Sonic's, when the day has already been saved, Knuckles is chilling out in Mushroom Hill with some dancing animals. Had this taken place in the midst of the Death Egg's relaunch and inevitable tumble back onto a live volcano on Angel Island, I would like to think Knuckles would have a bit more urgency about him at this point. Anyway, his after-party is disturbed by a mysterious Eggman-branded bomb that plops itself down in the center of the scene. Before anyone knows what to do with themselves the thing explodes in a bright white light, sending our young echidna friend flying, though causing curiously no damage to the small animals that are closer to it. They scurry off though, as you would, and Knuckles regains consciousness to see a rogue Eggrobo badnik hovering above him, presenting himself to be the perpetrator. Knuckles shakes his fist and chases him off of the screen, thirsty for revenge. Reason enough for four and two bits of levels of fun, I'd say!
View Notes(0)
Go to..
No notes have been posted in response to this section.
Hide Notes
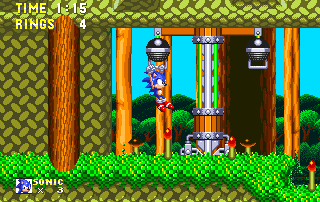
Pump devices offer a nice way of switching between routes, particularly when found in corridors like this. You can either walk on, or jump onto one of the pulleys and hold down repeatedly to raise the device.
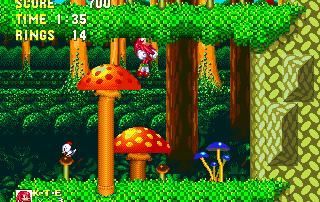
These wobbly mushrooms aren't just for show and cheap gimmicks you know. They're often useful for getting up to higher ledges or pathways just above. Bounce on them repeatedly and you'll start to go higher and higher, like a trampoline.
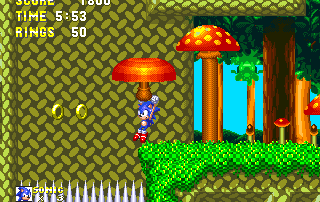
There's a long drop close to half way through the act with some spikes at the bottom that you might want to avoid. A hanging mushroom glider is offered as a safe route down from the top, but if you just jump off it and poke around the top right of this shaft, you might find a hidden 1-up inside a long tunnel.
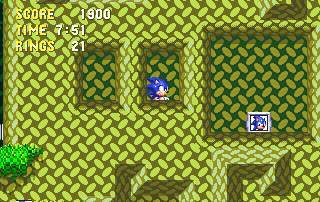
Another extra life can be found near the end, by staying on the highest route possible, which includes using diagonal yellow springs to cross the last couple of high up platforms. When you reach a solid wall with a yellow horizontal spring forcing you back, simply jump over the spring and find this in the tunnel behind it.
View Notes(1)
Go to..
#1. Comment posted by Anonymous on Saturday, 13th September 2014, 2:49pm (UTC)
Hide Notes
Special Stage Rings
Note: If playing Sonic 3 & Knuckles, see Point #1 for details on two additional Special Stage rings at the start of the act.
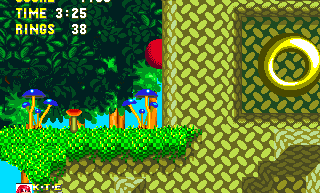
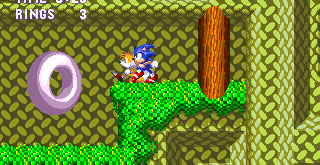
You can get to this ring either on the top or middle route. From the top, if you can find the first checkpoint - which is on a small isolated platform above the top route, with a collapsing mushroom and a diagonal spring on it - go right from there and as soon as you step off the curled up plant stem, drop down from it, then take a horizontal grey pole to flip down to a ledge where the ring room is to the right. Alternatively, there is a wooden swing to the left of this ledge on the middle route which can also get you here.
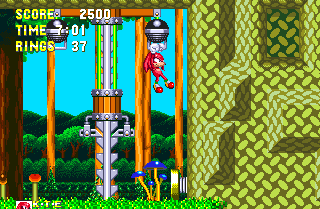
After the last ring, you'll come out through the tunnel on the right. A swing can take you safely to a platform over on the right, but you should then drop down to the path below, where you'll find the second checkpoint. From there, carry on down the slope and drop down the gap after the short corridor. Down here is a little room with a pump device. Latch on, and from there you can just jump to a hidden upper right path in the wall, holding the ring.
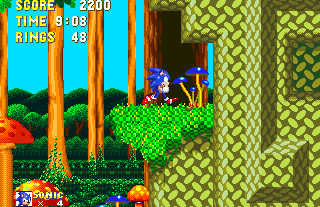
Again, head right through the corridor on the other side of the last big ring and you'll emerge from a curved route to rejoin the end of a vine pathway. Keep heading down the slope, through one loop, but then the following vine pathway will lead up but then flip back to the left, winding up to the path via a red spring. You need to avoid going along with it, and instead jump off when it starts heading left, and walk off of it to drop down to the right. If you're too slow and end up taking the spring upwards, just drop off the platform to the left and try again. Shortly after, you'll find this room on the lowest route, which later rejoins the normal one to go straight into the boss.
View Notes(3)
Go to..
#1. Comment posted by Anonymous on Sunday, 25th November 2012, 7:23pm (UTC)
#2. Comment posted by Anonymous on Saturday, 13th September 2014, 2:51pm (UTC)
#3. Comment posted by Anonymous on Saturday, 4th October 2014, 3:06pm (UTC)
Hide Notes
The start of Mushroom Hill is quite interesting, as it's the only one for which the Sonic 3 & Knuckles version unlocks a small portion of the map at the very beginning which wouldn't ordinarily be accessible. It's to the left of the normal starting areas for both characters, and playing Sonic & Knuckles alone, you would face a solid barrier if you tried to go back any further.
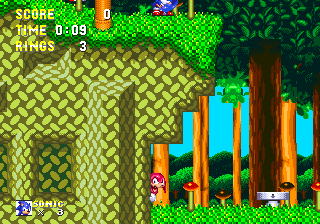
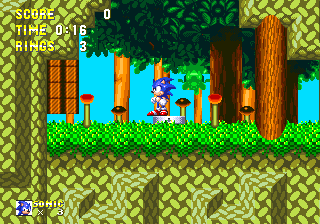
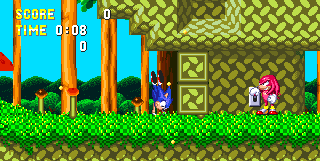
When playing as Sonic in S3&K, Tails will air lift you safely into the level (and then fly off again, if you're playing as Sonic alone). Walk forward and you'll automatically stop at a ledge, and duck, to let the screen scroll down, where you'll see a tunnel leading into the ground beneath you. Knuckles will walk out of it, and then peak insecurely around the exit for a moment, making sure no one's watching him, before stepping out and pressing a button on the ground, which closes the doorway to the tunnel. Mysterious. When he leaves, you'll regain control of Sonic, and though you don't have to, what sane man could resist opening up that doorway and seeing what all the fuss was about? Do so, and at the end of the tunnel, you'll find a Special Stage ring. Not just any old one though - this one is flashing with various colours! Hop in and you'll be taken to the altar in Hidden Palace Zone, where the Master Emerald is held, and having obtained all the Sonic 3 Chaos Emeralds, you can now go for the S&K ones, here. More details about this to come in a later section. As Knuckles, you'll find one of these rings early on in your path, rather than going through the tunnel, and both characters quickly rejoin their respective routes, after this brief moment.
View Notes(2)
Go to..
#1. Comment posted by Anonymous on Tuesday, 29th March 2011, 11:44am (UTC)
#2. Comment posted by Simon on Sunday, 3rd May 2015, 4:37pm (UTC)
Hide Notes
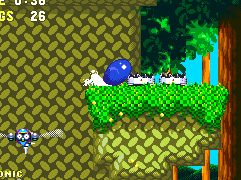
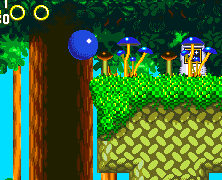
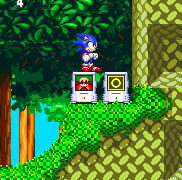
As Sonic, following on from Point #1 and for S3&K players only, before you return to Sonic's ordinary starting point, you can spring up to a high platform in a brief internal section, past a Dragonfly to a couple of ten ring items. What you may not realise is that this little platform actually allows access to a series of other platforms and high up pathways dotted across the top of the first third-or-so of the act, which otherwise would have remained completely inaccessible. Granted, there's not much of interest on this route other than an invincibility item, some extra rings and a rare Eggman item you may never have realised was there at all (although purely look-but-don't-touch - it causes you to take damage if opened!) but it's nice to explore. From the platform with two ten ring items, all you have to do is spin dash (give it quite a few revs though!) to the right, from the left side of the platform, allowing yourself enough space to jump off of the end, thereby giving you the speed and height to make the next one. Springs, ramps and swings will take you the rest of the way.
View Notes(3)
Go to..
#1. Comment posted by Anonymous Mark 3 on Sunday, 25th November 2012, 7:31pm (UTC)
#2. Comment posted by Anonymous on Saturday, 4th October 2014, 3:09pm (UTC)
#3. Comment posted by Anonymous on Tuesday, 11th November 2014, 9:25pm (UTC)
Hide Notes
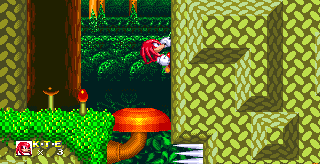
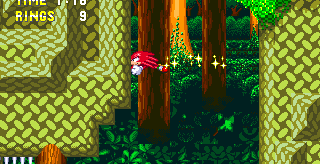
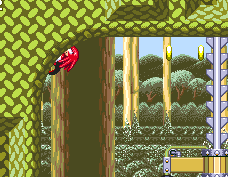
As Knuckles meanwhile, you get to try out your wall climbing and glide abilities for the first time ever, very early on in the act. Double jump on the wall here to grab hold of it, and then use the D-pad to climb up and down it. You can also drop down through that collapsible mushroom, where you'll have an alternative place to try it, further down there. This way is a bit more challenging, as it also forces you to glide between two adjacent walls. Jump off of the right hand wall, then press and hold the jump button again to glide toward the left hand wall, which you will latch onto.
View Notes(0)
Go to..
No notes have been posted in response to this section.
Hide Notes
Act 1 Boss
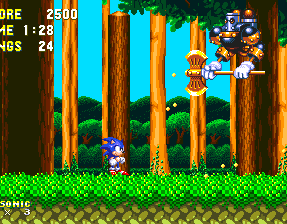
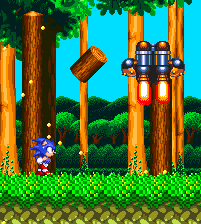
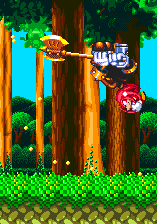
Here, you'll have to take on a floating robotic woodsman in order to progress to Act 2, and he has a slightly different pattern of attack, depending on your chosen character. You're in a long, open stretch with a series of already half-cut-down thin tree trunks across the immediate background. The woodsman fella will float in from the top right, complete with jet pack and shiny axe, and then blast off out of the screen, to the right. Follow him along and he'll eventually stop at a tree trunk, which he'll proceed to chop down to size into four pieces, starting from the top, and working his way down. For Sonic, the spinning logs will just be thrown directly left from where they are, but when playing as Knuckles, you may also have to try and dodge some of them (with difficulty) as they fall and bounce across the ground.
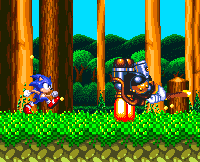
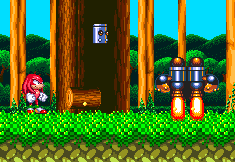
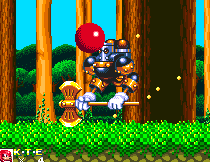
When he tries to cut down a fifth piece, in Sonic's fight, his axe will get stuck in the stump. He'll exert some energy trying to pull it out, and when he finally does, this will cause him to be thrown back, and bounce along the ground to the left. He'll then hover back up and repeat the process, moving onto a new tree trunk further on to the right. For Knuckles, he actually does chop down the fifth piece, but obscurely, he also loses his head in the process, which bounces across to the left with it. It'll blast back up to the body, which is floating on the right side, and he'll then sweep the middle of the ground, then fly back off to the left and restart the pattern. This may all seem fairly complicated, but dealing with him is easy. Just hang out in the bottom right corner, directly beneath him, where you'll be perfectly safe from all the logs. When he's facing right, just keep jumping and hitting him, but watch out for when he turns his back to you, because then you may collide with the small flames from his jet pack. Deal him six hits, preferably before he moves down to the bottom of the log and even begins the second phase of the attack. A fire shield is handy to avoid the flames.
View Notes(2)
Go to..
#1. Comment posted by James on Friday, 1st April 2011, 9:03am (UTC)
#2. Comment posted by Tent2 on Monday, 26th January 2015, 5:07am (UTC)
Hide Notes
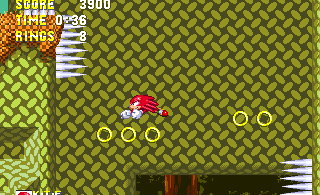
Act 2 has a couple of large, heavily spiked rooms for Knuckles to drop down from the top left to the bottom right. If you want to collect the rings dotted around, you can carefully glide back and forth, or you can just drop, but aim for the bottom right, as there will be floor spikes on the other side.
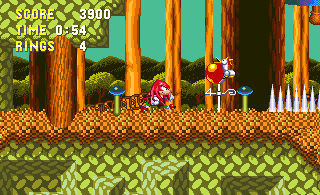
A long line of sticky sap and one Cluckoid is a bad combination. The sap prevents you from getting close to the badnik, and the strong gusts of wind produced by the Cluckoid interrupt your attempts to escape the sap by blowing you back.
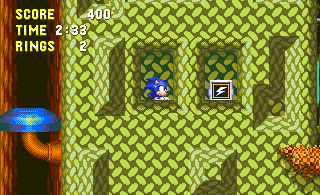
Normally you would only catch a glimpse of this lightning shield from the wrong side of the wall while darting from spring to horizontal pole, heading upwards. To get it, you actually have to leap from a curving vine on the other side. There's a mushroom platform growing out the side of the wall to assist you.
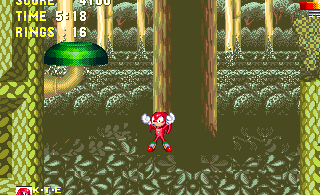
A Death drop?! In lovely, cuddly Mushroom Hill Zone? Yep, but it's quite well hidden, on Knuckles' route toward the end. You're only really at risk while poking around the second to last Special Stage ring, the entrance to which is on the left hand wall, where the mushroom is.
View Notes(3)
Go to..
#1. Comment posted by Anonymous on Sunday, 18th November 2012, 6:05pm (UTC)
#2. Comment posted by Anonymous on Saturday, 13th September 2014, 2:57pm (UTC)
#3. Comment posted by I.M.2R on Friday, 23rd February 2018, 2:41pm (UTC)
Hide Notes
Special Stage Rings
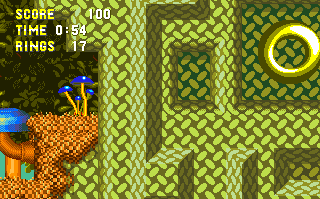
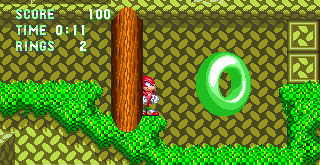
The first ring of Act 2 is Sonic only. After Point #1, keep going and be on the lookout for a curved pit in the ground, with a vertical pole in the middle. Head down the left side of the pit with speed so that you're fast enough to swing on the pole, which should give you enough speed to fly straight up to the right, and the start of a vertical loop that then leads toward this corridor.
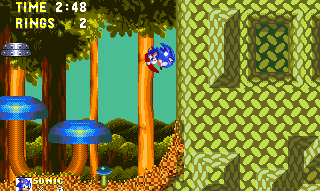
This ring is on a middle path, however it can be easily accessed from any route just before it. It occurs shortly before Point #6. If you take the top route, you must drop down the gap after a loop and a yellow diagonal spring. Look out for this see-saw next to a curved wall, which, obviously, hides the ring within it. If you're coming from the middle route, take a red spring that sends you running into the air via a curve, between two coiled stems. Below this on the bottom route, there is a hanging glider mushroom that can be used to float upwards because of a windy updraft. After the first gust, you must turn left to catch another updraft that then takes you to this platform.
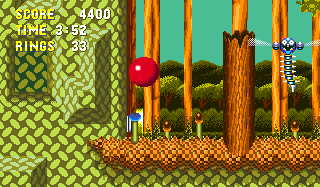
Knuckles has a couple of his own exclusive Special Stage rings, the first of which can be found right after the start of his own route, on Point #6. Break through the wall, then drop down through a series of horizontal poles. At the bottom you'll find a yellow horizontal spring suggesting you to go right, but ignore it for a minute and jump to the wall above it on the left, which houses the ring in question.
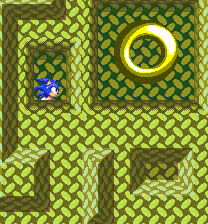
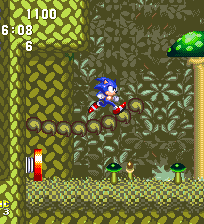
This ring sits in a corridor that leads into Act 2's Winter portion - the highest of three transitional corridors, heading straight into Point #7. To get here, aim for the highest route after the second Special Stage ring. You should find a checkpoint and a pump elevator device. Stay on this route and eventually a loop and a yellow diagonal spring will get you here.
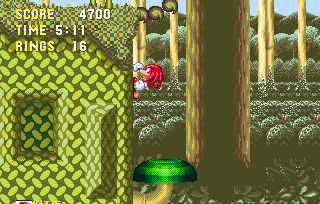
From Knuckles' first exclusive Special Stage ring, his second can be found to the side of Mushroom Hill's only death drop, so it's a bit of a risky one! Keep on running into Winter, beyond a large heavily spiked room, you'll run down a slope and along an uncurling stem. Stop here, before it takes you to a red spring and a loop. Instead, jump off and aim to land on the mushroom growing off the left hand wall below. The corridor with the ring in it can be accessed from here. When finished, carefully glide over the bottomless pit to the spring and continue.
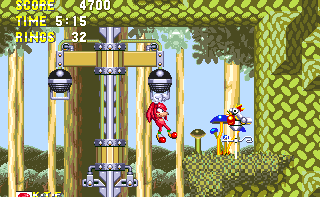
An easy one. Near the end, right next to the pump device of Point #8, the corridor that leads to the ring is guarded by a Cluckoid. Use the pump handle to negate the breezes he generates, then take him out and stroll into one of S3&K's most obvious big rings.
View Notes(2)
Go to..
#1. Comment posted by DigitalDuck on Wednesday, 27th April 2011, 5:59am (UTC)
#2. Comment posted by Anonymous on Friday, 30th November 2012, 5:08pm (UTC)
Hide Notes
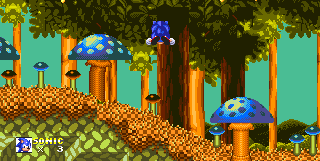
Kicking off Act 2 as Sonic, he and Knuckles will meet once again, and like in their various confrontations in Sonic 3, Knuckles once again sets off one of the island's many traps to thwart the hedgehog. This time, safely behind a barricade, he stands there grinning as he tugs several times on a lever on the wall. Each pump increases the wind level from beneath Sonic, who tries to hold onto the ground for dear life. Eventually, it becomes too strong, and you'll be blown upwards into the Autumn area of the zone. Playing as Knuckles, you can just break down this barricade and continue on a lower route, which quickly becomes autumnal too. Later, you will enter the Winter segment towards the end of the act, after exiting a completely enclosed area.
View Notes(1)
Go to..
#1. Comment posted by Anonymous on Saturday, 13th September 2014, 3:01pm (UTC)
Hide Notes
I can see some people getting momentarily stuck at this point. It's a fairly large room a little further than half way through the act with curved edges on the floor and the right side of the ceiling. On the right is a barricade with no ledge in front of it, so Sonic will be unable to spin dash through. Knuckles, however, can break it as soon as he touches it, no problem, but Sonic will have to take another route, above. On the left side of the curved room is a downward spring that will send you running along the walls and up to a ledge just above on the left, which will have a swinging handle object on it. Use the spring to get to that ledge, then hit the swinging handle at speed and try to release it so that you'll swing up to the right hand ledge above that, which holds a spring that sends you up and along a loop.
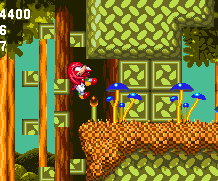
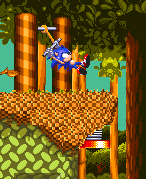
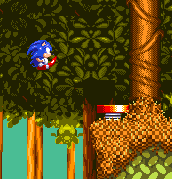
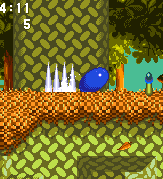
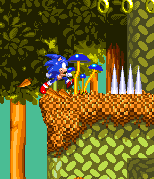
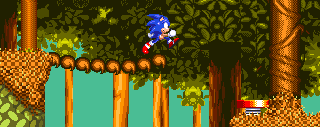
If you're having trouble, there is another option. From the swing, try going left a little way, back through the corridor and out the other side. Stand to the right of the first set of floor spikes that you see, and hit a powerful spin dash toward the curved bit of the path to fling yourself up to the ledge above, whilst holding right when in the air. On this higher path, you can carry on right, and straight over to the spring.
View Notes(2)
Go to..
#1. Comment posted by Anonymous on Saturday, 15th September 2012, 10:53pm (UTC)
#2. Comment posted by Anonymous on Friday, 30th November 2012, 5:16pm (UTC)
Hide Notes
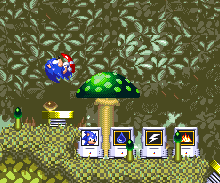
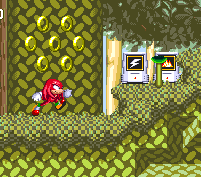
Eventually, through one of three different routes that delve from the Autumn, through brief internal areas, you'll then burst out the other side to find you've wandered into Winter, where everything looks much lighter and discoloured. If you take the top most route (which contains a Special Stage ring in its transitional internal area), you might just be able to find your way to a well hidden platform high up into the act, near the end. As soon as you enter the Winter area, stop and look around - you should be surrounded by four green mushrooms on the path as it begins to slope down toward a loop. Bounce off of the tall one furthest to the left and look for a diagonal red spring on the left hand wall. Use this to fly effortlessly toward the hidden platform, holding an extra life and your pick of all three shields - water, lightning and fire. Get the fire one. You'll need it for the boss!
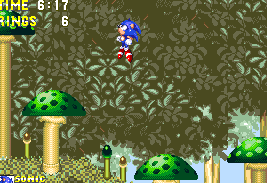
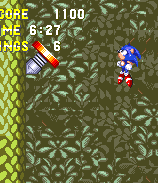
View Notes(2)
Go to..
#1. Comment posted by Charlie on Friday, 30th November 2012, 5:19pm (UTC)
#2. Comment posted by Anonymous on Tuesday, 11th November 2014, 9:29pm (UTC)
Hide Notes
A real mystery here that I have only just solved during the final phases of putting this guide together. After your speedy introduction to the Winter portion of the act, you'll end up at one of those large pulley pump devices, next to the final, and very obvious, Special Stage ring. Use it to go all the way up through the floor to the next level above. If you hit the red spring to your right, you'll either be sent all the way around the curved edges of the room you're in, or you'll go right through the ceiling on the top left side of the room, through to an extra hidden room that contains a fire and a lightning shield. The fire shield is pretty significant, as it does make the following boss a little easier. What mysterious factor determines this path though?
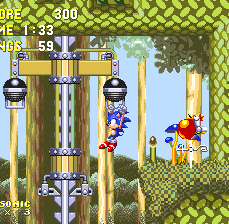
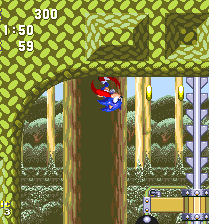
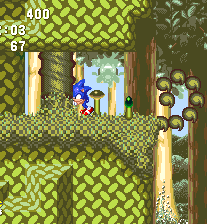
Well, as it turns out, it all depends purely on which of the two pumps on that device you used to get up here, or more specifically, which one you were on when you came up through the path, it would seem. Come up on the right pump and the hidden room will be closed off. Come up on the left, however, and it'll be open to you! Both rooms exit on the right and there's a solid vine wall at the end of the corridor out of the higher one that allows you to walk through toward the boss, but denies access the other way if you try to use the see-saw below to get in. Could have really done with knowing this in my earlier years.
View Notes(3)
Go to..
#1. Comment posted by Cf on Wednesday, 6th April 2011, 2:57pm (UTC)
#2. Comment posted by Hyper_Sonic on Friday, 21st October 2011, 3:54am (UTC)
#3. Comment posted by Anonymous on Sunday, 18th November 2012, 10:58pm (UTC)
Hide Notes
Act 2 Boss
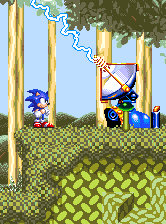
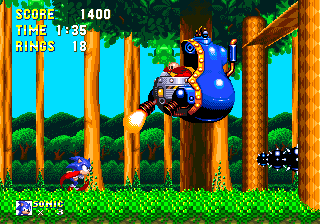
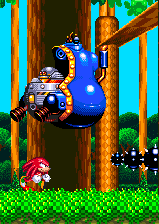
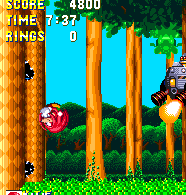
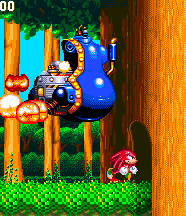
After the last checkpoint, you'll see a satellite sitting on top of a step, emitting electricity up to the sky. I've no idea for what purpose, but just go with it. Jump and hit it, and it'll start exploding, and a brief bit of white light will transform the Winter area back to Spring/Summer again. Out of the ground will emerge Robotnik (or Eggrobo if playing as Knuckles), in a fairly odd looking large blue machine, with twin fire-blasting jets at the front. If you want to be done with him as quickly as possible, snag as many cheap hits in on him as you can now, because he's about to blast off out of the screen! Follow him over the hill, and you'll find that rather than mounting an effective offense, he's actually retreating, flying backwards above the ground as the screen scrolls with him, pushing you forward. You still have the ability to run and jump around the on-screen area though as you chase down your nemesis, landing hits on him at every opportunity, just about anywhere on his machine. However, in addition to the harmful flames periodically produced from the small front-mounted jets, you also have to be concerned with the series of orange posts that you're running between, lining either side of the path. Each pair of them has a string of small spiked balls linking the posts together, and they're at varying vertical positions, so you'll have to leap over some, and run underneath others. For some of them, Knuckles has to actually jump between two strings of spikeballs on the same pair of posts, so ensure that your jumping accuracy is top notch for those. Also be aware that if you lose your rings, it's sometimes tough to re-collect any as they'll fall to the left side of the screen and out of the area, and there are no additional ones during the boss fight. After eight hits, your foe's craft will burst into flames, as auto-pilot kicks in on your character, running him through the small doorway of a giant tree trunk, while Eggman just crashes into it. This is the first of many bosses in the series to be fought on-the-run in this way.
View Notes(13)
Go to..
#1. Comment posted by Mike L on Tuesday, 29th March 2011, 12:06pm (UTC)
#2. Comment posted by AquaRuin on Tuesday, 29th March 2011, 12:41pm (UTC)
#3. Comment posted by maza17 on Tuesday, 29th March 2011, 10:18pm (UTC)
#4. Comment posted by Tiddles on Saturday, 2nd April 2011, 11:29am (UTC)
#5. Comment posted by Cf on Tuesday, 5th April 2011, 11:23am (UTC)
#6. Comment posted by Oobo on Thursday, 7th April 2011, 1:01am (UTC)
#7. Comment posted by SpeedingHedgehog on Sunday, 10th April 2011, 6:01pm (UTC)
#8. Comment posted by Oobo on Tuesday, 19th April 2011, 11:31pm (UTC)
#9. Comment posted by Hyper Emerson on Wednesday, 20th April 2011, 12:10am (UTC)
#10. Comment posted by Pengi on Saturday, 30th July 2011, 10:47pm (UTC)
#11. Comment posted by AndrewBerry on Wednesday, 22nd August 2012, 10:27pm (UTC)
#12. Comment posted by Ratchet 0203 on Saturday, 4th October 2014, 3:20pm (UTC)
#13. Comment posted by Tent2 on Monday, 26th January 2015, 5:11am (UTC)
Hide Notes
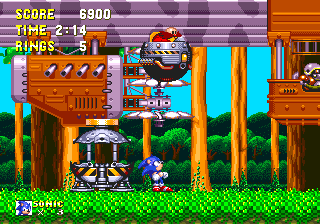
After freeing the animals and all that jazz, Sonic or Knuckles will start to hear a noise from above them, and look up to see the Flying Battery, Eggman's latest flying battle and prison ship, hovering just above. There seems to be one of those mole badniks sitting in a sort of hanging cockpit for some reason. Eggman/robo then flies off with it, attracting the attention of your character who then runs further along the platform in hot pursuit, eventually leaping and grabbing hold of it, in order to sneak onboard..
View Notes(4)
Go to..
#1. Comment posted by Sonic10158 on Tuesday, 5th June 2012, 7:18am (UTC)
#2. Comment posted by AndrewBerry on Wednesday, 22nd August 2012, 10:37pm (UTC)
#3. Comment posted by Anonymous on Friday, 20th December 2013, 8:02pm (UTC)
#4. Comment posted by Anonymous on Saturday, 13th September 2014, 3:08pm (UTC)
Hide Notes

- Did you know?... Mushroom Hill Zone was originally slated to be called Mushroom Valley Zone, as shown in Sonic 3's level select menu, produced at a time when the S&K zones were well into production and originally planned for that game. I assume they changed it to inkeep with a standard "Hill Zone" cliche.
View Notes(1)
Go to..
#1. Comment posted by Andreww on Thursday, 12th May 2011, 6:18am (UTC)
Hide Notes
Each section of this page allows users to add their own notes to fill in any missing details or supply additional research etc.
View general notes for Mushroom Hill Zone (10)
#1. Comment posted by Beau on Monday, 16th May 2011, 4:00pm (UTC)
#2. Comment posted by LiQuidShade on Monday, 16th May 2011, 7:46pm (UTC)
#3. Comment posted by flablar on Sunday, 12th June 2011, 5:26pm (UTC)
#4. Comment posted by o78g on Friday, 1st March 2013, 2:45pm (UTC)
#5. Comment posted by angelthehedgehog on Thursday, 22nd August 2013, 2:03am (UTC)
#6. Comment posted by Anonymous on Saturday, 13th September 2014, 3:11pm (UTC)
#7. Comment posted by Ratchet 0203 on Saturday, 4th October 2014, 3:23pm (UTC)
#8. Comment posted by I.M.2R on Wednesday, 21st February 2018, 2:01pm (UTC)
#9. Comment posted by I.M.2R on Wednesday, 21st February 2018, 2:03pm (UTC)
#10. Comment posted by Anonymous on Wednesday, 21st February 2018, 2:04pm (UTC)
Hide Notes
Last Updated
Content for this page last edited:
27th March 2011
Files last uploaded for this page:
25th March 2011
27th March 2011
Files last uploaded for this page:
25th March 2011
Recent Notes
Act 2
Posted by I.M.2R on 23rd February 2018
General Notes
Posted by Anonymous on 21st February 2018
General Notes
Posted by I.M.2R on 21st February 2018
General Notes
Posted by I.M.2R on 21st February 2018
Features and Obstacles
Posted by Anonymous on 29th September 2016
63 notes posted on this page in total


