


It doesn't take Eggman very long to throw the Master Emerald into the Death Egg and launch it once again. Sonic and Knuckles' best strategy is to intercept it on the way up, so they come here, to Sky Sanctuary. This is a collection of crumbling ruins, once a grand Echidna metropolis, that now hovers precariously in pieces high above the island, thanks to the Master Emerald's power. The ruins are beginning to collapse without it though, plus Eggman has an ace up his sleeve, sending an old, but revamped nemesis to hinder our hero throughout the level. Knuckles doesn't have a stage to play here, instead, this is the battleground for his final boss of the game.
Game: Sonic & Knuckles
Stage Number: 6
Level Division: None
Boss: Three for Sonic/Tails. Two final boss fights for Knuckles.
Playable Characters: Sonic, Knuckles. Sonic & Tails, Tails (Sonic 3 + Sonic & Knuckles only).
Difficulty Rating: ![]()
![]()
![]()
![]()
![]()
Music: An excellent light, airy but dramatic tune with a slightly ancient feel to it. It's a real shame that most of the sound effects, even the ring chime, cut into the main melody and replace it. Also doubles up as the theme for Angel Island, at the end of the game.
Typical Length:
4 minutes - 5 minutes (Sonic)
2 minutes, 30 seconds - 5 minutes (Tails / Sonic & Tails)
2 minutes - 3 minutes (Knuckles)
Available Items:
| Act 1 | 179 | 3 | 8 | 1 | 1 | 1 | 2 | 0 | 3 | 0 | 0 |
Sky Sanctuary Zone Downloads:
| Level Maps: |
Act 1 Map (.png) |
| Art: |
Official badnik art (.jpg) Official concept art (.jpg) Art found in the Japanese instruction manual |
Top Tips
- Sometimes it's worth treading lightly in this zone, not just because of the long death drop below all of the lowest platforms, but also because you can occasionally get unexpectedly crushed by things. Some of the large structural platforms bob up and down slowly, and you can get trapped in places where they move into a solid object or another platform. Also be careful when you encounter the swinging black half-spikeball objects, because it's surprisingly easy to get crushed between them and the ground as they swing close to it. Try to jump over them if possible, or wait until they're far away from the floor before you walk underneath.
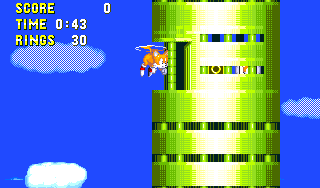
- Many of the structures are held together by tall green pillars, some of which have entrances at their base, leading to a spring that takes you all the way up. If you see some animals come out of the entrance as you approach, don't let your guard down - they're not popping out to greet you, they're fleeing for their lives from the Eggrobo badnik that's following them! Be ready for it.

Each section of this page allows users to add their own notes to fill in any missing details or supply additional research etc.
View general notes for Sky Sanctuary Zone (2)
#1. Comment posted by benjamin on Saturday, 18th February 2012, 8:39pm (UTC)
#2. Comment posted by yasin smaidy on Wednesday, 6th June 2012, 12:03am (UTC)
Hide Notes

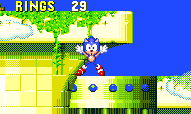
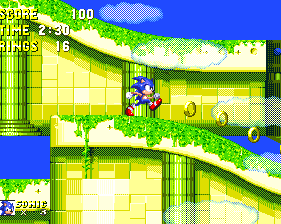
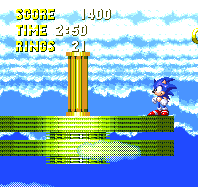
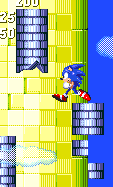
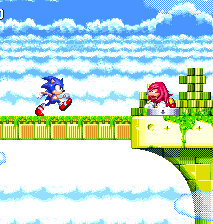
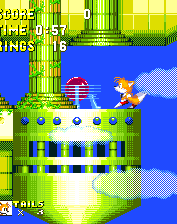
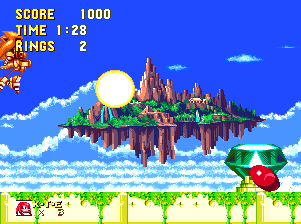
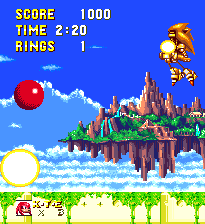
With no other level quite like it, the ruins of Sky Sanctuary are located high up in the white, misty clouds, which you can see lined up across the bottom of the sky, with larger, bluer ones behind them. It's a bright, clear day, capturing the pleasant, tranquil feeling that's often present in the penultimate stages of some Sonic games. This is counter-balanced though by the dramatic storyline behind the level and the action that unfolds within it. As you go up, clouds in the background get fewer and fewer, until another thick layer of them can be seen behind the highest platforms of the level. In addition, there are always several small, transparent ones floating by in the foreground at any time. With the wind blowing strongly to the left, also notice that all the clouds seem to bob up and down slightly, giving the impression that the whole place is floating precariously in the air.
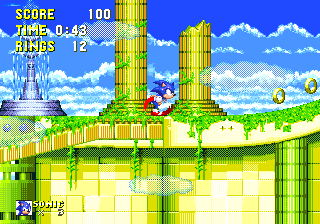
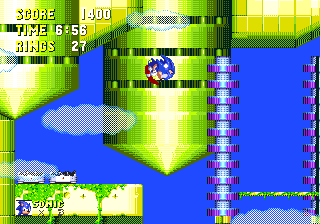
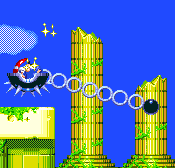
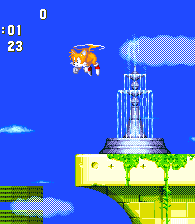
There's plenty more to see around you. All the ground takes a very lime green/yellowish colour, and much of the large, thick platforms that comprise it are made of those same square tiles from Hidden Palace Zone, only yellow, not turquoise. These are supported by long green pillars evenly spaced out across it, and topped by thick stone roads that are covered in bright green moss. Often book-ending these many isolated platforms are tall, thick green pillars - a characteristic piece of Sky Sanctuary architecture, with rows of small dark windows across them, blue circles along the top, and each pillar tapers to a point at the bottom. There are tall silver water fountains and purple stands with clear spheres on top of them, as well as more crumbled pillars reaching upwards from the roads. Built on small bricks at the bottom, there are also pairs of tall, thin purple posts on either side of the road, some of which reach up to quite a height and may contain poles to grab onto or a swinging spike trap. Sky Sanctuary Zone appears to be the remnants of a peaceful and beautiful city, left by Knuckles' lost race of people thousands of years ago... so be careful with all these priceless artifacts around, won't you?
View Notes(0)
Go to..
No notes have been posted in response to this section.
Hide Notes

First and foremost, this is a level primarily for Sonic (and Tails). Knuckles plays this level, but is limited to a single platform, on which he battles two final bosses (we'll get to those later). Unlike most levels which travel from left to right, Sky Sanctuary is one of the few that is based more on vertical progression, with long horizontal paths that wind their way left and right, across many large platforms as they ascend to the top, with platforms starting to get shorter as you get higher. Separating the level out into three segments are three different bosses, so this is definitely an unconventional stage in more ways than one. Each of these are detailed in the guidance section below, though also detailed below in Point #2 is a way to avoid the first two completely as Tails, taking advantage of the vertical structure to fly to easy shortcuts. Between these bosses, there are short courses to complete across the winding vertical structure. It's based entirely on floating pieces of land, most of which are static, but a few hover up and down, with higher adjacent platforms only accessible when at the highest point. Watch out around these though, as there are several places in which you can get crushed, at points where two platforms intersect and at least one of them hovers. You can cross large vertical gaps and ascend the structure by way of the teleporting devices, or by entering the small doorways at the bases of tall green pillars, which have springs inside them that bounce you straight up to the top.

Roads of the platforms are either straight or slightly sloped, and there are no loops and curves to speak of. Some of them are linked by long diagonal lines of thin road that falls away as you run across it, other gaps you will have to traverse via many platforming segments, though nothing you can't handle by now. The large platforms often overlap, leading to several brief alternate routes separating out and converging again at numerous intervals, or just well hidden areas holding item boxes. Well-timed jumps on objects such as bouncy clouds or rising horizontal poles will often get you there, as well as making use of the aforementioned large, gently bobbing platforms. These alternate routes don't last long however, and the only significant shortcuts that can be taken require the use of Tails, who, with good knowledge of the map, can be used to skip out massive portions. With some paths leading left and some right, it can be easy to get lost when coming to the end of an alternate route, so consult the map if you're not sure. Lastly, to give the impression of more height, this is another level that loops vertically - the top of the map seamlessly leads up into the bottom, so the highest platforms are actually situated at the bottom right of the map. Before you attempt to take advantage of this by just simply dropping down there shortly after the start though, bear in mind that you are of course prevented from doing this by placement of a death drop below all of the first platforms. So if you fall off the level anywhere along the beginning of it (and also on the collapsing road just before boss 2), you'll die. If you slip off anywhere above, there's a good chance you'll be saved by a platform somewhere in the middle, but you will obviously have to make your way back to the top all over again from that point.
View Notes(0)
Go to..
No notes have been posted in response to this section.
Hide Notes

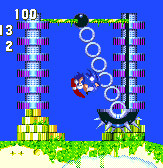
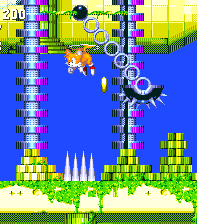
Use the same teleporting devices from Hidden Palace Zone to make your way up to the next segment of the level. Just hop on to the red orb and it'll take you straight upwards, usually to another one sitting on a platform directly above. You cannot use this second one to go back down however. Between two long purple posts, you'll be able to grab hold of and hang from horizontal bars that move up and down, and you can jump off at any time, ideally to a higher ledge above. Also between these posts on an immobile bar (and sometimes just floating on their own) you can often find a large chained black spikeball with the top half cut off. This can swing back and forth on its chain, usually when it's perched above the path, where it becomes an annoying obstacle. Obviously the spikes are damaging, and it can even crush you into the ground if it catches you in a small enough gap. However, they can also be found to completely orbit the central point too, still attached to the chain. In both cases, often more useful in the latter, you can actually jump inside the open top, and use it as a means of crossing a wide gap, or reaching a higher area. You'll spin around inside, and can jump out at any time, or if you stay in, you'll be given a quick rolling dash when it touches the ground.
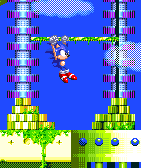
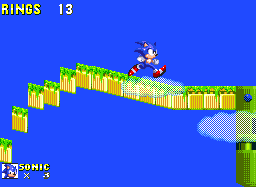
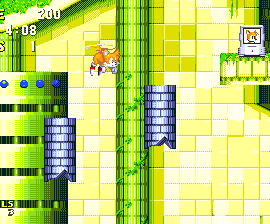
You can bounce off of the small, thicker white clouds (which remain stationary, unlike the moving transparent ones in the foreground) with a satisfying "wrepp!" sound, but be quick across long thin diagonal roads, which link two platforms, as each part you touch will quickly collapse under your weight. Around platform hopping areas, there are long green spinning platforms (shown side on) of large or small size, with a spinning cylinder in the middle. Your character will revolve around continuously on it until he jumps off, but the trick is to stand on the edge, and you'll revolve right around the outside of the disc, so that you can jump off safely to the opposite ledge. If you land too close to the centre then you'll only revolve around the inner circle of it and will need to jump further out. Be quick and precise on clusters of grey stone pillar platforms, which crumble when you land on them, as do most of the long thin diagonal roads that link many large stable platforms. Pieces of these fall away as you're running on them, so just ensure that you keep up the pace and you should be fine. Use the pop-up horizontal springs that appear behind you on long stretches such as these, to gain an unexpected burst of speed.
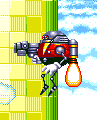
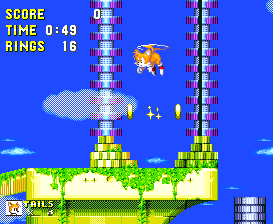
The only badnik in this zone is Eggrobo, Eggman's first real foot-soldier type badnik, modelled on himself. The same badnik that acts as Eggman's substitute for most of Knuckles' bosses, and the Death Egg is sending out legions (well, a dozen or two) of them to intercept Sonic - you can see them shooting up out of the background occasionally, throughout the stage. What they do is hover in one spot, always facing you, and when they spot you, they simply fire a horizontal laser from their gun. Easily taken care of with a bop on the head. Watch out when entering some of the long green pillars, if animals starting flooding out, it means they'll closely be followed by one of these dudes, hoping to catch you out!
View Notes(0)
Go to..
No notes have been posted in response to this section.
Hide Notes


There's an extra life, along with ten rings, hidden inside a tall green pillar off to the right, but as far as I can make out, Tails is the only one who can get here because there doesn't seem to be any way for Sonic to make it on his own. It's located near the right end of the bottom floor, when you spring up to the first floor, through another pillar.
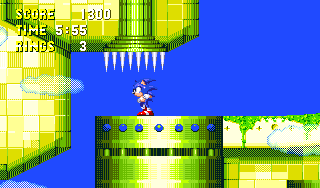
Because some of the large platforms bob up and down slightly, there are times when they can crush you into another solid platform. In this spot shortly after the second boss, this is clearly the intention, made all the more obvious by these slotting spikes.
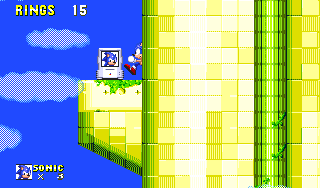
Another well hidden extra life can be found later on in the act, though this one is much easier to get if you know where it is. Look for a secret passage in a left hand wall, after you've gone all the way to the left along one of the roads after the second boss. This wall can be found just before you're lead up to the next floor above, which heads to the right.
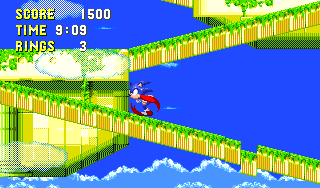
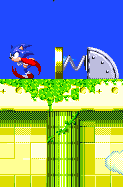
Before the third and final boss clash, the act ends at a quick pace as pop-up springs send you running across these diagonal collapsing roads. Just go with the flow.
View Notes(1)
Go to..
#1. Comment posted by Michael on Wednesday, 10th October 2012, 12:14am (UTC)
Hide Notes
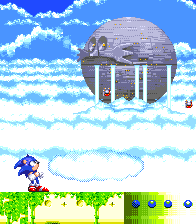
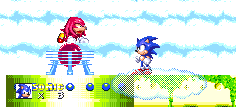
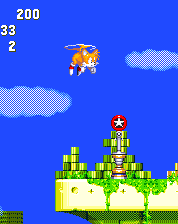
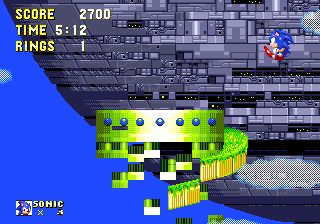
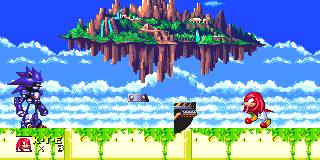
Sky Sanctuary kicks off right from where Hidden Palace left us, and Sonic and Knuckles are teleporting up to the bottom of the stage. Take Sonic right a little bit and you'll see the Death Egg, already emerging through the clouds, and producing Eggrobos as it goes. Not good. You won't be able to go any further right just yet, so go back to Knuckles, who's still on the transporter, struggling to breathe. As it happens, the electric shock in the previous scene hit him pretty badly, and he won't be able to continue, so it's all up to Sonic to save the day by himself. Eventually, Knuckles gets up and summons enough strength to run off to the right and leap the gap to hit a button on the other ledge. This draws a bridge across, allowing you to continue. Make sure you thank him, and then carry on your way. It's all up to you now - no pressure or anything.

View Notes(2)
Go to..
#1. Comment posted by MNV on Thursday, 9th February 2012, 12:14pm (UTC)
#2. Comment posted by MNV on Thursday, 9th February 2012, 12:17pm (UTC)
Hide Notes
For Sonic and Tails, this level holds three different bosses at intervals across the map. If you're playing as Tails though, or at least have him to hand when playing as Sonic, the first two bosses - not to mention huge chunks of level - are completely avoidable by just flying upwards at certain points, taking advantage of the vertical progression of the act. There are actually several opportunities to skip the first boss, some more tricky than others. Ordinarily you will start the level by running to the right, eventually reaching the second floor up, either by way of some bouncy clouds, or by springing up through a tall green pillar. Locate the platform nearby with the twin purple, segmented pillars; it has a thin diagonal road to the left and a couple of floating grey platforms to the right. There's a platform high above and slightly to the left of here, which holds a teleporter plus invincibility and ten-ring boxes. It's tricky to reach though and will require your full amount of flight time, if you can jump up nice and high. An easier alternative is to head to the left from the twin purple pillars, down the thin collapsing road and onto the next platform. At the left end of this, stop when you get to the fountain and fly up and to the left of here. You'll find a large green pillar that is easier to reach, and from there, fly to the path above. Both of these shortcuts avoid a long path back to the left, then the first boss, then the majority of a long path back toward the right on this upper floor.
That's not all, as the second boss is just as easily avoided! At whichever point you arrived on the upper floor, head to the right, and eventually all sub-routes here converge at another pair of purple segmented pillars, this time with a black spiked object swinging between them. A thin diagonal road to the right here leads straight to the second boss, and if you look above, you'll see a large piece of ground with a couple of green pillars on its left, slowly floating up and down. Fly up into this large floating piece of ground and you should find small grey platforms leading to an extra life to the right. This area occurs shortly after the second boss, and normal direction for this floor is to the left. If you want to take a final sneaky shortcut, ignoring yet more of the level, fly up to the highest ledge above the extra life, which holds a checkpoint, next to a small spinning circle platform. Fly up again from the checkpoint, and up here is a platform with a teleporter on it. Take it, and it's simply a matter of crossing the last few paths to reach the final (or in this case, only - and no, it can't be avoided) boss! Using all of these shortcuts, it's possible to almost slice the time taken to complete this act in half!
View Notes(0)
Go to..
No notes have been posted in response to this section.
Hide Notes
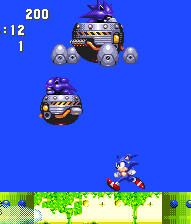
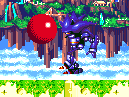
First Boss (Sonic/Tails)
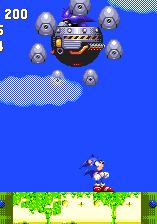
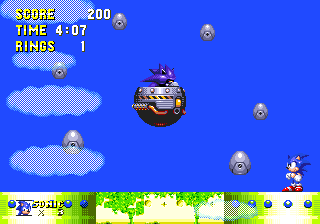
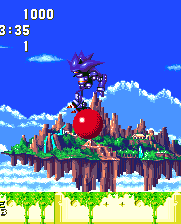
After a brief course leading right and then left, you'll come to this familiar setting. Two adjacent platforms hovering above the ground, on either side of the screen. The egg-mobile drops down from the upper right and, funnily enough, Eggman isn't in it. It's controlled by a spiky, purple robot whose identity will be made clear soon enough. In the meantime though, he drops a massive orange ball on a chain from the bottom of the craft and swings it back and forth like a pendulum - suddenly things are getting a little nostalgic, as we revisit the first ever Sonic boss, from Green Hill Zone. This version works in the exact same way, with the robot moving from right to left a little way, allowing the ball to swing across the entire arena, with the only two completely safe places being underneath either platform. What you want to do right at the start is stand on the right hand platform, then give him hell as soon as he comes in. You need the standard eight hits here to beat him, and you can get in four or five at the start, if, as Sonic, you use your insta-shield (double jump) move when he's further away from you. After that, seek refuge under a platform when the ball comes swinging past, then hop up on it and give him a hit or two, allowing enough time to drop down and back under there before it comes back. When he's defeated, the teleporting device will rise up from the centre of the ground, which will take you up to the second segment.
View Notes(1)
Go to..
#1. Comment posted by theblackferret on Tuesday, 3rd December 2013, 3:42pm (UTC)
Hide Notes
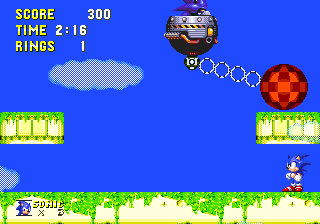
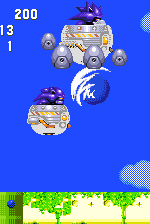
Second Boss (Sonic/Tails)
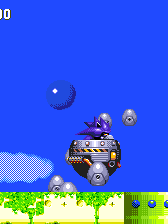
The second segment leads to the right only, and has several different brief routes to it, all culminating in a flat platform on the far side of the ruins. Here, Sonic has another boss battle to fight, this time against the boss of Metropolis Zone, from Sonic 2. The mysterious robot is doing the driving once again, and just like the Sonic 2 original, he's surrounded by seven orbs that circle him. Fortunately, this version is made a lot easier for Sonic by the added maneuver of the insta-shield, which, if used correctly, can make short work of this otherwise enduring boss. He'll come down from the top/middle and if you're feeling daring, you can jump and use your insta-shield at the exact moment of impact to get your first hit, as he descends. The lightning quick shield will both attack the robot and keep you safe from the orbs for that split second, and this will cause him to skip the regular attack pattern and go straight to the "balloon phase", explained in the paragraph below. If you prefer, you can play it safe and wait for him to come all the way down. In this case, he'll slowly move towards you. When he does this, jump right over him and run to the other side, and then repeat when he comes back at you again. After that first attack, he'll move into the middle of the screen, and then throw the orbs around the whole area, but you'll be safe if you stand right up against either side of the screen. When he draws them back in again, that's your opportunity to attack the bottom of the craft, which is unprotected.
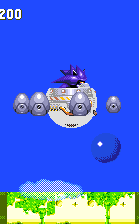
Every time he gets hit, he'll move up to the top/middle of the screen and just like in Metropolis, one of the orbs will turn into a mini balloon version of him that floats about the arena. They hurt you, but don't worry too much about them. To make him come down again and repeat the whole process, burst the balloon with a jump, but that's not the quickest strategy this time. Instead, ignore the balloon, and jump as high as you can, using your insta-shield to hit him. Keep doing this and, one by one, it will cause all the orbs to turn into balloons, and the boss should get a little easier with each one gone. You can also use the double jump with the lightning shield, if you have it. If you remove the last balloon, the boss will float to one side and, just like the original, start firing laser beams across the arena, as he descends downwards. You simply have to stand underneath, and register the final blow as soon as you can. Hop on the teleporter when it appears to move up to the next section.
View Notes(2)
Go to..
#1. Comment posted by Anonymous on Saturday, 22nd December 2012, 6:05pm (UTC)
#2. Comment posted by theblackferret on Tuesday, 3rd December 2013, 3:46pm (UTC)
Hide Notes
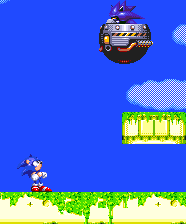
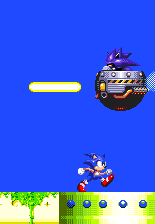
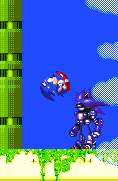
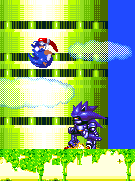
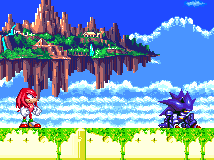
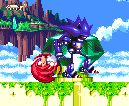
Third Boss (Sonic/Tails)
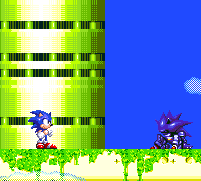
At the end of the level, Sonic will teleport up to the final platform, where there's a large green pillar in the background. As you're in the air above the exit teleporter, that purple robot will shoot past and destroy it right beneath you! He'll then spin across the top of the screen in a ball, and land on your right, where you can now plainly see (and I'm sure you've already realised it anyway, but I like to keep the element of surprise) that your foe is another mechanical Sonic! The third in the series, and an advanced model of the unofficially dubbed "Silver Sonic" at the end of Sonic 2, and of course Metal Sonic, who debuted in Sonic CD. I think this one is mostly referred to as "Mecha Sonic", and it's not clear if he's actually one of the previous ones rebuilt, or an entirely new robot. Anyhow, he stands before you without the Eggmobile this time, and he means business. He has several attack patterns, similar to that of "Silver Sonic", but they seem to be selected at random this time, so you need to be well prepared for all of them.
Basically, he moves from one side of the screen to the other, either by dashing backwards along the ground, spinning in the air, or spinning on the ground, which he does in a variety of ways. You can hit him whenever he's standing in the corner and facing you, for a brief pause before launching into another random attack. Hit him on the head, or preferably, use your spin dash, from the opposite side of the screen. If you use the spin dash, you'll bounce right off back to the opposite side, which is the best place to stand, allowing you to interpret which attack he's about to use, and can therefore dodge it effectively. Now, when he jumps up into a ball, he'll either dash straight over to the other side, above your head, or land in about the middle of the arena, still spinning. When he lands in the middle, he'll either bounce off over to the other side, or stay on the ground, and spin along it, hoping to knock you down. Walk underneath him or jump over him accordingly. Whenever he goes to one side of the screen, he'll drop down and land either facing you, or with his back to you. You can hit him if he's facing you, but with his back to you, he'll always crouch down and shoot along the floor backwards to the other side. You'll need to jump over, as the spikes are obviously harmful. He'll stand up when he gets to the other side, allowing another opportunity to attack. With eight hits, the Mecha will start to explode, but won't be destroyed. Instead, he collapses on the ground, blinking with electricity. Don't worry though, because as Sonic, you've now completed this stage. Nice one!
View Notes(1)
Go to..
#1. Comment posted by dinosaur202 on Sunday, 17th April 2016, 2:21am (UTC)
Hide Notes
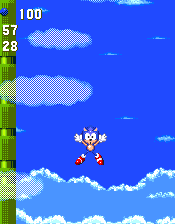
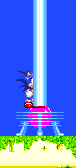
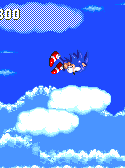
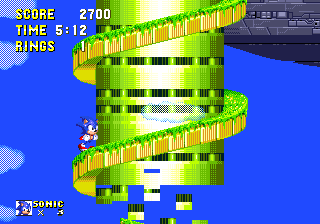
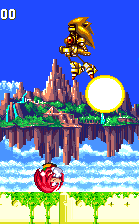
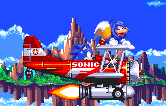
With Mecha Sonic defeated, the platform you're standing on will start to collapse, bringing the Mecha down with it. Meanwhile, Sonic goes into autopilot and makes a jump for the centre, running an iconic spiralling road that wraps around the large green pillar in the middle. With large chunks of it crumbling as he ascends, there's almost nothing left of the Sky Sanctuary Zone now. However, the Death Egg is close. Can Sonic make the leap of faith before it's too late?... Yes, he can.
View Notes(0)
Go to..
No notes have been posted in response to this section.
Hide Notes
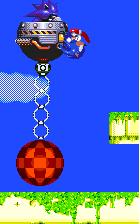
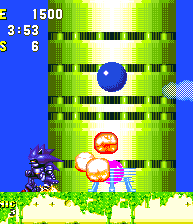
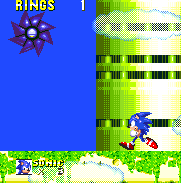
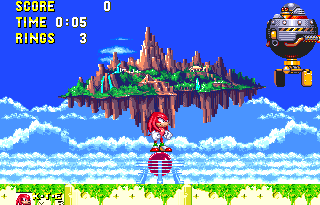
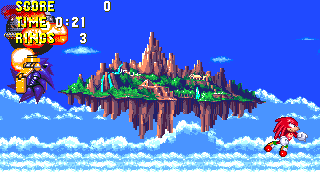
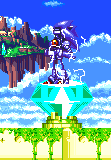
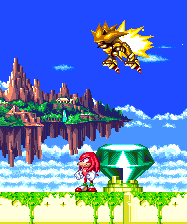
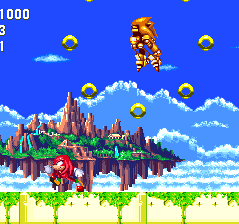
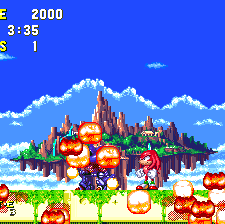
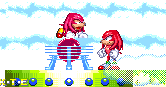
Final Boss (Knuckles)

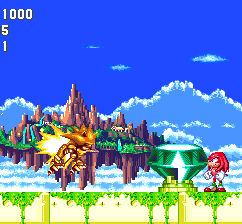
As Knuckles, you'll zip up to a teleporter from Hidden Palace, and catch three rings when you get up there. Keep them close, as they're the only rings you get in this final battle arena in the skies. Note that Angel Island is airborne in the background, but it's unstable without the Master Emerald and will begin to plummet unless Knuckles can retrieve it, by completing this boss (and having collected all the Chaos Emeralds too, by the way). Almost immediately, the Eggrobo that's been following you around reappears once again from the right, and he's got that grabbing attachment on the Eggmobile. He'll slowly move towards you and the attachment rises and falls to stay in line with your vertical position, as you jump. There's no way of avoiding it (or any point), so just allow him to catch you. From there, Eggrobo will take you across to the right where the screen scrolls to reveal the Mecha Sonic, accompanied by that awesome piece of final boss music from Sonic 3. Sonic didn't destroy the Mecha when he had the chance, during his run through this zone, and now it's the only thing standing in Knuckles' way to the Master Emerald. The Mecha spins into a ball and jumps to the middle, then dashes along the floor and upwards, trying to finish Knuckles off while he's being held in the grabber. Doesn't work out though, and Knuckles automatically glides his arse out of there just in the nick of time, leaving the Eggrobo badnik to take the full force of the attack instead, which finally finished him off. Would have been nice for Knuckles to settle that score, himself, but whatever. From then on, you fight the Mecha in exactly the same way Sonic fought him in his third boss fight, so please read that section just above for more info... Then come back down here again.
Beaten him? Good. He collapses again, but it's not over yet. As the music for Doomsday Zone hits, his eyes light up again like the Terminator, and he'll dash backwards to the right. As the screen scrolls along, you'll see the Master Emerald sitting on the far right hand side. But look! Mecha Sonic hops on top of it and uses it to charge himself up! Knuckles dashes over but he's too late, and Mecha launches into the air, glowing with pure emerald power. This time, you'll have to fight "Super Mecha Sonic"! He's tough, but working strictly to a set pattern, you should be able to survive.
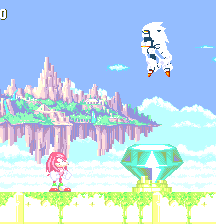
First of all, go and stand right in front of the Master Emerald, leaving a bit of space away from the edge of the screen. The super powered robot will zip back and forth across the top of the screen for a bit before eventually staying in the top left corner. From there, he'll either drop down and charge at you, (which is a very sudden attack, so be prepared to jump over him when he comes round), or he'll stop and use up all his energy to fire three large flashing projectiles at you from his stomach. If he charges, then he'll fly straight back up afterwards and repeat, without needing to go back to the Master Emerald. You'll know he's about to fire the three projectiles when he looks up and leans back a little bit, while staying in the air. What I usually do at this point is begin to charge up a spin dash facing left, but don't release it just yet. Instead, wait for the first projectile to be launched, and heading towards you. While it's on its way, release the spin dash, and you'll go all the way to the left side of the arena. The second projectile will aim at you while you're moving, so it'll miss you completely, and for the third one, you'll just need to jump over it.
After that, Mecha Sonic will be drained of his super power and will need to retreat back to the Master Emerald to recharge. Your opportunity to attack is when he's in this weakened state. He'll return to normal in the air, and then drop down. Before he lands, get close to him and then jump up to mark your first hit. Just make sure you're facing him and don't touch his spikes. He'll begin spinning when he lands and then shoot off back to the Emerald. Charge up another spin dash, this time to the right, and wait about a second or so, and then release. If you've timed it just right, you'll hopefully hit him from behind after he's stopped spinning, but just before he jumps up on the emerald. This can be tough at first, and perhaps a safer, though less effective strategy would be to stay near the Master Emerald, dodge the projectiles from there, and then intercept him when he comes to recharge. There are a number of strategies you could employ for this phase, but you don't get many clear opportunities to hit him, so experiment to see what works best for you, if you've got enough lives to spare that is.
After six hits in that first phase, he'll ditch those attacks and try something else. After his next charge-up, instead of zipping around like a crazed monkey, he'll calmly float around the top of the arena, but following your movements as you walk across the floor. At regular intervals, he'll produce eight small ring-like objects that fire outwards at all directions, and fairly quickly too. If you're experienced, you might be able to stand roughly where you know you'll squeeze into the gaps between them, but everyone else should stay far away from him during this phase. Not too far though, because after every one or two blasts of harmful rings, the super powers start acting up a bit, and Mecha Sonic briefly reverts to his regular self, and drops a little bit towards the ground before floating back up and resuming the super form again. This is your chance to land the final two blows to finish him off once and for all! He'll start exploding and so will the ground, for some reason. The screen turns to white and congratulations! You've completed Knuckles' adventure through S&K. Details of his ending sequence will be added to the Stages and Story page.
View Notes(1)
Go to..
#1. Comment posted by Anonymous on Monday, 15th July 2013, 2:47pm (UTC)
Hide Notes

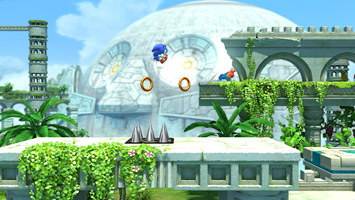
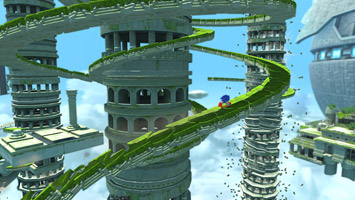
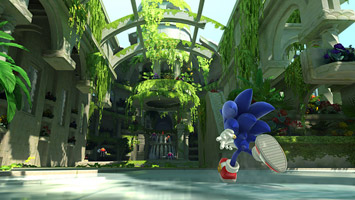
- Joining Green Hill Zone and Chemical Plant Zone, Sky Sanctuary is one of the lucky classic levels to be recreated in the high end version of 2011's Sonic Generations, the 20th anniversary celebratory title, available for XBox 360, Playstation 3 and PC. As with all levels in the game, there are two acts, played by Classic Sonic and a more Modern Sonic respectively, and it's great to see the old place with a new lick of paint, although a lot of changes and enhancements have taken place. For starters it's huge, with various floating islands (slightly more stable this time) covered in ruins and greenery stretching for miles across the sky. Compared to the relatively small and flat original version, you'd be forgiven for thinking that this was Sky Sanctuary in its prime, at a time when it wasn't bothered by the misplacement of the Master Emerald and the Death Egg - that is, if it weren't for the fact that you can see the massive spherical satellite itself rising through the centre of the ruins. The buildings are now more white than light green, though familiar structures can be spotted as well as new ones. Eggrobos are of course back in full force, as well as some of the memorable obstacles and features such as teleporters, spinning platforms, bouncy clouds, thin collapsing roads and moving bars to grab hold of. Other features, including any appearance of Mecha Sonic, are conspicuous in their absence however. Act 2 actually takes you inside some of the ruins, which take on a rather dark, even alien appearance. Both acts conclude with a dash up spiralling, collapsing pathways leading toward the escaping Death Egg.

- Technically, Sonic's version of the level is Act 1, while the tiny platform Knuckles has access to is Act 2. Therefore, it's easy to play as Knuckles in Act 1 and Sonic and/or Tails in Act 2 using the Stage Select cheat. However in order to be allowed access, you have to activate the debug cheat (see the Miscellaneous page), then return to the level select by pausing the game and pressing A. Despite their different abilities, no character appears to have a problem getting through either act. However, as to be expected, you will encounter some weird stuff. Knuckles will meet a duplicate version of himself upon entry, and Sonic's encounter with Eggrobo (who turns into Eggman) highlights his lack of gliding sprites. Weirder still is that upon beating Super Mecha Sonic as Sonic, Knuckles pops in for his game ending sequence, in a dashing shade of blue. Weirdest of all though? Do it as Tails. Blue Knuckles will have twin tails, which don't get any smaller as the Tornado flies into the background.
View Notes(7)
Go to..
#1. Comment posted by Hyper_Sonic on Sunday, 5th February 2012, 3:32am (UTC)
#2. Comment posted by Ace on Sunday, 5th February 2012, 5:20am (UTC)
#3. Comment posted by Anonymous on Saturday, 18th February 2012, 3:16pm (UTC)
#4. Comment posted by Anonymous on Friday, 30th March 2012, 7:26pm (UTC)
#5. Comment posted by KoopaTroopa125 on Wednesday, 1st August 2012, 11:44pm (UTC)
#6. Comment posted by Anonymous on Saturday, 22nd December 2012, 6:38pm (UTC)
#7. Comment posted by lollypop on Sunday, 10th November 2013, 12:46am (UTC)
Hide Notes
Each section of this page allows users to add their own notes to fill in any missing details or supply additional research etc.
View general notes for Sky Sanctuary Zone (2)
#1. Comment posted by benjamin on Saturday, 18th February 2012, 8:39pm (UTC)
#2. Comment posted by yasin smaidy on Wednesday, 6th June 2012, 12:03am (UTC)
Hide Notes
- Origin
- Storyline
- Comments
Gameplay - Basics
- Items
- Common Objects
Stages and Story - Mushroom Hill Zone
- Flying Battery Zone
- Sandopolis Zone
- Lava Reef Zone
- Hidden Palace Zone
- Sky Sanctuary Zone
- Death Egg Zone
- The Doomsday Zone
- Endings
Other Modes - Bonus Stages
- Special Stage
- Super and Hyper Forms
- Lock-On Technology
Miscellaneous - Ports and Compilation Appearances
- Cheats
Downloads
Last Updated
Content for this page last edited:
26th June 2012
Files last uploaded for this page:
2nd February 2012
26th June 2012
Files last uploaded for this page:
2nd February 2012
Recent Notes
Third Boss (Sonic/Tails)
Posted by dinosaur202 on 17th April 2016
Second Boss (Sonic/Tails)
Posted by theblackferret on 3rd December 2013
First Boss (Sonic/Tails)
Posted by theblackferret on 3rd December 2013
Miscellaneous Notes
Posted by lollypop on 10th November 2013
Final Boss (Knuckles)
Posted by Anonymous on 15th July 2013
17 notes posted on this page in total