


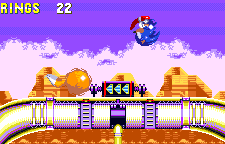
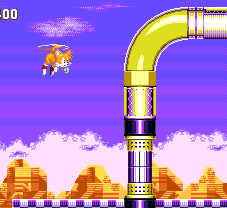
After ploughing their way through the island, Sonic and Tails finally make it to the crash site of Robotnik's Death Egg. It's sitting in a lake, surrounded by heavy construction work, complete with massive cranes and launch towers. This mechanical base is well protected too, with a number of different enemies and traps, plus elevators, pulleys and long spinning metal cylinders, based both outdoors and in several large buildings in Act 1. In Act 2, you explore the water systems in and around the lake and leg it full speed across long, twisting water pipes. The Death Egg is almost ready for re-launch, so there's no time to spare!
Game: Sonic the Hedgehog 3
Stage Number: 6
Level Division: 2 Acts
Boss: End of Act 1. 2-3 bosses at the end of Act 2, depending on character and version (Sonic 3 alone or S3&K).
Playable Characters: Sonic & Tails, Sonic, Tails. Knuckles (Sonic 3 & Knuckles only).
Difficulty Rating: ![]()
![]()
![]()
![]()
![]()
Music: Variations of similar music for each act. ..How to describe it? Well, it follows Carnival Night, by fitting into that "weird" category and helping to cement Sonic 3's somewhat unorthodox soundtrack. Largely made up of funky, mechanical-like sound effects, and the word "Go!". Act 2 has a very similar variation.
Typical Length:
Act 1: 4 - 5 minutes
Act 2: 6 - 7 minutes (or for S3&K, 3 minutes, 30 seconds - 5 minutes)
Available Items:
| Act 1 (S3) | 211 | 6 | 15 | 3 | 5 | 5 | 0 | 1 | 0 | 0 | 3 |
| Act 1 (S3&K) | 294 | 6 | 16 | 2 | 5 | 4 | 2 | 1 | 0 | 0 | 3 |
| Act 2 (S3) | 287 | 6 | 15 | 4 | 4 | 0 | 1 | 0 | 1 | 3 | 5 |
| Act 2 (S3&K) | 409 | 6 | 16 | 5 | 5 | 0 | 2 | 0 | 1 | 0 | 5 |
Launch Base Zone Downloads:
| Level Maps: |
Act 1 map (Sonic 3 & Knuckles version) (.png) Act 1 map (Sonic 3 version) (.png) Act 2 map (Sonic 3 & Knuckles version) (.png) Act 2 map (Sonic 3 version) (.png) |
| Art: |
Official badnik art (.jpg) Official concept art (.jpg) Art found in the Japanese instruction manual. |
Top Tips
- If you're still after those Special Stages, keep an eye out for the small purple checkered cylinder tunnels, usually found sticking out the side of a wall in both acts. Enter one and you could find yourself in a small room with a large ring.
- One thing you can count on in Launch Base is that you're never too far from a trap, usually one of the several badniks that regularly pop up, or perhaps a flame thrower. By all means go crazy on the long sloping roads, but take it easy and carefully on all the other bits, because you never know what's lurking a couple of inches off the side of the screen.
- An inexperienced player might take quite a bit longer to find their way through Act 2 than a Sonic expert. That's ok in Sonic 3 & Knuckles, because during the longish cut scenes at the end of the level, the timer pauses until you begin the last two bosses. In Sonic 3 though, it carries on, so you may find that by the time you get to the final boss, you're down to 9 minutes on the clock, and losing a life because of a time out is very possible. Be aware of this.
Each section of this page allows users to add their own notes to fill in any missing details or supply additional research etc.
View general notes for Launch Base Zone (9)
#1. Comment posted by Tamashii M. on Saturday, 12th February 2011, 1:01am (GMT)
#2. Comment posted by Anonymous on Friday, 25th February 2011, 10:25am (GMT)
#3. Comment posted by Dan on Saturday, 16th April 2011, 12:31am (BST)
#4. Comment posted by Andrew on Saturday, 23rd April 2011, 4:40am (BST)
#5. Comment posted by dara on Thursday, 9th June 2011, 4:58pm (BST)
#6. Comment posted by MNV on Wednesday, 15th June 2011, 1:27pm (BST)
#7. Comment posted by Anonymous on Wednesday, 13th November 2013, 3:28pm (GMT)
#8. Comment posted by Anonymous on Saturday, 21st December 2013, 4:00am (GMT)
#9. Comment posted by Anonymous on Wednesday, 7th June 2017, 1:11pm (BST)
Hide Notes

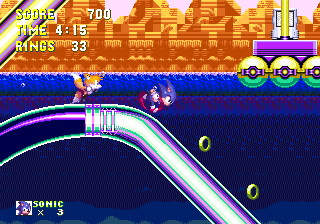
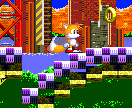
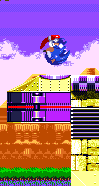
This normally tranquil lake nestled somewhere between the mountains and, seemingly, deserts of Angel Island has been overrun by Eggman machinery! It's a bright and clear afternoon, whilst the mighty Death Egg sits half submerged in the water, with large red cranes and towers positioned around it, working around the clock to make those repairs. They reach out of the lake as well, and actually go on further along it in a long row, varying in size and structure. Behind that in the far background are large, rocky orange walls, arguably part of the edge of Angel Island's canyons and deserts. You'll see them close up in Act 2. The action in Act 1 takes place on one side of the large lake, with the Death Egg sitting in the middle of it, and there are lakeside bushes on both sides.
The scenery around Act 2 changes quite a bit as you've now moved into the lake, and the structure and appearance has become very different as you tackle the water system around the Death Egg. It's now late afternoon/early evening, with a pinkish glow to the sky and clouds, of which there are now plenty. The top of the level is filled with nothing but sky and small clouds moving briskly across. Get down to the middle and you'll notice that you're now closer to the other side of the lake, so that the Death Egg is out of view. You can get a look at those rocky walls up close now, and they appear to be Egyptian Sphynx-like sculptures, perhaps creating the border of the Sandopolis Zone? Interesting. A thin line of bushes separates them from the water, which you can now dive into. Get down there, and you'll discover Launch Base's hidden environment. Below mountainous rocky ground, observant players will be able to spot walls of brick, which presumably support the cranes and towers, as they work on the giant death machine. This is Knuckles' surroundings through the stage, as he comes up from underneath the structures in his Act 2 route. There, the background is made up of the purple walls you get in the internal sections, but there are big holes in some places, showing you a pure brick wall some distance behind it.
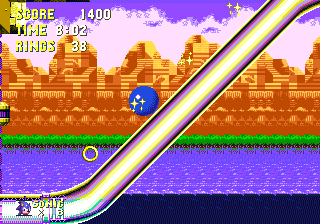
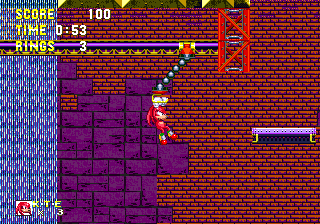
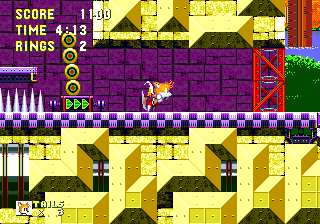
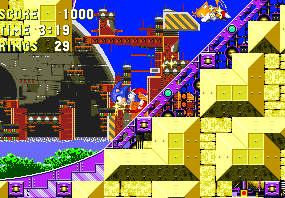
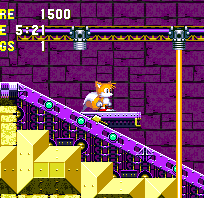
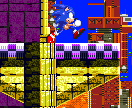
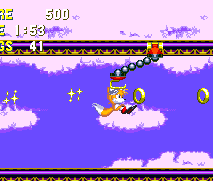
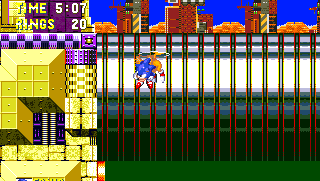
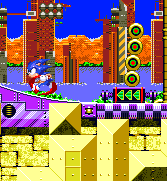
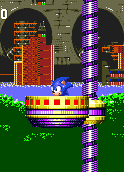
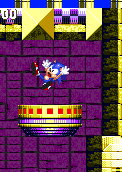
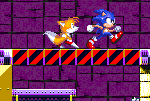
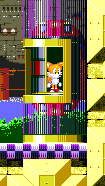
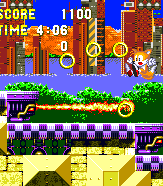
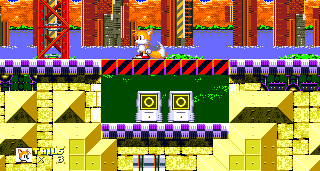
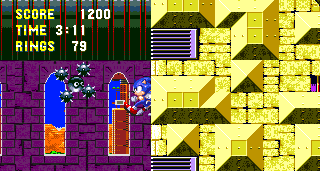
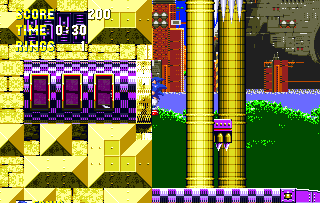
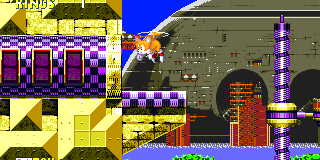
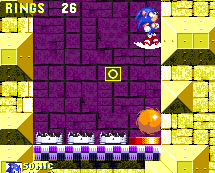
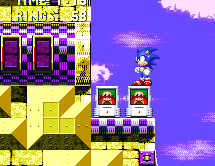
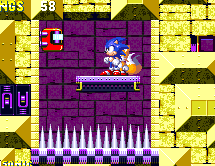
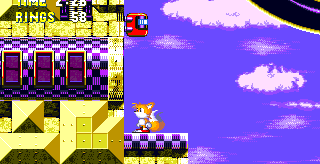
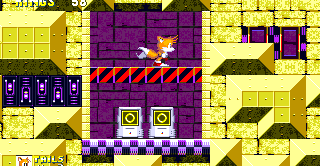
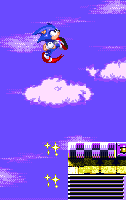
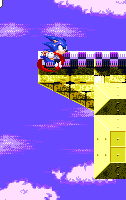
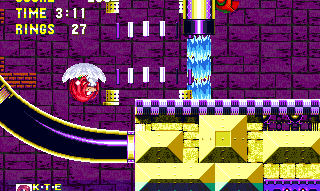
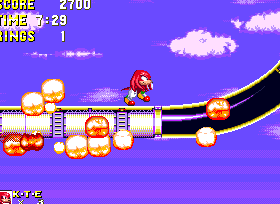
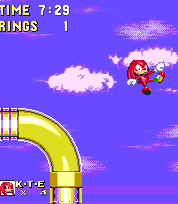
As a structure in itself, Launch Base Zone consists of a massive armed base, its reason being to not only restore the power of the fallen Death Egg satellite, but also to protect it and keep intruders (i.e. you) out. It has a strictly yellow and purple colour scheme, a lot more colourful than other final mechanical levels, with ground made up of sturdy yellow brick and various 3-dimensional extruded blocks, while your roads are a purple checkered pattern. Slopes in Act 1 also feature flashing green lights and other electronics, and there are various bits of purple machinery here and there. Small yellow towers with tapering steeples are located on some straight roads, either side of the path (some containing a small crushing claw between them), and red crane structures and other cylindrical pillars help support the deadly base as it sits on the lake. Some large buildings in the level are made entirely of yellow brick. Walk through the entrance ways, and the external walls will disappear, revealing the purple internal brick walls of the building, complete with golden pillars and long, thin windows. Act 2 removes the small towers and big buildings, and the long slopes are now mostly made up of thick twisting black and white water pipes that your character runs along the top of (and can also be transported through). They're supported by thin yellow vertical beams that float on the water by buoys. You can also see waterfalls cascading down in some areas of Knuckles' low route through Act 2.
View Notes(1)
Go to..
#1. Comment posted by Monty Eggman on Friday, 4th February 2011, 6:36am (GMT)
Hide Notes

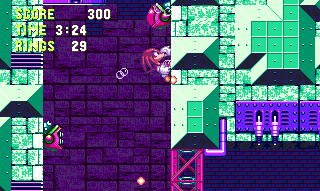
The structure of Act 1 isn't really particularly special, but it is quite long, and directions pull you back and forth at every opportunity before bringing you to the end. All the ground is built in fairly stable chunks that are arranged across the map as large platforms and separated areas of ground. There's a fair bit of space between them for you to move around in though, creating fairly large open rooms, both indoors and out. To look at the map, it's almost a little reminiscent of more recent structural habits of Dimps in games like the Sonic Advance series. It can be a pretty speedy act, with lots of long, steep slopes and curves to hurl yourself down. Use small looping tunnels in the ground to be blasted straight from the bottom of one of these long sloping roads straight up through a vertical shaft to the next area. It gets a bit slower when you step inside one of the several large buildings around the place, which are often tighter and multi-levelled, encouraging you to wind your way up or down them, often through gentler slopes and using formations of diagonal lift platforms and badniks, though these segments are often brief and you're outside again before you know it. In general, you'll have to make good use of platform-hopping skills or otherwise fall in a pit below, though this usually becomes more of an inconvenient detour than a punishment, and there are no death drops here. Routes aren't too varied, but when playing as Tails alone, a tube elevator near the start automatically takes him to an alternate path, different from the one Sonic or Knuckles usually go on, but the two routes meet up soon afterwards. From then on, there are only minor differences in routes, but because of the multi-directional nature of the act, it can sometimes be confusing to figure out which way you're supposed to be going, as much of the main route is a long, winding path, weaving back and forth on itself until it arrives at the end. You can find Special Stage rings or small shortcuts and rooms by walking through purple cylinder passages in the walls.

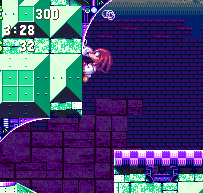
Act 2 carries similar ideas but presents them in a fairly different way. For starters, there's water on the field, but only Knuckles will spend enough time in it for it to become bothersome. The speedy sloping roads are still with us, but this time they're provided by long, twisting water pipes arranged in a complex system across the whole act. There are no more internal sections, though there are still pieces of solid yellow ground here and there, often creating narrow vertical shafts with various traps in them, but they're smaller and less connected now, and those water pipes are also used as a transport tubing system in some places, to take you to a whole other place on the map. You can gain access to this hidden tubing network by breaking through certain barriers along the paths, which leave a gap for the water to start flowing out. The design is still very multi-directional, with similar path features and obstacles to Act 1, but the general structure appears much looser and more precarious, and it's easy to tell the two apart just by looking at them. Fortunately, despite its structural nature, there are no death drops here either. As far as routes go, again, there isn't a great deal of variety for Sonic and Tails except for an occasional detour or shortcut, though there is a longer alternate route towards the end (see Point #8). Unlike Act 1 though, Knuckles attempts to tackle the level from below, leading him along an entirely separated area running parallel, and completely hidden, below Sonic's. It tends to be quite a lot tougher, with extra water segments and essentially becomes a whole other level for him, only briefly flirting with the main route toward the end. Like Sonic's route, there are few variations besides occasional detours and after coming back up to the surface, knocking down a barricade will lead the Echidna onto another exclusive route towards his own boss battle.
View Notes(0)
Go to..
No notes have been posted in response to this section.
Hide Notes

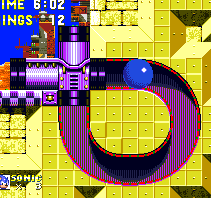
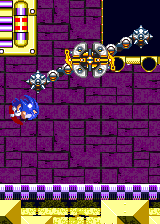
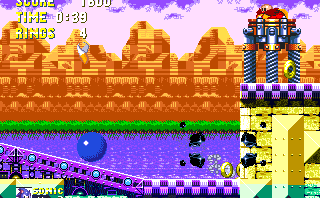
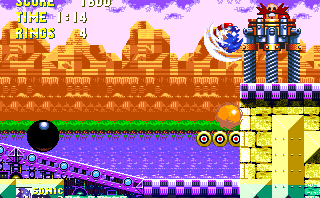
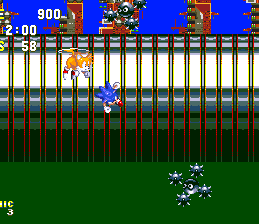
Thin purple bars make for all variety of platforms, including moving, stationary, falling and even those that travel diagonally up slopes in internal rooms, when stood on. Beware of those ever-present collapsing ledges and floors too. Grab hold of hanging red and yellow hooks and they'll take you across long horizontal gaps with quickly progressing speed, and while hanging on, you can change the direction using the left and right buttons. Large, dark shiny cylinders joining one ledge to another revolve continuously. Step on and you'll go around and up and down with it, but be careful of badniks and traps along the way, and you can jump off at any time. Use small speed-up devices to throw yourself across long speedy paths, although some may be more of a hindrance if there happens to be a badnik in front of them instead!

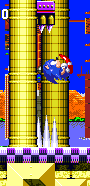
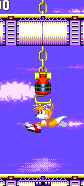
A common way of ascending or descending a vertical height in this level is to hop in one of many round yellow cup contraptions, attached to a long, thin metal corkscrew. When you sit in it, the cup will start spinning around the thin corkscrew, heading up or down along it, and you jump out when it stops. Leave the area and come back if you miss it to make it reappear, and when it's reached its destination, you can also hop back in again and it'll return to where it started. One or two will function slightly differently, in that they'll start spinning increasingly quickly once they've reached their destination. The cup will then throw itself across an area, and it'll collide with a wall sooner or later and you'll fall out. Don't worry - this won't harm you, it's simply another means of transportation.
Hit small red and green switch boxes, positioned on the walls to open up red and black gates that block your path. These can either be vertical ones that block a corridor or horizontals that sit between two long walls to block a vertical shaft. In many instances, hitting the gate's switch box will transform it from a vertical to a horizontal or vice-versa, and in each form it will block access to a different area or route, creating minor puzzles to solve.
Act 1 also features nifty elevators in cylindrical glass tubes. If you see an open one embedded into the wall, hop in and it'll start spinning and then blast along the tube, taking you through the ground to a different area, often in a large U shape. Unlike the spinning cups, you can't go back in it afterwards however because it closes up behind you. Watch out for small guillotines positioned between two of those thin yellow towers along the paths. They rise slowly and fall quickly, acting as small vertical crushing devices trying to squish you into the ground or a set of spikes. The bottoms are made up of two or three sharp claws, but you can stand safely on the flat bit at the top while it's rising and dropping. At the ends of small steps or ledges, you'll often find a flame thrower, producing a long burst of fire at regular intervals.
In Act 2, the hooks that took you across horizontal gaps now also act as pulleys, hanging from stationary square blocks and taking you up or down as soon as you lay your mitts on them. Spring up through large square converter objects that change your springing status to a spinning one, and yellow gateways that appear rather half-built are most often positioned at either end of the long rotating cylinders. These gateways regularly produce a cascading horizontal laser beam that drops from top to bottom, which, fairly obviously, is harmful to our furry friends. Break down big pipe barricades standing in your way, and if it's connected to other pipes, water will flow downwards through the gap you've just made. Step into the flushing water and you'll be taken through the water pipe at great speed, coming out in a whole other place.
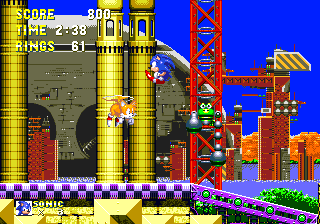
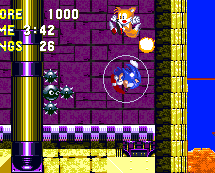
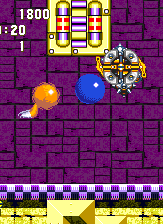
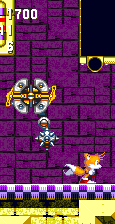
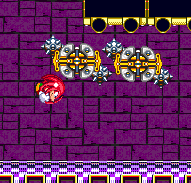
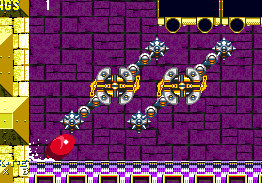
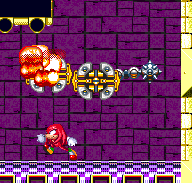
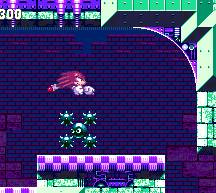
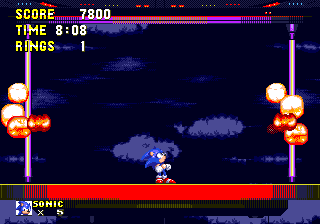
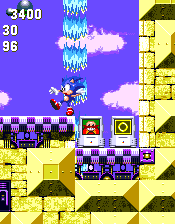
Launch Base Zone is very heavily guarded with a number of different badniks. When you walk through a square glass sensor on the ground, alarms will sound and lights from it will start flashing. You've been detected, and every time this happens a bird badnik named Fybot 767 will appear from above to intercept you. They basically flap around, following you, and then dive down and back up again in diagonal directions, but they're easily disposed of. The whole sensor thing is scrapped for Act 2, and they just appear in certain places, often in pairs. Ribot are frog-like badniks that mostly sit on the red crane support structures around the level. They'll either be swinging a dangerous metallic ball around them, via a long arm of spheres, or dropping two of them, one at a time, down to the floor. They can also be seen swinging them on the floor, and more rarely, throwing the balls from side to side on the floor too. Orbinaut is yet another version of the spheres-with-spikeballs badnik design, and a pretty nasty one too, with a mean expression. Similar to the one in Star Light Zone, he doesn't throw his spikeballs at you, rather he just moves towards you, swinging them violently around him, but only when you move. Interestingly, if you stay still, so will he, but regardless of the direction you're moving in, when you're active, he'll approach you. That's not going to kill him though, and in fact the only thing that will is invincibility and Sonic's insta-shield attack. Snail Blasters are snail bots that move up and down walls incredibly slowly, stopping occasionally to open up the shell on their back and produce two projectiles in either diagonal direction, and at this time only, they are vulnerable to your attack. Finally, Corkery might not look much like a badnik, but it is. In internal sections in Act 1, a couple of them move back and forth along a bar above you, stopping regularly to fire a nasty laser beam down to the floor. They can also be found on their own outside, sometimes stationary on a ceiling.
View Notes(2)
Go to..
#1. Comment posted by 3ach on Saturday, 5th February 2011, 6:49am (GMT)
#2. Comment posted by Anonymous on Wednesday, 21st November 2012, 5:26pm (GMT)
Hide Notes


Note: The above map is applicable to the Sonic 3 version of this act. The Sonic 3 & Knuckles version is also available here.
The act kicks off with a transition from Icecap Zone, as a small part of the path is covered in snow that our heroes burst out of.

The difficult Orbinauts are best dealt with using Sonic's double jump insta-shield attack.
These mysterious ring items trapped beneath a gate can be obtained by destroying the switch, hidden on an alternate shortcut that leads up to the area just left of this area. Read up on the third Special Stage ring, below, and you're not far off.
Near the end, just before Point #3, a bubble and lightning shield can be found in this hidden passage. In Sonic 3 alone however, just outside is another pesky Orbinaut. He moves whenever you do, but always towards you, so he'll essentially follow you into this passage! Try and kill him first.
View Notes(0)
Go to..
No notes have been posted in response to this section.
Hide Notes

Special Stage Rings
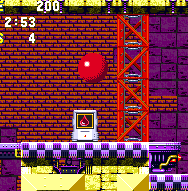
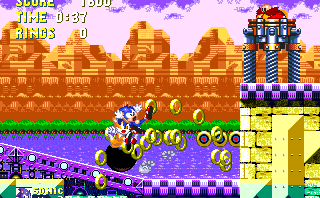
The first big ring is right under your nose. Simply head off from the start and hop on the first large rotating cylinder. Drop downwards from it then head left and it's in a corridor with a purple tunnel leading into it in the wall. Stand on top of a rising guillotine next to it to gain access.
This one is one just for Tails. Point #1 describes an interesting elevator that takes Sonic and Tails on different routes during their respective single player campaigns. As Tails, you're taken upwards. When you get out, head left and take the spinning cup object. It points you to the right at the top of its corkscrew, but if you jump out and fly to the left, the ring is in another purple corridor entrance, beyond a collapsing ledge.

From Point #2, keep running down a series of slopes for quite a while until you spot a flame thrower off the bottom of a right hand wall with a red spring on top. Use the spring up to a couple of falling platforms and take them to the left. Dodge more flame throwers and then take a leap into the purple corridor on the left hand wall that leads into the third and final big ring of this act. You can also get to this area later on using the large rotating cylinder above this whole area.
View Notes(1)
Go to..
#1. Comment posted by SonicTailsKnuckles on Monday, 18th February 2013, 10:11pm (GMT)
Hide Notes
Soon after the start, you'll arrive at the first tube elevator, waiting for you to step inside. Now, the difference is that when you're playing as Sonic or Knuckles, the elevator will go down the tube, taking you to a room lower down and to the right. From there, a spinning cup device will take you upwards and you'll have to make your way up the internal floors of one of Launch Base's buildings. However, if you hop in that first elevator while playing as Tails alone, it'll actually take you directly upwards instead, to a whole other sub-route that eventually leads up to the roof of the building, and seems to be a tad quicker. The two routes meet up soon afterwards, and it doesn't appear to be possible for any character to influence the direction in which the elevator goes. This seems to be the only place in the level where this kind of thing happens.
View Notes(0)
Go to..
No notes have been posted in response to this section.
Hide Notes
Shortly after Point #1, you'll probably find yourself in another building if you continue to head right. This is actually a dead end and you need to exit it on the left, bottom floor. If you open up the red and black gate on the floor instead, by destroying the red box on the wall above, it'll open it up, allowing access to a bubble shield and rings below, but will block your exit to the left. You need to use the spring to get up to a high ledge on the top right, where you have to avoid an Orbinaut and hit another box to switch the gate back to normal and get out. If speed is your top priority, you should probably ignore this building entirely.
View Notes(0)
Go to..
No notes have been posted in response to this section.
Hide Notes
After coming out of a building towards the end, you need to be careful not to run into this particularly nasty three-pronged guillotine. It has a much lower height than all the others around the stage, so it comes down and hits the ground a lot more often and if you try and risk going underneath, it'll probably get you. Slow down just before you come to it and leap over.
View Notes(2)
Go to..
#1. Comment posted by Anonymous on Sunday, 26th July 2015, 5:10pm (BST)
#2. Comment posted by fieryglaceon on Sunday, 26th July 2015, 5:11pm (BST)
Hide Notes
At the end of Act 1 for Sonic and Tails, just before the boss, you'll use a couple of spinning corkscrew cups to get up to the top of another building, after catching a quick glimpse of Eggman lugging a large yellow block in his eggmobile, before promptly leaving. At the top, you'll spot Knuckles again, standing on a right hand ledge, and you become paralysed in the cup to allow this brief scene to play. He'll rather uncharacteristically whip out a bomb, which he hurls down to the floor of the building and then begins chuckling again. The bomb goes off, explosions rise up from below you, and Knux scurries off through the doorway, naturally assuming your death to be imminent. Immediately leap out and chase him through as soon as you regain control of yourself, and you'll fall to the outside, down to a balcony at the bottom. The red one has disappeared, but left pure destruction in his path, as that building you were just in begins to slowly crumble and tumble down, once you've exited it. When it's done, proceed east to the mini-boss.
When you're playing as Knuckles himself, you'll eventually come to that building and discover it to be much shorter and closed off - no surprise really, you're the one who destroyed it! Instead, you must climb up the wall, and then continue right and you'll be able to drop down into it from above. You'll spot a red box on the right wall which you'll need to hit to open up the gate to the boss arena below you, but before you do that, I would strongly advise going left, where you'll find a checkpoint and some rings. If you hit the box as soon as you see it, the gate will prevent you from getting the checkpoint, which will most probably have come in handy.
View Notes(0)
Go to..
No notes have been posted in response to this section.
Hide Notes
Act 1 Boss
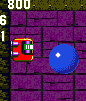
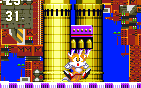
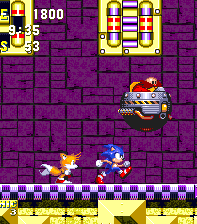
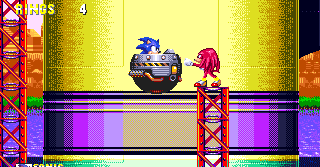
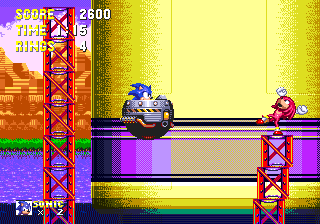
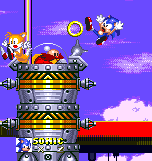
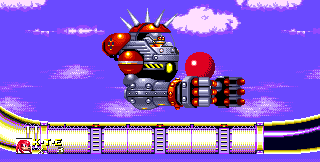
This takes place inside yet another building. As Sonic or Tails, you'll immediately spot Eggman dragging that large yellow block beneath his eggmobile again. He places it in the mid/centre of the long room, between two others, before flying off again to the right. You don't have to fight him yet, but you can get a few cheap, pointless shots in if you like. Don't be too concerned with him though because that horn sound means that the block he's left behind is opening up, and within it is your next mechanical opponent. It's a yellow and grey circular contraption with moving parts and has two small spikeballs attached to the top and bottom. It'll start swinging them dangerously around it on fairly long arms, and move down to follow you, hovering above the ground. Avoid the spikeballs when they're swinging and wait until he draws them in for a brief moment, which is your best time to jump and attack (but not on the very bottom tip, where one of the spikeballs is held). After three hits, one of the swinging arms will break off, leaving it with only one to attack with for the remaining three hits. Bear in mind that the contraption moves up when you jump, so that it'll always try to remain a certain distance above you, but you should be quick enough to catch it for one hit at a time.
Playing as Knuckles in Sonic 3 & Knuckles, you're going to have a much harder time here because you actually have to fight two of these things at the same time. The arena is much larger and very deep, with a cylindrical tunnel at the bottom, offering you stable ground to stand on. Above, you'll find two of the large yellow boxes right next to each other. They open at the same time and the two machines that were inside then move down towards you, together. They both follow the exact same pattern as the one Sonic and Tails fought, and you have to defeat both, six hits each, in order to complete the act. You can climb up the long walls and glide from one to the other if you like, but I think the best method is to make them chase you, by spin dashing along the ground from one corner to the other. You should be able to time it so that they're swinging offensively while actually trying to catch up with you after you've quickly dashed to the other side, out of their way. By the time they reach you, they'll hopefully have withdrawn their arms, allowing you to quickly land one or two hits to either of them, before spin dashing to the other side and repeating the process. This is a tough challenge, but beatable with the right technique, and it does get easier with the more progress you make, as they still each lose an arm after three hits. After beating the two of them, the tunnel below collapses, and you'll fall down to some steps to complete the act.
View Notes(1)
Go to..
#1. Comment posted by Shadow on Wednesday, 10th January 2018, 5:12pm (GMT)
Hide Notes


Note: The above map is applicable to the Sonic 3 version of this act. The Sonic 3 & Knuckles version is also available here.
Careful down this shaft, as these flame throwers do their business, one by one. Use their top sides as platforms while you wait until you can pass.
This extra life can be obtained just after you take the long way round in Point #7. The water tube will drop you off to the upper regions of the act. Near the exit is a rotating cylinder. Drop off below it and then head left and find this little room hidden in the far wall.
View Notes(1)
Go to..
#1. Comment posted by AZ on Monday, 3rd December 2012, 8:56pm (GMT)
Hide Notes
Special Stage Rings
From the start of Act 2 as Sonic or Tails, after the initial spinning cup, there are two platforms. Drop between them and head into the water to the right. Immediately turn left in the water into a hidden room that holds the first Special Stage ring.
Continue from the start and once you start heading left on the main route and begin following a long rotating cylinder, drop down beneath it and continue along this route. Eventually it leads to a spinning cup. The big ring is at the top of this cup's corkscrew, in the wall on the left, however as Sonic you might have some difficulty getting to it. Jump out to the ledge on the right and begin a spin dash toward it. Release and give a very small jump to land in the adjacent tunnel.
The next is only accessible with Knuckles, who of course cannot access the other four. Keep a look out for this collapsing platform leading into small tunnel in a right hand wall tucked away in a corner. It's at the end of a couple of sloping pathways not far into the act, and the nearby speed zipper then sends you back underneath them towards the entrance to a water tube network. There's no coming back after that unfortunately.
Back to Sonic's route and Point #8 describes two branching pathways leading towards the end. Take the higher one, reached by going at speed up the curve and take the two spinning cups afterwards. These drop you off in front of two long rotating cylinders, one above the other. Aim for the area between them and look for a hidden ring tunnel on the far right wall.
This is perhaps the most obvious one if you happen to spot it. A big long purple tunnel jutting out of the wall, though you have to be quick, as the zipper underneath is prepared to only give you a moment's notice before it sends you back again. It's located on the main route coming out from Point #8 this time, or shortly after Tails' shortcut of Point #7.
View Notes(2)
Go to..
#1. Comment posted by Hooverphonic on Thursday, 17th January 2013, 7:36am (GMT)
#2. Comment posted by Shadow on Thursday, 11th January 2018, 11:35am (GMT)
Hide Notes
Not far into Act 2, you'll head left over a gate, closed over a gap in the floor that you need to open to get through. You'll find the switch further over to the left in or outside of a room, depending on whether you're paying Sonic 3 alone or Sonic 3 & Knuckles. Launch Base Zone is notorious for its many differences in the two versions, and this is a characteristic point for such differences. In the Sonic 3 alone version, there are two of those rare Eggman item boxes sitting on a ledge just before you enter the tunnel into the room. Don't open these, you'll take a hit, so what you need to do is carefully walk up the curve without spinning or jumping, so that you're left standing on top of them. Inside the small room you'll find the switch to open the gate, but you'll need to use a moving platform over a set of spikes on the floor to get to it. In the S3&K version, the switch can be found outside the room, above the entrance and the Eggman items are gone. In the room, the spikes have been replaced by two ring boxes. However, be very careful if you're playing as Sonic with Tails, because as soon as you hit that outside switch, not only will the original gate open, but another one will close over the top of the ring boxes, and if Tails happens to hit that switch while Sonic is standing on the floor of the room, he'll be trapped. There's no way to get out, so you'll have to either restart the game or wait until your time limit expires. And don't think it can't happen, because I'm fairly sure it's happened to me in the past. I'm not so sure that little feature was thought through very well to be honest.
View Notes(1)
Go to..
#1. Comment posted by Michael on Monday, 15th October 2012, 11:56am (BST)
Hide Notes
Just after you fall down the gap from that switch fiasco in Point #5, avoid the flame thrower and speed down the following slope. You'll be lead up a smaller slope where a speed-up device is waiting to throw you in the opposite direction, where you'll go on a different road which will lead you into the water underneath. You can take quite a decent shortcut here (and I admit, one I've only just recently discovered) just by jumping over that speed-up and carrying on along the road to the right. Down a couple more slopes and you'll rejoin with the main route, having shaved a good 15-20 seconds off your time. Nice!
View Notes(0)
Go to..
No notes have been posted in response to this section.
Hide Notes
Very soon after the previous point's little sneaky shortcut, Tails has an opportunity to take out another modest chunk of the act. Carry on and allow springs in the water to take you up to a right hand ledge. There's a checkpoint on a platform over to the left. Carry on right though and you'll come to the first water pipe system. Ordinarily you would spin dash through the barricade connecting the curving pipe above into the floor, thus allowing you to join the streaming water with aid from a spring on the other side. The tube takes you above on what is really just a detour heading backwards, eventually looping back to an area just above this point. If you have Tails handy though, all you need to do to avoid this unnecessary romp is just fly up and over the curving tube. The corridor above joins the route later on (the main route from Point #8).
View Notes(1)
Go to..
#1. Comment posted by Tiddles on Thursday, 3rd February 2011, 6:49pm (GMT)
Hide Notes
When you speed along this winding path, at the end of the main route detour described in the last point, you'll have the option of taking an alternate route at the end of it. There's a curve at the end, off of which you'll sail up into the air if you hit it with enough speed, best obtained from rolling down the slopes. The regular route carries on just to the right off this curve, but the alternate route, leading all the way to the end of the level, can be found on a high ledge above. It's debatable which one is the quicker, but at least this is a different way of getting to the end, if you've played this a number of times and are keen for a bit of good old fashioned exploration. This alternate path does keep you out of the water though, preferring to stay up near the top of the map.
View Notes(0)
Go to..
No notes have been posted in response to this section.
Hide Notes
Knuckles' journey, almost entirely different, is definitely the more challenging one. It climaxes at a tricky water-rising segment that is as tough as any other in the game, thanks largely to some unfortunately placed enemies and obstacles, and of course that relentless countdown of air supply underwater. You'd be well advised to come equipped with a water bubble shield then. Fortunately, there's one just before you reach the area. After you climb a wall on the right and hit the box on the opposite side, the gate that blocks your way to the right will change and lead you towards a spinning cup device at the top of a corkscrew. Take the cup and it'll swing down to a ledge on the left with a flame thrower, where you will find the bubble shield you seek nearby. If you miss the cup, head left when you get to the bottom, underwater, and you can get to the shield that way by taking the platforms going up. When you've got that, head right.
Soon, Knuckles arrives at a breakable barrier in a water tube. You have no option but to spin dash it, causing all the water to leak out and quickly flood the whole place, so you now need to head along a path upwards rather sharpishly, to avoid being submerged for too long and drowning under the water, which will rise all the way up to the top before you can get there. It only takes 30 seconds to drown remember, and there are NO air bubbles on the floor to help you out along the way, so if you lose that bubble shield or didn't get it, then you need to start worrying a bit. If you did get it, your immunity from drowning will mean that you needn't hurry with this section, but there are a lot of enemies and traps along the way, so be very careful not to lose it on one of them. This is a tough segment, so it may take a few tries at first.
Here's a step-by-step guide. Head along the leftward path as fast as your echidna legs will carry you. Avoid the obstacles and you'll come to a vertical passage, requiring some wall-climbing. Problem is, it's guarded by two Snail Blasters, one on the lower left wall, and the other on the upper right. Preferably before the water engulfs this section, jump and latch onto the right wall, climb up and glide to the left one, avoiding the badniks and their projectiles, and climb up into the square contraption on the wall, which will send you rolling up the curve to the next ledge. Above a step on the right is an Orbinaut badnik with intentions to piss you off dramatically. To avoid safely, jump up to the wall on the left of this alcove, making sure to grab hold of it just below where it begins to curve, and then jump and glide over him. If that proves to be a bit tricky, you could just purposefully collide with the badnik, and then use your temporary flashing invincibility to get past it. Next, use the speed up device to propel you up to a small box on the wall and closed horizontal gate above it, where you'll get stuck for a moment. Jump to break the box, but then immediately press the jump button again to stay on the wall, and then climb up to the ledge, where you will briefly rejoin Sonic's route. From there, it's just a spring across another curving path and you'll land in a spinning cup that'll take you up to the surface. All of this needs to be done as quickly as possible because you'll be underwater for most of it.
From there, the unity with Sonic's route is short-lived, coming to a large block that only Knuckles can destroy, and the spinning cup just above is out of his range. The following path will soon take you up to the high regions of the level, where Knuckles' boss battles take place on a pipe road, with two slight curves on either end. He skips the first Act 2 boss, but fights the Eggrobo in the second and third machines, one after the other.
View Notes(3)
Go to..
#1. Comment posted by Shadow on Thursday, 11th January 2018, 10:18am (GMT)
#2. Comment posted by Shadow on Thursday, 11th January 2018, 11:03am (GMT)
#3. Comment posted by Shadow on Thursday, 11th January 2018, 11:29am (GMT)
Hide Notes
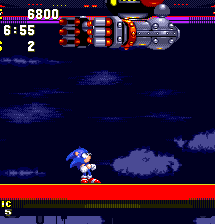
First Act 2 Boss
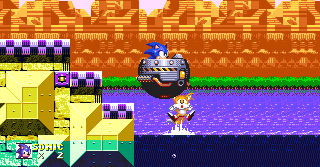
The first of three final bosses to bring Sonic 3 to a close, and in S3&K is only applicable to Sonic and Tails. Don't chicken out now, you've come so far! It's based on a chunk of sloping ground to the left, a small straight patch in the middle, and a high up ledge to the right, above a solid wall. Eggman will come running in along the path above and hop in his cockpit on the edge of it, which then rises. Beginning the attack, a hatch made of three small flashing circles will open, with its hinge in the middle of the wall, lifting it up from the bottom to create a small ledge from which you can jump and hit that mad scientist. However, a large harmful black ball will shoot out from the wall repeatedly, either above the ledge or below it. It usually alternates from one side to the other on each blast, but sometimes it'll come out from the top twice in a row, so keep your guard up. When it shoots out from the hatch below, it travels along the ground and up the slope, but without enough momentum, it slows and falls back down it, breaking against the wall on its return. When it flies out from above the ledge, it'll go flying across the screen, and depending on its speed, it'll either break harmlessly outside of the screen, or if it's too slow, harmfully fall back down the slope. The hatch closes and opens between each blast, but the best strategy is to try and stay on it as much as possible, and jump when it closes, or when you expect that the ball will fly out from the top side. Try and be as quick as you can, and if possible, use Sonic's double jump insta-shield. Hopefully, if you keep jumping and hitting, you'll be able to dodge most of the balls, and Eggman can actually be beaten very quickly, especially if you manage to get on his ledge and keep jumping to charge through those 8 hits.
View Notes(4)
Go to..
#1. Comment posted by Anonymous on Thursday, 17th March 2011, 10:25am (GMT)
#2. Comment posted by Tim333 on Thursday, 30th June 2011, 7:13pm (BST)
#3. Comment posted by Black Doom Fan on Tuesday, 11th September 2012, 1:27pm (BST)
#4. Comment posted by Anonymous on Saturday, 5th October 2013, 1:38pm (BST)
Hide Notes
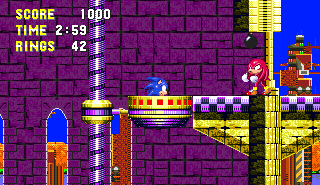
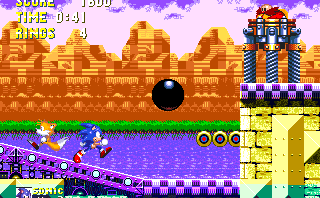
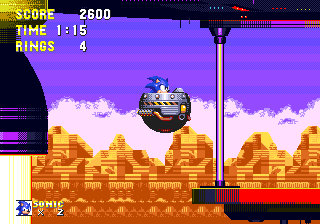
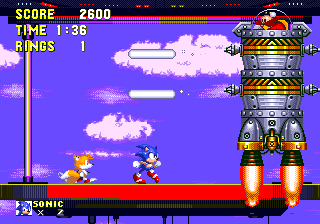
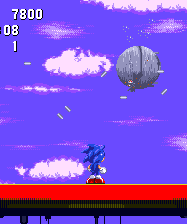
Once that contraption is crushed, Eggman, still in his cockpit, will fall off to the bottom of the screen. Move along the now open path he was on and at the end, beyond some steps leading downwards, floating just above the water you'll find Eggman's unused egg-mobile (or one of them anyway, he probably has several I'd imagine). In a complete one-off moment, you can now actually walk down and sit in the thing, and it'll rise and take you across the lake! Following your lead, Tails will simply drop into the water and in Sonic 3 alone, he won't actually return at all, making for a rather amusingly unheroic death for our young furry friend (don't worry kids, he'll be back at the end of the next game - promise!) Travel along and you'll approach the lower booster rockets of the Death Egg, now raised above the water. Your progress is then impeded once again by that stubborn Echidna. Knuckles is standing on top of a thin crane structure directly in your path. You'll automatically hover towards him, only to get the egg-mobile knocked backwards by his powerful punch. He chuckles now, but he won't be in a few seconds, as some rumbling begins. That rocket behind you is moving upwards, the crane tower Knuckles is standing on is wobbling.. the Death Egg is finally launching! Knuckles falls off into the water as the tower collapses, and you'll continue on to the right as the rockets and the grimy underbelly of the massive space station gradually begin to rise, until you reach a small red hanging platform. It's attached to the Death Egg by poles either side and is the width of the screen.. This is the battleground for the final confrontation with Dr. Robotnik!
Note that in Sonic 3, this little cut scene actually eats away at your timer for this level, whereas in Sonic 3 & Knuckles, the good guys at Sonic Team saw fit to correct this issue by pausing the clock until the next boss starts. Good idea.
View Notes(3)
Go to..
#1. Comment posted by Hooverphonic on Thursday, 17th January 2013, 7:04am (GMT)
#2. Comment posted by Hooverphonic on Thursday, 17th January 2013, 7:21am (GMT)
#3. Comment posted by SonicTailsKnuckles on Monday, 18th February 2013, 10:36pm (GMT)
Hide Notes
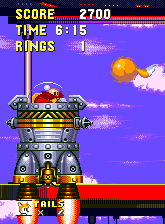
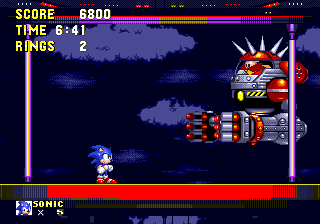
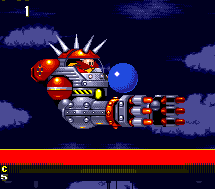
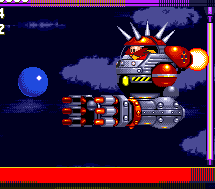
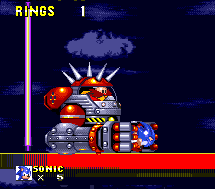
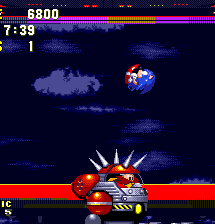
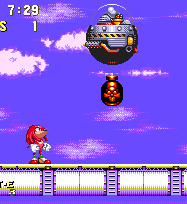
Second Act 2 Boss
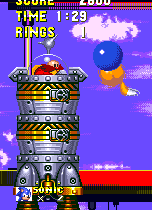
The only one of the three bosses that is playable to all three characters, in either version of the level. Eggman is now perched on the top of a rocket-like machine, with a booster jet at the bottom and two columns in the middle, each mounted with a small laser gun on either side. He'll start by coming up from the bottom right hand side of the hanging platform, and head upwards. Upon exiting the screen, he'll then randomly select a place to appear from; from any one of the four corners of the screen, going up or down along the left or right hand side. He'll repeat the pattern continuously, randomly selecting a place to emerge from each time. As he goes, the segments that hold the lasers will spin around the machine, and when they're aligned to face your character, both will pause and fire a long blue laser each, simultaneously. Your plan of attack is simple; when you get the opportunity, leap up above the laser beams and aim for Eggman up in the cockpit at the top. Upon contact, the machine will stop for a brief moment. However, be aware that he's guarded by a small harmful orb that is forever circling him in an anti-clockwise direction, so you can't just stay up there and repeatedly bounce off of him until he's defeated. I'd recommend doing so for as long as you can though, and time it so that you leap off of him before the orb comes round again, so that you get in the maximum strength of attack without getting hit. Depending on how many hits you sneaked in on him, his speed will then increase for the rest of that short phase, in order to get away from you. After a total of four hits, one of the columns will be destroyed, leaving only one laser to worry about. Another four will eliminate the second column, and it'll then take only one more hit to beat this boss, when he's protected by the orb alone. If you're playing Sonic 3 & Knuckles, as Sonic or Tails, then that's it for Launch Base Zone. Those of you who are playing Sonic 3 on it's own though.. you have but one more challenge to complete, I'm afraid..
View Notes(5)
Go to..
#1. Comment posted by Anonymous on Thursday, 3rd February 2011, 6:11am (GMT)
#2. Comment posted by LiQuidShade on Thursday, 3rd February 2011, 8:06am (GMT)
#3. Comment posted by Super Volcano on Sunday, 6th March 2011, 6:12am (GMT)
#4. Comment posted by Natalie on Friday, 29th June 2012, 5:57am (BST)
#5. Comment posted by Hooverphonic on Thursday, 17th January 2013, 7:10am (GMT)
Hide Notes
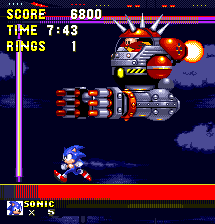
Final Boss
For Sonic and Tails, this final boss is only playable in Sonic 3 alone, and in Sonic 3 & Knuckles, only Knuckles takes it on.
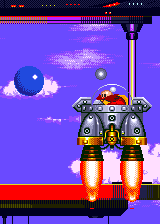
Robotnik slowly hovers up towards the ever-rising Death Egg above. The sky suddenly turns dark and the normal boss music fades away, to be replaced by that of the final boss, an incredibly dramatic and brilliant boss tune if ever there was one. Best boss music ever, in fact? Yes. Eggman quickly swoops down in the background, in his most deadliest machine yet. The top is adorned in long, sharp spikes, and there's a booster flame fitted to the back of the machine. Most dangerously though are two massive arms that hang at the bottom, with deadly gripping hands on the end. This is a tough fight, because it doesn't completely rely on good timing to defeat. What it does require is pinpoint accuracy and very quick reflexes.
Before he comes in, make sure you stay in the far left corner. He'll come in from the right at a certain angle and try to grab you with the hands. If you get caught in them, he'll fly up and slam you back down to the ground. What you want to do is jump with just the right amount of pressure, and at just the right time, so that you jump high enough to clear the arms, but low enough so that you don't collide with the spikes on top. Hopefully, you'll instead leap right into Eggman's fat face. He'll fly off to the left side, and then repeat this procedure again from there, so make sure you're now standing all the way over to the right corner and do the same, only from the opposite side. This is pretty tough because the way in which Eggman comes in changes slightly each time, so you need a brief moment to recognise how you should jump into him, hence the need to stay in the far corner. He'll only do this attack twice before moving to the next phase, meaning only a maximum of two hits here, and bear in mind that if he grabs you on the first charge, you'll miss your chance to attack him at all, as he'll then move straight on to phase two.
At phase two, he moves up to the very top of the screen so that you can only see the arms. He'll move back and forth across it until finally stopping, at which point he'll drop down to your level, so stay out of his way. He rests at the bottom of the screen and now you can only see him and the bulk of his machine, but unfortunately, he's too low for you to hit. What he does is move back and forth across the bottom in front of the red platform you're standing on, but uses the huge spikes on the top to try and hurt you. This can be tricky because he moves very fast, but try and jump over him as best you can when he moves towards you, perhaps leaping from one side of him to the other. Eventually he'll stop and then fly off up into the direction he's facing at the time. Make sure you stay well away from him, the safest place being behind, and don't get caught by his hands. He then repeats phase one again, but he comes from the side that he just went away to, so keep track of where he goes, and then stand in the opposite corner and get ready. Repeat the whole procedure, landing preferably two hits on every first phase of his method of attack until you cover all eight hits.
When playing as Knuckles in S3&K, this boss is actually a little easier (for once) because he charges at you four times in phase one, instead of just two. Plus, even if you get caught by the hands in one of them, Eggrobo will still return with the remaining charges before moving to phase two. That aside, it's the same pattern.
View Notes(7)
Go to..
#1. Comment posted by Axecutioner on Friday, 4th February 2011, 4:24am (GMT)
#2. Comment posted by Jimjams on Friday, 4th February 2011, 12:08pm (GMT)
#3. Comment posted by Oobo on Tuesday, 22nd February 2011, 4:33pm (GMT)
#4. Comment posted by Anonymous on Thursday, 17th March 2011, 10:28am (GMT)
#5. Comment posted by Alexis on Sunday, 29th May 2011, 12:23am (BST)
#6. Comment posted by LOFC_Ed on Wednesday, 16th November 2011, 12:17pm (GMT)
#7. Comment posted by Anonymous on Saturday, 28th December 2013, 6:19pm (GMT)
Hide Notes
Land your last hit on Robotnik and the attachments of his egg-mobile will fall off, and he'll burst into flames, falling slowly to the bottom of the screen. Sonic (or Tails) stands in the middle and looks up as the fire and explosions travel along the platform, up the side poles and towards the Death Egg, causing it to catch fire! Chunks of machinery start falling from it and the platform is released causing it to fall slowly down, safely out of the way of the burning wreckage. The sky lights up again as the dark clouds disappear and your character looks out to the background to see the exploding Death Egg falling out of the sky in the distance, surrounded by broken pieces. You've saved the day once again, and just in the nick of time! In Sonic 3, your character poses to the short ending theme and leaps out at you in triumph, giving the cue for the credits to hit. Congratulations!
In Sonic 3 & Knuckles, there's no credits screen just yet, because you've got a whole other game to complete, my friend! For Knuckles, the Eggrobo drops a bomb after being defeated, which starts to blow up the whole pipe area you're standing on. Knuckles legs it up a slope to avoid it, but it catches up with him and throws him off the edge, into the next zone. Meanwhile, after defeating the second boss only and crashing the Death Egg, the hanging platform brings Sonic and Tails back down to Angel Island, and deep into the depths of its thick forests, in the Mushroom Hill Zone..
View Notes(1)
Go to..
#1. Comment posted by Anonymous on Sunday, 8th May 2011, 12:56pm (BST)
Hide Notes

- When you connect Sonic 3 into Sonic & Knuckles, you will find that some minor changes take place now and then to the Sonic 3 levels and object placements. Usually, it's only one or two things, but for Launch Base Zone, some considerable changes are made. An almost uncountable number to be honest (I didn't bother counting at least, anyway). Some objects are added or changed and some obstacles that were already there have been removed, in order to take down the difficulty of the level a notch, so that S3&K can flow more easily as one, unified, gigantic game. Such changes include removing certain badniks (most notably the Orbinauts on long rotating cylinders and a few tricky Ribots) and spike sets etc, as well as adding rings to the long slopes in Act 1 and changing the contents of certain item boxes. Occasionally S3&K might add a trap or two that wasn't there in the original, but that aside, the difference could almost suggest the Sonic 3 version as "hard mode" to the S3&K version. As such, I felt it only fair to provide you with alternate maps for each version of each act. Having one would just be far too confusing really.
View Notes(0)
Go to..
No notes have been posted in response to this section.
Hide Notes
Each section of this page allows users to add their own notes to fill in any missing details or supply additional research etc.
View general notes for Launch Base Zone (9)
#1. Comment posted by Tamashii M. on Saturday, 12th February 2011, 1:01am (GMT)
#2. Comment posted by Anonymous on Friday, 25th February 2011, 10:25am (GMT)
#3. Comment posted by Dan on Saturday, 16th April 2011, 12:31am (BST)
#4. Comment posted by Andrew on Saturday, 23rd April 2011, 4:40am (BST)
#5. Comment posted by dara on Thursday, 9th June 2011, 4:58pm (BST)
#6. Comment posted by MNV on Wednesday, 15th June 2011, 1:27pm (BST)
#7. Comment posted by Anonymous on Wednesday, 13th November 2013, 3:28pm (GMT)
#8. Comment posted by Anonymous on Saturday, 21st December 2013, 4:00am (GMT)
#9. Comment posted by Anonymous on Wednesday, 7th June 2017, 1:11pm (BST)
Hide Notes
- Origin
- Storyline
- Comments
Gameplay - Basics
- Items
- Common Objects
Stages and Story - Angel Island Zone
- Hydrocity Zone
- Marble Garden Zone
- Carnival Night Zone
- Icecap Zone
- Launch Base Zone
Other Modes - Data Select Menu
- Bonus Stage
- Special Stage
- Super Sonic
- Competition Mode
Miscellaneous - Ports and Compilation Appearances
- Sonic 3 and Michael Jackson
- Cheats
Downloads
Last Updated
Content for this page last edited:
30th January 2011
Files last uploaded for this page:
30th January 2011
30th January 2011
Files last uploaded for this page:
30th January 2011
Recent Notes
Special Stage Rings
Posted by Shadow on 11th January 2018
Point #9
Posted by Shadow on 11th January 2018
Point #9
Posted by Shadow on 11th January 2018
Point #9
Posted by Shadow on 11th January 2018
Act 1 Boss
Posted by Shadow on 10th January 2018
44 notes posted on this page in total
Posted by Shadow on 11th January 2018
Point #9
Posted by Shadow on 11th January 2018
Point #9
Posted by Shadow on 11th January 2018
Point #9
Posted by Shadow on 11th January 2018
Act 1 Boss
Posted by Shadow on 10th January 2018
44 notes posted on this page in total