


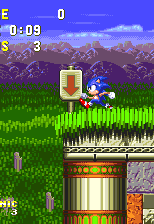
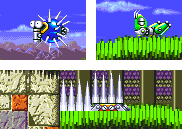
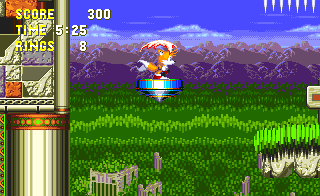
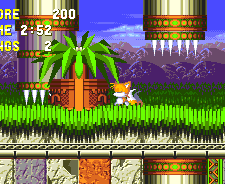
The massive, rich and decaying gardens of the island are surrounded by thick forests, growing around the ruins of the lost civilisation that once inhabited it. Many multiple routes, shortcuts and hidden secrets, some only open to particular characters, make this one of the largest and most complex levels ever constructed, with a mix of speedy paths from its hilly inclines and tricky, trap-filled labyrinthian mazes. Small earthquakes are common and some unusual devices feature, such as floating spinning tops to run on, arrow-spitting statues to dodge and even badniks posing as sets of spikes!
Game: Sonic the Hedgehog 3
Stage Number: 3
Level Division: 2 Acts
Boss: End of Act 1. End of Act 2.
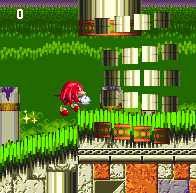
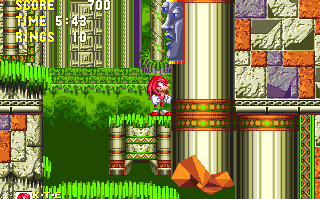
Playable Characters: Sonic & Tails, Sonic, Tails. Knuckles (Sonic 3 & Knuckles only).
Difficulty Rating: ![]()
![]()
![]()
![]()
![]()
Music: Variations of similar music for each act. Despite a slightly funky underlying beat, the Act 1 tune has aspects based on the ancient, mysterious world of this level. Act 2 is a bit slower, and plays up this regal theme a bit more.
Typical Length:
Act 1: 3 - 4 minutes
Act 2: 4 - 6 minutes
Available Items:
| Act 1 | 506 | 3 | 13 | 4 | 1 | 7 | 1 | 1 | 3 | 0 | 8 |
| Act 2 | 352 | 8 | 8 | 2 | 1 | 3 | 2 | 1 | 2 | 0 | 3 |
Marble Garden Zone Downloads:
| Level Maps: |
Act 1 map (.png) Act 2 map (.png) |
| Art: |
Official badnik art (.jpg) Official concept art (.jpg) Art found in the Japanese instruction manual. |
Top Tips
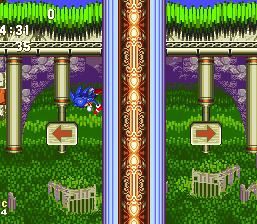
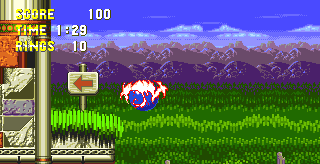
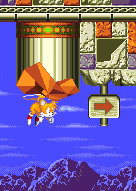
- Probably the best tip I can give you is to follow the arrow signposts! You don't normally get them in most Sonic levels, but since this zone is such a colossal maze, you'll want to make use of them if you get lost. They point out any possible directions you can go in, so use them to find extra routes, shortcuts or secret rooms, some of which are only accessible to Tails, or sometimes Knuckles, thanks to their extra abilities. This level is all about exploration in general, so just try things, and see what happens!

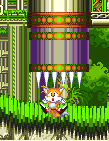
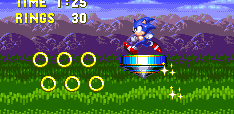
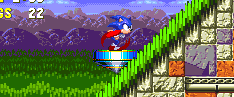
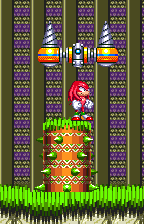
- One of Marble Garden's most prominent features is its spinning top objects, found regularly throughout the level, and use of them is usually mandatory. Hop on one and start running to make it slowly levitate upwards. There's a certain knack to gaining mastery over them though, as when you want them to go up, they also go in the direction you're running toward, and when you change direction, they'll drop down a little way, so it can be pretty tough to steer them precisely where you want to go, but practise makes perfect. Use collections of rings and signposts to tell you where to go while floating, if you're not sure. When they touch the floor, they'll whizz across it rather quickly. Only jumping off or colliding with something will stop them, but bear in mind that in this case, they're often used to break down otherwise impenetrable barriers later along the path, so it's often worth staying on them in case they're needed.
- Thanks to its huge supply of secret rooms, this level holds more Special Stage rings than almost any other. Act 1 has a record-breaking 8, while Act 2 adds 3 more. More are accessible with Tails, and the secret rooms in which they are placed may even carry on out the other side, and exit in a different place along a route, creating a shortcut for you. Again, look for those all important signposts, as they give away the locations of some of these rings as well.
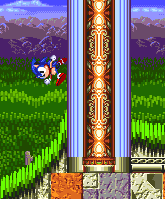
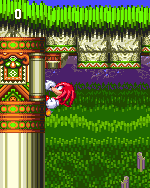
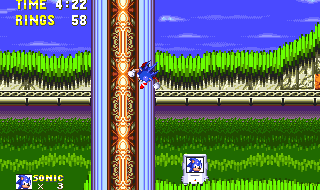
- Look out for the loop-de-loops that then drop down into a long pillar that your character will spin around on as he falls down them. If you let him run, he'll always come down on one side that curves into the path below, but mid-way, you can also do a well timed jump to leap off to the other side. These occur in both acts and will always take you on a shortcut, some of which are extremely time-attack friendly, or will at least offer an interesting new sub-route. You're best off consulting the maps.
- Look out for the loop-de-loops that then drop down into a long pillar that your character will spin around on as he falls down them. If you let him run, he'll always come down on one side that curves into the path below, but mid-way, you can also do a well timed jump to leap off to the other side. These occur in both acts and will always take you on a shortcut, some of which are extremely time-attack friendly, or will at least offer an interesting new sub-route. You're best off consulting the maps.
Each section of this page allows users to add their own notes to fill in any missing details or supply additional research etc.
View general notes for Marble Garden Zone (12)
#1. Comment posted by Viking ZX on Monday, 7th February 2011, 10:31am (GMT)
#2. Comment posted by 3ach on Thursday, 24th February 2011, 11:17pm (GMT)
#3. Comment posted by Andrew on Friday, 22nd April 2011, 4:50am (BST)
#4. Comment posted by Andrew on Tuesday, 26th April 2011, 1:28am (BST)
#5. Comment posted by Anonymous on Saturday, 25th June 2011, 1:11am (BST)
#6. Comment posted by faceplant on Sunday, 27th November 2011, 6:47pm (GMT)
#7. Comment posted by faceplant on Sunday, 27th November 2011, 6:47pm (GMT)
#8. Comment posted by Omnomnom on Tuesday, 20th November 2012, 3:02pm (GMT)
#9. Comment posted by LJLMETAL on Thursday, 20th November 2014, 8:04am (GMT)
#10. Comment posted by SonicTailsKnuckles on Thursday, 20th November 2014, 11:46am (GMT)
#11. Comment posted by I.M.2R on Wednesday, 21st February 2018, 2:13pm (GMT)
#12. Comment posted by I.M.2R on Wednesday, 21st February 2018, 2:14pm (GMT)
Hide Notes

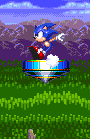
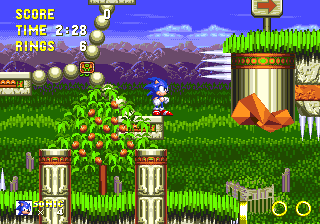
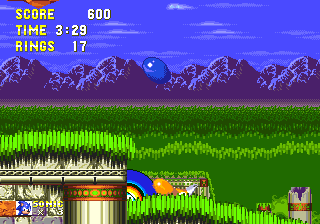
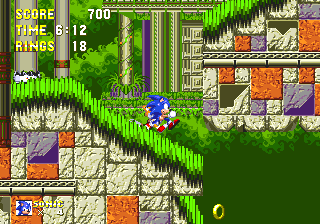
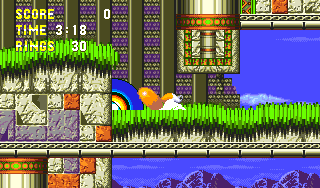
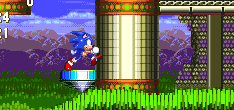
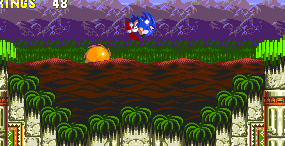
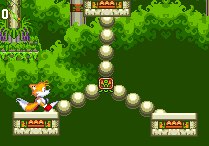
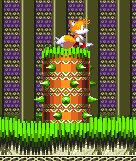
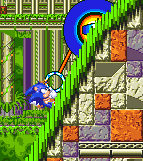
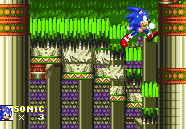
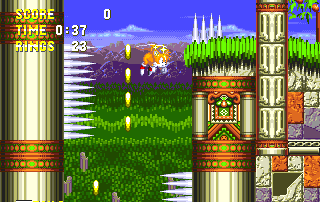
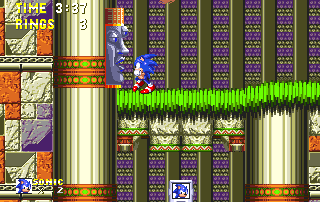
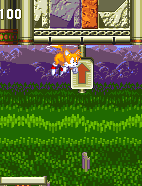
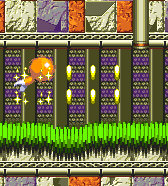
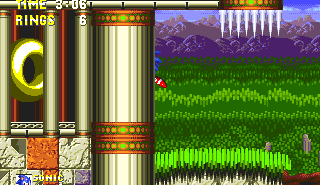
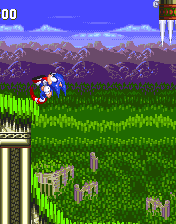
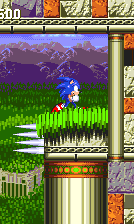
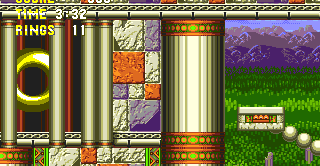
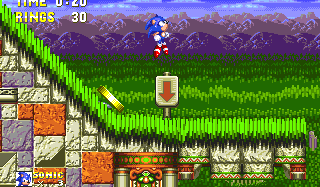
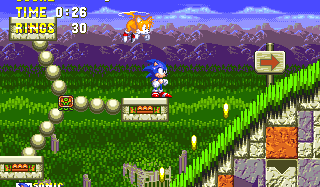
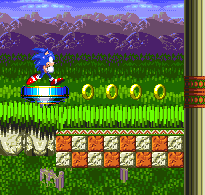
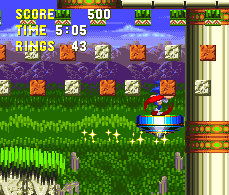
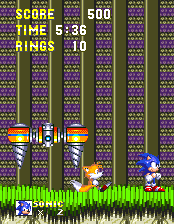
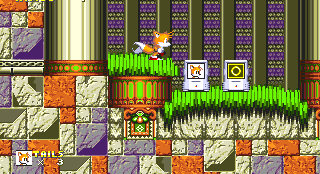
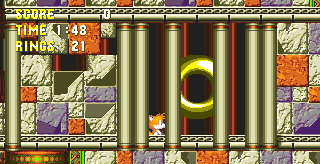
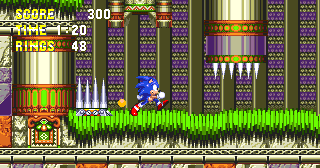
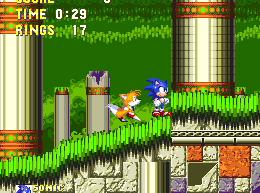
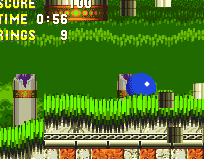
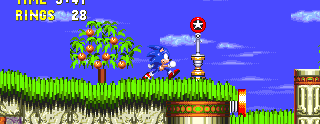
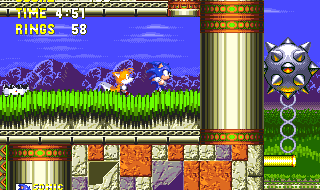
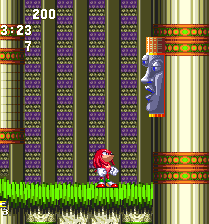
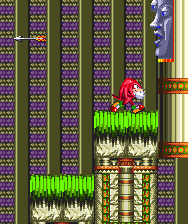
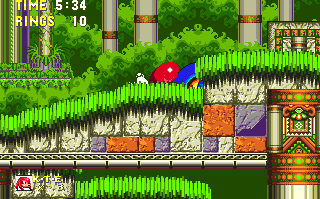
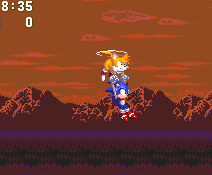
You're based quite high up on the green, rolling hills, where you can see for miles across the thick forest landscape, in which the ruins of an ancient collection of buildings now decay and are being reclaimed by nature. It's a misty blue sky in Act 1 with dreary clouds and rows of small, rocky purple mountains across the horizon. The thick green forests cover the entire area in front of it, with closer regions holding ruins of the ancient pillars and small temples within. Internal rooms carry a simplistic church-like background with little purple and yellow fragments of stain-glass window, between long brownish grey columns. The ground is mostly man-made (or echidna-made, if you're going to split hairs) and consists of big crumbly stone slabs of grey, orange and purple colouring, and perhaps the odd complex pattern thrown in here and there, plus all of the paths are covered in thick grass. You'll also spot huge silvery cylindrical pillars holding the whole place up, with orange patterns and sometimes big chunks missing from the bottom of them, leaving a large patch of broken, orange stone. There are also smaller ones that reach up out of the ground a little way, standing before your character. This being a garden, it is of course highly decorated with plantlife, including thin trees of varying sizes, ripe with bulging fruit, and massive potted plants with straight-edged leaves. The National Trust would love to get their hands on this place.
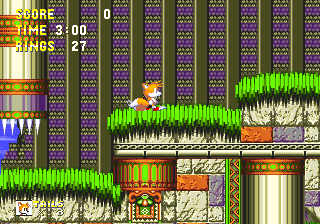
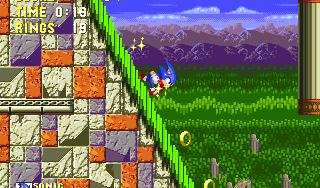
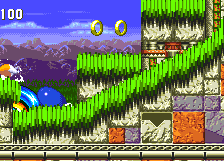
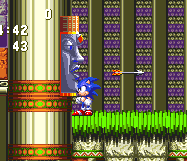
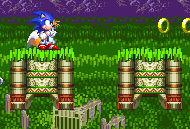
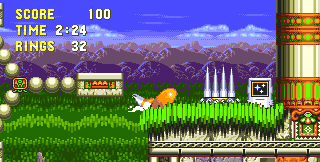
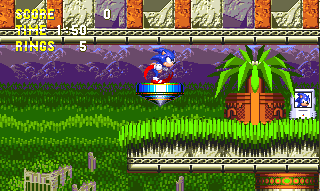
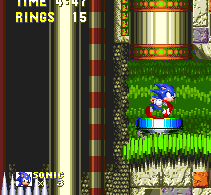
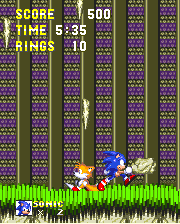
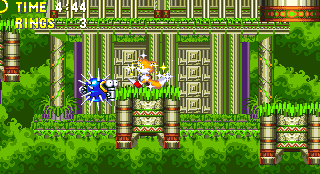
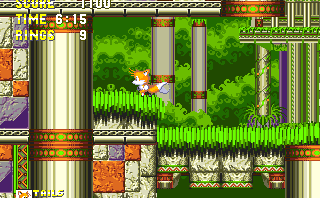
The only visual difference in Act 2 is an altered background, which seems to be set closer to the floor of the forest. At the bottom of this you can see those ancient temples close up, with moss and leaves growing around them and with long stone patterned pillars and whatnot. Wild, curly bushes are surrounding the area, and there are more ruined pillars reaching up through them. The miles of forest are now more vertically compressed, and if you reach high enough, you can see that the rocky mountains in the distance are larger and more pronounced than in Act 1. The cloudy sky now has a slightly darker, more late-afternoon/early-evening feel to it.
View Notes(6)
Go to..
#1. Comment posted by Speeding Hedgehog on Monday, 15th March 2010, 9:14pm (GMT)
#2. Comment posted by Sonicfan32 on Saturday, 7th August 2010, 7:21pm (BST)
#3. Comment posted by Oobo on Wednesday, 9th February 2011, 7:01pm (GMT)
#4. Comment posted by Oobo on Wednesday, 9th February 2011, 7:01pm (GMT)
#5. Comment posted by ghostofsandopolis on Friday, 22nd November 2013, 3:16am (GMT)
#6. Comment posted by ghostofsandopolis on Friday, 22nd November 2013, 3:17am (GMT)
Hide Notes

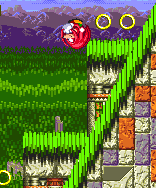
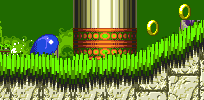
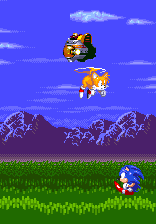
Perhaps one of the most structurally impressive levels ever conceived, this garden is gargantuan, and rich in secret paths and rooms all over the place. Despite its clear, open surroundings, the layout is fairly restrictive, made up of a series of large rooms and narrow corridors, connected up into a complicated network. This maze-like structuring meanders from left to right around the level, with different routes, sub-routes or parts of the same route squeezing close next to each other, usually offering a shortcut between them on only well hidden occasions, but you're completely oblivious as to what other, far away parts of the level may actually be sitting just on the other side of a wall. It's not all slow moving by any means though, as evident when the grassy, bumpy pathways suddenly send Sonic and co hurtling down very steep slopes, uncontrollably tumbling between alternate sides, best witnessed at the very beginning of the level. Numerous brief appearances made by Eggman and his drilling machine in Act 2, or his tunnelling crony in Act 1 are the cause of several rumbling earthquakes to shake the ruins. These cause small portions of slopes to completely restructure and point you toward a lower path, or toward the end of Act 2, even cause a whole long chunk of level to slowly rise up, creating a particularly daring dash for you, underneath the pillared ceiling.
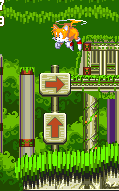
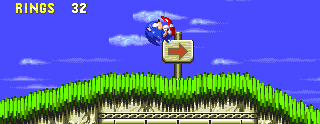
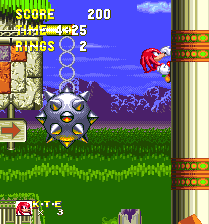
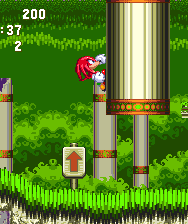
As already mentioned, acts are extremely plentiful in multiple routes, shortcuts and hidden rooms. Your best friends are the wooden signposts with orange arrows on them. Not only will these prevent you from getting lost when you rejoin an unfamiliar route from somewhere else, but they'll also indicate many options (though not necessarily all) that are open to you. You may be able to use them to find hidden entrances inside walls (where many big rings or other power-ups lie), and Tails players should take note of those pointing straight up, as they invariably highlight a flight-only sub-route. Act 1 uses the looping system, whereby if you take a certain path that leads directly to the very bottom of the level, you'll magically reappear at the top where that path resumes. This occurs twice in Act 1, and adds even more complexity to the branching multiple routes. During your first drop down a series of steep slopes at the start, there are two exits - one on the way down, the other at the very bottom, but they lead to two different routes across the entirety of the act. They can mingle together at certain points via sub-routes, but you can also follow them completely separately all the way to the end, thanks to the strict separation of the rooms from each other. Brilliantly designed, and there are loads of shortcuts and secrets to find no matter where you go - you really can't explore even half of this act in just one sitting.

Act 2 is only slightly more linear, certainly for Sonic alone, as if Tails is in your party, you'll be able to access a few neat shortcuts shortly after the start along the top of the stage. Two distinct choices emerge fairly early on for clever players (Point #7) but join up again around halfway through. Later you'll meet a series of loops with long pillars that your character will circle around as he drops down them. He'll always land on one side at the bottom, but on the way down, you can also jump him off to the other side. These appear in Act 1 too, and they always offer a sneaky shortcut on their hidden side, but in Act 2, some of them are particularly time saving (see Point #8). The level ends with Knuckles having to take a separate route to his own boss, via a slightly tougher earthquake segment in Point #10. With such a clever arrangement of paths and features, this, my friends, is Sonic level design at its most impressive.

View Notes(3)
Go to..
#1. Comment posted by items on Monday, 23rd January 2017, 7:28am (GMT)
#2. Comment posted by items on Monday, 23rd January 2017, 7:29am (GMT)
#3. Comment posted by items on Monday, 23rd January 2017, 7:30am (GMT)
Hide Notes

This level is full of nasty traps and puzzle-solving objects, so if you're treading unfamiliar ground, be very cautious. Huge spikeballs attached to chains swing around small posts, either horizontally on the ground (or occasionally the ceiling), or positioned vertically, above doorways or next to ledges. There are also some particularly evil crushers around, often found in the internal sections. They're lined with spikes on the bottom and retract relatively quickly, and come down like a shot, with a ground-shaking sound. Pass under them very quickly, preferably with a spin dash.
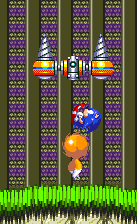
When you find a small spinning top on the ground, jump on it and start running. It'll slowly begin to float upwards and in the direction you're facing, and as long as you maintain your speed, it'll continue to ascend. It will drop a little bit when you slow down, stop, or change to face the opposite direction, which makes it a bit difficult to control but with practise, these allow you to fly up to far or high ledges. Use signposts and collections of rings to tell you which way to go. You can jump off at any time, but if you don't make it to the ledge you're supposed to be going to, there should be a new one waiting for you in the original spot, if you go far enough away so it can re-spawn, and then come back. Bear in mind though that if you land the thing on the ground while still running on it, it'll start to tear across the path with speed. Sometimes this is necessary to knock down otherwise impenetrable barriers or checkered flooring, essential for your progression, and if you find a spinning top mounted on a small block, it'll go straight into this action as soon as you land on it. You can also use them to go up and down large black vertical shafts, as long as you maintain your speed in one direction. It'll circle its way back and forth around the walls as it heads up or down. Just watch out for other obstacles around, because you won't be able to defend yourself without jumping off. While racing along the floor, they will often collide with a badnik or some spikes sooner or later, thus ending your journey. Interestingly if you're still on it when this happens, you'll fall back as if you've been damaged but won't lose rings, however you will lose a shield if you happen to be wearing one. Why? Search me.
Pits of thick brown sludge work much like the oil in Oil Ocean Zone and drag you downwards if you land in it. If you don't jump your way out, you'll die instantly, so don't hang about. Above these, you typically get a group of three small platforms circling each other, attached by a stiff chain of circles, which you can use to cross the pits and get up to a higher ledge. When you spot a large blue wheel in the corner of a step in the ground, stand next to or preferably on it (only because you'll satisfyingly bounce off of it) and hit a spin dash. This will get it spinning, and trigger huge rock platforms that lie nearby to move either up or down. They can form steps up to a ledge in this way, or open up a doorway through a narrow passage. On some walls, you'll encounter a pretty ugly statue face. Get near and its upper eye will turn red and it'll start spitting arrows at you from its mouth. You can't just ignore it though, because in order to open up your next path, you need to jump and hit that red eye three times, in order for it to stop spitting arrows and allow you to continue on your merry way, by opening the ground underneath, or raising a platform, etc.
A rarer trap is a large rotating pillar adorned with prickly spikes on the sides, and made up of several cylindrical blocks. It'll move back and forth over an area, and also bob up and down a bit, but the top is a flat chunk of grass that you can safely land on. You'll find pulleys in Act 2 that will allow you to scale up the steep slopes, just by grabbing hold of the circular handle at the bottom, while another spinning blue wheel at the top pulls you up. Naturally, all the basic stuff is here too, such as crumbling ledges, large moving platforms, springs of all directions, plenty of spikes (not to be confused with the Spiker badnik) and lots of breakable walls that can be spin dashed when using Sonic and Tails, while Knuckles can make them crumble simply by walking into them. They look like pillars that are part of the scenery, but you can always tell the difference if you look closely, as the ones that can be broken have a slight grid pattern to them.

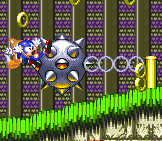
Marble Garden has three badniks to offer up to the plate. Bubbles is similar to Pointdexter from Hydrocity in that it's protected by spikes, which are brought back into its body at regular intervals, allowing you to attack. They hover around in the air and float toward you in an effort to piss you off (at which they are often extremely successful). Mantis are, obviously, praying mantis bots that hang out in Act 2 and simply jump up and down in a stationary place, sometimes jumping right over you, if you run along with speed. They can also be found hidden in the ground, leaping out at you when you get near, so beware of this sneak attack as well. Spikers are interesting. These are the "fake" spike sets that you'll notice fairly quickly, and act just like a regular spike set until you get close, at which point their robotic body underneath rises up and chucks a couple of projectiles either side. The great thing about this badnik though is that its spikes aren't harmful, they're actually bouncy, giving you a little extra boost upwards when you land on them. However, you can't tell whether any set of spikes is a genuine one or this badnik, until you get right up close to it, potentially in harm's way of its projectiles. If you play this level enough times, you'll eventually develop intuitive knowledge over which ones are real and which ones aren't, but until then, treat them all as real ones. Spin dash this badnik to kill it.
View Notes(4)
Go to..
#1. Comment posted by Oobo on Wednesday, 9th February 2011, 7:02pm (GMT)
#2. Comment posted by Andrew on Monday, 16th May 2011, 9:19am (BST)
#3. Comment posted by Tim333 on Thursday, 30th June 2011, 2:15am (BST)
#4. Comment posted by Anonymous on Monday, 17th August 2015, 5:18am (BST)
Hide Notes


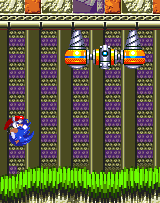
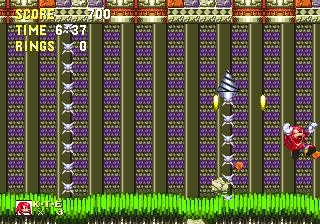
Tails has a small shortcut after the start of the main route that evades the first spinning top bit. Given this threatening vertical corridor of spikes however, perhaps it'll be more trouble than it's worth!
Don't miss this extra life on the lower of the two branching paths from the main route. It's guarded by a spitting statue but once taken care of, it'll draw back the floor. A hidden spring will see you back safely.
View Notes(2)
Go to..
#1. Comment posted by Anonymous on Friday, 14th September 2012, 11:00pm (BST)
#2. Comment posted by TeamAwesome3 on Sunday, 18th November 2012, 9:00am (GMT)
Hide Notes

Special Stage Rings
This is the first of four rings that are all in roughly the same area, and you'll need to take the alternate route in Point #1 to get at them. Start from this route and head right until you must spin dash up this curve and go left. Before going left, stand on this edge, and spin dash toward the spiker and invincibility - you'll go right through the wall and find the ring there.
The next one has two possibile entrances. If you're Tails or you have him with you, fly straight up from the previous location, up through a hidden hole in the ceiling, indicated by the arrow. It leads into a ring-filled corridor. There's another open ceiling between the rings and item boxes at the end of the corridor - fly up there to get the ring. You can then exit through a hidden wall to the right of the ring for a pretty big shortcut, as it leads out to an external corridor with a speed-up item, later on in the route. However, you can also use this exit as an entrance from the other side as well, if you don't have Tails with you.
From the last rings, follow the route up, past the drilling robot and pair of crushers. Beyond the platforms leading up is a ring on a top left hand ledge. If you go over to the opposite ledge that has a fire shield on it, you can take a run up from there, hop to the chained rotating platforms and then take another big jump over to it. Using a double jump from that very fire shield may assist you.
Without Tails, this one is quite tricky. Carry on across the path below the ledge with the fire shield at the previous ring. Find a spinning top on the ground, get on it and go back to the left. Hover around the fire shield ledge, and aim toward the top right of this large room. There's a narrow corridor with a well-earned extra life and a big ring hidden behind it.
Continue on this alternate route as it winds back and forth. When you get to a loop and long blue pillar, go down it as normal so that you exit to the right. Shortly, there'll be another spinning top. Get on it and use it to ascend to the top left wall. Normally you would then switch your direction to the right in order to carry on to the ledge, but another ring can be found in a room hidden in the top left part of the wall here.
This is the first ring to be found if you took the main route at Point #1 (simply fall all the way to the bottom, off the start). The second spinning top object you come to will invite you to hover across to a higher ledge on the right, from an upper left hand one. Instead, drop to the bottom, where there is a fairly long pit of sludge. There's a ring hidden in the corner here on the left.
After the previous ring, at the bottom of the spiked slope over on the right, carry on to a checkpoint. There's a steep slope next to it where the route splits into two, each path of which has one more big ring left. The upper way may only be possible if you took the spinner that you just had to jump off of to get the previous ring. On the route going down the slope, wind through a loop, go to the left down the pillar, as normal, then you'll soon find this curve. Hit the nearby horizontal red spring to go along it and up in the air, where a ring can be found on an upper ledge to the right, past some spikes.
If you went up the slope after the first checkpoint on the main route, instead of going for the previous ring, carry on along this road to the east. After defeating a statue face, the road drops and goes to the left. Use the platforms to negotiate the long pit of spikes you find, but rather than dropping down, to the left of the spikes, use the trio of rotating platforms to get to the ring in the wall on the left.
View Notes(2)
Go to..
#1. Comment posted by Oobo on Wednesday, 6th February 2013, 8:34pm (GMT)
#2. Comment posted by SonicTailsKnuckles on Tuesday, 19th February 2013, 6:24pm (GMT)
Hide Notes
You begin this level by falling from a great height, and running at full speed down the incredibly steep slopes. About halfway down, to the far right of the area, you'll spring to a three-platform grouping, circling each other by chains. If you manage to land on one of these, try and head to the ledge on the right, and you'll be taken along the alternate route for Act 1, but if you miss, more slopes lead you down to the regular, main route all the way at the bottom. Map-wise, this bottom route is actually above the other one, because the initial drop is so long it occupies one and a half the height of the map (it loops over itself). There's no significant difference between them with regard to difficulty or speed, but if you don't take one of several sub-routes that link them at various points, they can potentially remain completely separate for pretty much the whole act.
View Notes(0)
Go to..
No notes have been posted in response to this section.
Hide Notes
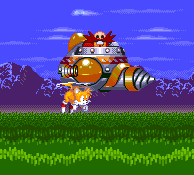
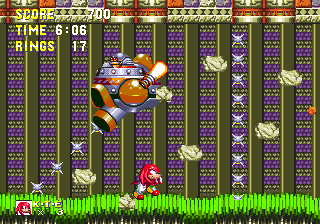
No matter which route you took, you'll soon meet a large robot with twin drillers, ready to cause commotion by drilling up into the ceiling above him, and creating a small, harmless earthquake. Like the appearance of the flame pod during Act 1 of Angel Island Zone, you can give this guy as many hits as you like, but for the moment, he's got a job to do and there's nothing you can do about it. On the main route, he'll appear at the end of the first room after the long slopes, but will actually assist you by causing two large steps to descend, on the right, allowing you to exit the room. They'll settle on top of a pit of spikes, so for the love of God, do not impatiently jump into the spike pit before they do so. Meanwhile, on the alternate route, he doesn't really aid or hinder you in any way, so just carry on to the left, where there are a pair of mean crushers waiting for you. Pass under very carefully, and it may be wise to refrain from using your spin dash to get through the first one, in case you roll right under the second crusher as it comes down.


View Notes(1)
Go to..
#1. Comment posted by Anonymous on Wednesday, 19th December 2012, 3:02pm (GMT)
Hide Notes
On the main route, shortly after the area described in Point #2, go right and you'll have to spin dash next to the blue wheel to cause more steps to rise up along a steep slope upwards. At the top, you'll use the spinning top to float your way across to a high ledge all the way over to the left. That's all very well and good for Sonic, but if you're playing as Knuckles in S3&K, the only problem is that the later steps are simply too high for him to jump up to, seemingly putting him in a bit of a jam. Since you're going be heading left anyway, use your initiative, and simply jump and glide to the left wall, opposite the steps and climb up.
View Notes(1)
Go to..
#1. Comment posted by vmk89 on Monday, 21st November 2011, 10:25pm (GMT)
Hide Notes
No matter what route or sub-route you took, you'll eventually find yourself going down one of these long vertical shafts, having broken into it by using a spinning top from either side. If you came in from the top right of it, you'll exit at the bottom left where you'll speed down a couple of slopes and appear in the final room before the Act 1 boss. If you came in at the top left of the shaft, you'll arrive on the bottom right, at a path that'll drop you off directly at the end of the final room. The trick is, you have to smash your way through the breakable areas of four separate floors to get there, and in order to do that, you need to stay on that spinning top you came in on. Keep it under control, and guide it to destroy the breakable floors, going down through them, one by one. If you jump off before breaking through all four floors, you won't be able to continue along this path, so you'll have to use the springs to go all the way back to the top, and then head back to the left to the bottom of the shaft. Leap over the long set of spikes there and take the other road, to the bottom left of the shaft.
View Notes(0)
Go to..
No notes have been posted in response to this section.
Hide Notes
Act 1 Boss
At the end of Act 1, you fight the driller machine that has been causing trouble at certain points of the act already. He's in an internal room, and of course armed with two massive drills either side of his otherwise thin body. At first he's just floating in the right-hand side, so leap up and give him a piece of your mind. He's vulnerable in any place on his person, except for the business ends of the obviously painful drills. He responds by making his way up into the ceiling and doing what he does best. Reminiscent of the Mystic Cave Zone boss, he starts causing another earthquake that sends rubble and debris falling from the top of the screen. Like in Mystic Cave, the regular stones don't harm you but the spikes do, unless you're protected by a shield, which they just bounce off of. When he's done with that, he'll come down on you quickly with drills pointing downwards, so be ready to leap out the way. He then withdraws up a bit and pauses to turn his drills back upward, at which point you should try to land more hits. Six are required. In Sonic 3 & Knuckles, Knuckles' job is a bit tougher here, as halfway through the drilling procedure, a revolving spiked pillar will emerge from the ground and move around. When coming back down, the boss only extends his reach so far, and Knuckles needs to use the platform on top of the revolving pillar to make any hits. If you leap on that too early, his downward attack will be harder to avoid, so I recommend waiting until he's made his move, then leap up onto the platform and make yours.
View Notes(1)
Go to..
#1. Comment posted by I.M.AM2R on Thursday, 15th February 2018, 9:41pm (GMT)
Hide Notes


This life can be accessed by taking the alternate shortcut in Point #7, and following an arrow into the right hand wall shortly after it begins. This secret room then brings you back to the main route on the left.
These platforms, interrupted by a Bubbles badnik and swinging spikeball at the end are made a little easier by taking time out to grab the invincibility item just below them.
View Notes(2)
Go to..
#1. Comment posted by Andrew on Monday, 16th May 2011, 9:23am (BST)
#2. Comment posted by Anonymous on Tuesday, 9th August 2011, 4:14pm (BST)
Hide Notes
Special Stage Rings
Take the Tails shortcut expressed in Point #5, up to the top of the level, then when you go through the loop and down the long blue pillar, you need to try and jump off to the left rather than take it down to the right as normal. The big ring is found inside a right hand wall, down a small hole. Afterward, head left out of the room to rejoin the shortcut you were on.
To get the next ring, you need to avoid the enticing quicker route of Point #7 and carry on down the main path. At the end of the first internal section you come to afterwards, there's an area below a raising platform with a Spiker badnik and a crusher. The ring sits in a room beyond them to the right. To get back out, destroy the Spiker to access the spring that's held captive underneath it.
To obtain the final ring, you need to ignore the big shortcut advice offered in Point #8 and take all of the loops and long pillars as normal, down to the bottom of the act. You'll eventually come to a grounded spinning top that darts off up hills into a long black shaft going up. Instead of going up with it, jump off and exit the shaft on the left at the bottom. The ring is in a wall at the end of a corridor here.
View Notes(1)
Go to..
#1. Comment posted by Michael on Saturday, 15th September 2012, 2:41am (BST)
Hide Notes
Starting Act 2, after you exit the room and climb the slopes via the pulleys, outside, you'll notice (if you're observant), a signpost with arrows curiously pointing both upward and rightward. Sonic and Knuckles must proceed right, but Tails has an alternative shortcut of his very own to explore. Fly up to a ledge not far away on the left (watch out for the Bubbles badnik), then, in the following room, fly up to the top, past the large swinging spikeball. From there, follow the arrows up to a pulley. This upper route rejoins others at one or two points from then on but for best effect, keep following the arrows that you see to find the quickest paths along the top of the act. It also skips the following two points and joins the main route shortly before Point #8.
View Notes(0)
Go to..
No notes have been posted in response to this section.
Hide Notes

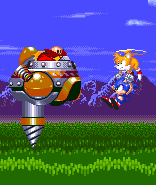
Along the early phases of the main route, you'll find yourself stuck in a room which is rumbling violently. Stay on the left side, because up through the floor on the right side will appear the devious Dr. Eggman! He's in his new drilling machine, and he's taking the place of his now deceased robotic crony. Give him a hit and he'll fly off upwards, but the ground will continue to shake when you're allowed to proceed on to the right, into the following point..
View Notes(0)
Go to..
No notes have been posted in response to this section.
Hide Notes

After meeting Eggman, you'll come to this curious slope which, as a result of the earthquake, starts to collapse as soon as you step on it. It initially leads up to a breakable barrier, but actually restructures itself to lead downwards into the main route, and the earthquake then ceases. Now, the thing about this bit is that the barrier hides the way to an alternate route that gets you to the half way point a bit more quickly. Knuckles can make his way through fairly easily even when the slope is collapsing, because all he has to do is walk into it and it breaks. This isn't a Knuckles-only route though, Sonic and Tails can get there but it's a bit harder, because in order to break it they have to use the spin dash, which will only work along a fully connected surface, which the slope won't be when it starts collapsing. Therefore the solution is to begin your spin dash just in front of where the slope begins (there is a pillar there blocking your view, but the slope only begins immediately to the right of it), so that you don't set it off while charging. When you release, you should just blast straight across the slope and through the barrier before it has a chance to reshape itself.
View Notes(2)
Go to..
#1. Comment posted by Hyper Emerson on Wednesday, 31st March 2010, 10:06pm (BST)
#2. Comment posted by Anonymous on Sunday, 18th November 2012, 3:09am (GMT)
Hide Notes
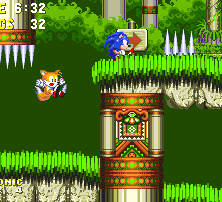
Eventually all of the routes and shortcuts of the first half of the act meet and meander toward the top, at a couple of pulleys on steep inclines, and a checkpoint follows a little further down the path. But it's pretty much a long, linear path from here on out, right? Wrong. There's a red horizontal spring next to the checkpoint. Take it, then take a big leap as you climb the gentle slope and pass the arrow signpost, but before the slope drops. You'll find yourself at a higher ledge over to the right, with 20 rings and a fire shield in a brief internal area. In the general area below all of this, the level becomes much more speedy, through several loops that wind down into long pillars. As explained in the Level Structure section, each of these pillars offer two possible routes at the bottom of them - the second, hidden one can always be accessed by jumping off of the alternate side while on your way down the pillar.
As such, there are loads of shortcuts here that cut across the otherwise rather long and winding main route at various points, all vying for the quickest way through, but there can only be one. From the twenty rings and fire shield, dodge the crusher and roll down the hill, at the bottom of which is a loop. As you head down it, you will ordinarily spin around the pillar and end up going left, but instead, quickly jump off to the right while heading down the pillar, into a little room with an extra life. You can then walk out through a hidden gap in the wall on the right, minding the swinging spikeball on the wall. Take the spinning top upwards and you'll come out having clipped a pretty massive portion of the act, leading into Point #9. If you failed to jump out of the loop on the right side in time, there's another shortly on toward the left that you just have to run through without trying to jump off to the side, and has a similar effect to this shortcut anyway.
View Notes(0)
Go to..
No notes have been posted in response to this section.
Hide Notes
Get to this bit as Knuckles, with a high up statue in an internal room near the end of Act 2, and you'll find yourself a bit stuck. Sonic and Tails can jump and hit the eye of this statue just fine, which will open up the floor below, but poor old Knux just can't jump that high, and those walls cannot be climbed either. The truth is, the gravitationally challenged echidna cannot get past this, so he'll have to backtrack a wee bit. Go back the way you came until you see a sign post with an arrow pointing upward. This is your route, and there's a perfectly good pillar there for you to climb up. At the top, follow the arrows and glide over to the opposite wall and carry on up from there, continuing to follow arrows and being careful of the vertically swinging spikeball. At the top, proceed left into the room, where Eggrobo will pop out from under the ground, on the left side, setting off the usual earthquake. Spin the blue wheel to create steps leading up to a statue head. Hit it until it stops spitting arrows, and it'll open up the ceiling in the top left corner of the room. Climb the left wall to get up there.
View Notes(6)
Go to..
#1. Comment posted by 3ach on Monday, 28th February 2011, 8:00am (GMT)
#2. Comment posted by Andrew on Monday, 16th May 2011, 9:25am (BST)
#3. Comment posted by Tim333 on Thursday, 30th June 2011, 6:57am (BST)
#4. Comment posted by Anonymous on Sunday, 8th January 2012, 3:49pm (GMT)
#5. Comment posted by theblackferret on Sunday, 2nd March 2014, 11:26pm (GMT)
#6. Comment posted by I.M.AM2R on Thursday, 15th February 2018, 10:05pm (GMT)
Hide Notes
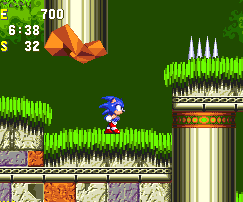
To kick this section off near the end of Act 2 for Sonic and Tails, Eggman will appear through the ground in his drilling machine, like he did at the start of the act. He drilled up through the right-hand side then, but here he'll come up through the left, so don't stand there. He drills through the ceiling and creates another earthquake, but this one is serious. Move onward through another internal room below, and eventually you'll reach an area where the floor is moving upwards! Similar to the start of Hyrdocity Act 2, the ground will be able to crush you into the ceiling, so get moving to the right as fast as humanly possible. Watch out for the broken pillars that extend from the ceiling, because if you don't get under those quick enough, you'll be trapped behind them. The ground isn't flat, there are bumps and steps all over it, and sometimes you might have to wait a little bit for the floor to move up high enough that you can reach the next ledge. Watch out for a couple of springs at one point that will impede your progress. This section might take you one or two attempts, but at least it's relatively brief. Just keep moving as fast you can and squeeze under those pillars.
Knuckles has his own version of this, in a different area and it's quite a bit tougher because you also have to deal with opening a doorway via a blue wheel, and destroying a statue head, on top of everything else. These are fairly self-explanatory, but can be pretty hard and nerve-racking, so keep trying. Try not to panic for the statue head. Just keep your rhythm of hitting it, and then letting it throw an arrow before going for the next hit each time and you should be ok. Keeping your cool is definitely the key to beating these sections.
View Notes(0)
Go to..
No notes have been posted in response to this section.
Hide Notes
Act 2 Boss
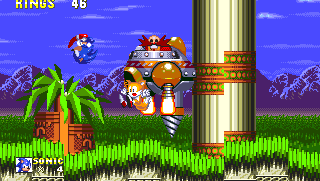
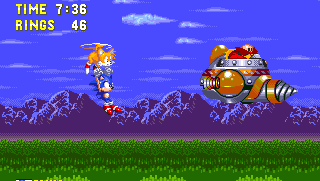
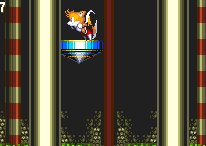
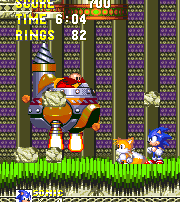
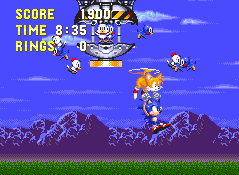
Not far on from that, and you'll find yourself in boss country. As Sonic and/or Tails, you'll be in an outdoors section, with a pillar and giant plantpot. Dr. Eggman will return from the top/middle, and you can get in some hits here, with best results from Sonic's insta-shield. A large drill mounted on the rear of his machine will face downwards and he'll charge into the ground from there, remaining in that place for a moment (continue hitting him), while the whole structure around you begins to crumble as a result of this action. The camera will then follow him as he flies upward, leaving our heroes behind for a second. With the whole area having collapsed, we now see Sonic and Tails giving chase through the air, using Tails' propellors. If you're playing as just Sonic, then Tails will make an appearance to aid you anyway. If you're playing as just Tails, see the next paragraph. You control your twin-tailed buddy with the directional buttons, tapping the up button to make him ascend, while you can also use the jump buttons to make Sonic leap out and attack Eggman, who's flying around. If you fall (and you probably will) then no worries, because Tails will swoop down to your aid, and unlike in the rest of the game, he appears to magically have infinite stamina, and never tires. At first, Eggman is just making his escape, heading to the right with his drill at the front. Get close enough to him and leap so that you hit him on the noggin. He'll move forward out of the screen, and then he can be seen retreating into the background. He'll come at you again from the left side and try to charge at you in the air, to which you should respond by giving him another whack to the skull. He dashes off into the upper part of the background now, and repeats the process but comes from above, with drill facing down. Stay on the right side and beam him again when you get the opportunity. Next, he'll come from below, with drill facing up, and then the pattern repeats, so hit him on every turn. As Sonic, this is relatively easy, if you get the hang of controlling Tails. Get as many hits in as you can in the initial phase where you're still on the ground and you may only need to get in three or four while in the air.
Speaking of Tails though, he now has a price to pay for all those shortcuts he's taken in this level - on his own, this fight is an awful lot tougher because of course you can't jump while flying, so you have to actually use your tails to attack him, but hit him from below rather than above. This requires very careful use of the jump button to monitor your altitude, staying just underneath Eggman so that when his craft is aligned with your tails, you can give a single tap on the button to raise yourself to just the right height and make the connection. It's very tough to do it without injuring yourself and of course if you do, ring recollection - even one of them - is unlikely. Definitely not for beginners. If/when you beat him, the upside down capsule will appear from above, so use Tails to hit the button. Our heroes continue flying on, as the sun begins to set on the forest, and nightfall creeps in..
"But what of Knuckles?", I hear you cry. Well, his version of this boss is totally different. You fight Eggrobo in the same machine, but in an enclosed room, inside the ancient ruins. It also uses the Act 1 boss theme instead of the usual Act 2, for some reason. A small driller which leaves a chain of spiked balls in its path will burst out of the ceiling, heading either straight down or diagonally down and drilling through the floor. It'll then emerge from a different place in the floor, facing either up or diagonally up toward the previous chain, and head back into the ceiling, leaving a small web of dangerous spiked balls that can sometimes trap you in a small space. Eggrobo will crash through the ceiling and travel down that first chain of balls, removing them as he goes. If you can, leap and hit him from above or underneath, but avoid the small jet flames that propel him. He'll burrow into the ground and then reappear from it, following the second chain of balls. Again, hit him if you can. This pattern will repeat with the drills appearing in different positions, loosely based on where you're standing. Beat this boss and free the animals, and Knuckles will wander off to the side of the screen, for the next level...
View Notes(11)
Go to..
#1. Comment posted by Sonicfan32 on Saturday, 7th August 2010, 7:18pm (BST)
#2. Comment posted by Oobo on Wednesday, 9th February 2011, 7:08pm (GMT)
#3. Comment posted by Oobo on Wednesday, 9th February 2011, 7:10pm (GMT)
#4. Comment posted by Anonymous on Thursday, 7th April 2011, 2:36pm (BST)
#5. Comment posted by 3ach on Wednesday, 7th September 2011, 7:07pm (BST)
#6. Comment posted by KingofHarts on Tuesday, 27th September 2011, 4:49am (BST)
#7. Comment posted by vmk89 on Monday, 21st November 2011, 11:08pm (GMT)
#8. Comment posted by Hyper_Sonic on Monday, 27th February 2012, 10:48am (GMT)
#9. Comment posted by Anonymous on Sunday, 18th November 2012, 3:39am (GMT)
#10. Comment posted by Dravenzangel on Saturday, 13th April 2013, 6:59am (BST)
#11. Comment posted by Tim333 on Monday, 22nd July 2013, 7:58am (BST)
Hide Notes

- Trivia to impress your friends with, and win over the ladies at parties: Marble Garden is the only one of the six zones in Sonic 3 that doesn't have any water whatsoever in it. All the rest do, even if it's only a tad. Sonic & Knuckles meanwhile doesn't have a single drop of the stuff.
View Notes(4)
Go to..
#1. Comment posted by Sonicfan32 on Saturday, 7th August 2010, 7:19pm (BST)
#2. Comment posted by Anonymous on Sunday, 8th January 2012, 7:51pm (GMT)
#3. Comment posted by Natalie on Monday, 9th July 2012, 9:23am (BST)
#4. Comment posted by AZ on Monday, 3rd December 2012, 8:52pm (GMT)
Hide Notes
Each section of this page allows users to add their own notes to fill in any missing details or supply additional research etc.
View general notes for Marble Garden Zone (12)
#1. Comment posted by Viking ZX on Monday, 7th February 2011, 10:31am (GMT)
#2. Comment posted by 3ach on Thursday, 24th February 2011, 11:17pm (GMT)
#3. Comment posted by Andrew on Friday, 22nd April 2011, 4:50am (BST)
#4. Comment posted by Andrew on Tuesday, 26th April 2011, 1:28am (BST)
#5. Comment posted by Anonymous on Saturday, 25th June 2011, 1:11am (BST)
#6. Comment posted by faceplant on Sunday, 27th November 2011, 6:47pm (GMT)
#7. Comment posted by faceplant on Sunday, 27th November 2011, 6:47pm (GMT)
#8. Comment posted by Omnomnom on Tuesday, 20th November 2012, 3:02pm (GMT)
#9. Comment posted by LJLMETAL on Thursday, 20th November 2014, 8:04am (GMT)
#10. Comment posted by SonicTailsKnuckles on Thursday, 20th November 2014, 11:46am (GMT)
#11. Comment posted by I.M.2R on Wednesday, 21st February 2018, 2:13pm (GMT)
#12. Comment posted by I.M.2R on Wednesday, 21st February 2018, 2:14pm (GMT)
Hide Notes
- Origin
- Storyline
- Comments
Gameplay - Basics
- Items
- Common Objects
Stages and Story - Angel Island Zone
- Hydrocity Zone
- Marble Garden Zone
- Carnival Night Zone
- Icecap Zone
- Launch Base Zone
Other Modes - Data Select Menu
- Bonus Stage
- Special Stage
- Super Sonic
- Competition Mode
Miscellaneous - Ports and Compilation Appearances
- Sonic 3 and Michael Jackson
- Cheats
Downloads
Last Updated
Content for this page last edited:
14th March 2010
Files last uploaded for this page:
14th March 2010
14th March 2010
Files last uploaded for this page:
14th March 2010
Recent Notes
General Notes
Posted by I.M.2R on 21st February 2018
General Notes
Posted by I.M.2R on 21st February 2018
Point #9
Posted by I.M.AM2R on 15th February 2018
Act 1 Boss
Posted by I.M.AM2R on 15th February 2018
Level Struture
Posted by items on 23rd January 2017
58 notes posted on this page in total
Posted by I.M.2R on 21st February 2018
General Notes
Posted by I.M.2R on 21st February 2018
Point #9
Posted by I.M.AM2R on 15th February 2018
Act 1 Boss
Posted by I.M.AM2R on 15th February 2018
Level Struture
Posted by items on 23rd January 2017
58 notes posted on this page in total