


Welcome to Hydrocity, the ancient, submerged aqueducts of Angel Island. Sonic 3's main water level can be fairly troublesome in places, what with some lengthy underwater segments in Act 1 that you'll really want to hunt out a bubble shield for, and one or two particularly tricky corridors where you must avoid crushing blocks in Act 2. Other than that though, it's mostly speedy and fun, and you actually spend more time above water than below it. Each act also varies considerably in its structure. Great background music and simple but challenging features make this stage a true favourite for me.
Game: Sonic the Hedgehog 3
Stage Number: 2
Level Division: 2 Acts
Boss: End of Act 1. End of Act 2.
Playable Characters: Sonic & Tails, Sonic, Tails. Knuckles (Sonic 3 & Knuckles only).
Difficulty Rating: ![]()
![]()
![]()
![]()
![]()
Music: Variations of similar music for each act. Lively and jazzy, with a certain aquatic theme to both of them. Act 2 is notably different in tune and one of my all-time favourite pieces of Sonic music with an absolutely superb climax.
Typical Length:
Act 1: 2 - 3 minutes
Act 2: 4 - 5 minutes
Available Items:
| Act 1 | 440 | 5 | 14 | 0 | 3 | 2 | 2 | 0 | 3 | 0 | 2 |
| Act 2 | 259 | 5 | 8 | 0 | 3 | 0 | 4 | 0 | 4 | 1 | 2 |
Hydrocity Zone Downloads:
| Level Maps: |
Act 1 map (.png) Act 2 map (.png) |
| Art: |
Official badnik art (.jpg) Official concept art (.jpg) Art found in the Japanese instruction manual. |
Top Tips
- As for all water levels, keeping an eye on your underwater air supply is the best piece of advice I can give, at least as far as Act 1 is concerned. The best course of action is to get yourself a bubble shield, your first real chance to make good use of it, and hang on to it for as long as possible so that it's no longer an issue for you. Otherwise, whenever you see a bubble cluster on the ground, stop and wait for the large bubble to come out, and grab it before proceeding, as some of these underwater routes can be quite long if you get stuck with one. Each bubble provides only 30 seconds, remember.
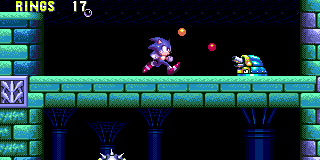
- The Mega Chopper piranha badniks may be your biggest danger in the water. If they latch onto you they'll begin sucking your rings away one by one until they kill you, and you can't jump or spin your way out of it. The solution can be tough to figure out yourself, but all you need to do is move from left to right quickly until it gets thrown off. Just hope that you have enough rings to hold out those few seconds!
Each section of this page allows users to add their own notes to fill in any missing details or supply additional research etc.
View general notes for Hydrocity Zone (18)
#1. Comment posted by Tailsspain on Tuesday, 15th December 2009, 7:13pm (GMT)
#2. Comment posted by LiQuidShade on Tuesday, 15th December 2009, 8:11pm (GMT)
#3. Comment posted by sonictails1189 on Friday, 18th December 2009, 9:21pm (GMT)
#4. Comment posted by smiley225 on Tuesday, 22nd December 2009, 3:07pm (GMT)
#5. Comment posted by Anonymous on Tuesday, 22nd December 2009, 3:14pm (GMT)
#6. Comment posted by smiley225 on Tuesday, 22nd December 2009, 3:15pm (GMT)
#7. Comment posted by Sonicfan32 on Monday, 9th August 2010, 5:30pm (BST)
#8. Comment posted by Oobo on Wednesday, 9th February 2011, 6:58pm (GMT)
#9. Comment posted by Andrew on Friday, 22nd April 2011, 4:39am (BST)
#10. Comment posted by Sonicfan32 on Tuesday, 12th July 2011, 6:43pm (BST)
#11. Comment posted by Nate on Saturday, 31st December 2011, 7:35pm (GMT)
#12. Comment posted by MetaRyan on Thursday, 5th July 2012, 11:45pm (BST)
#13. Comment posted by SonicTailsKnuckles on Tuesday, 22nd January 2013, 12:25am (GMT)
#14. Comment posted by taismo4ever on Friday, 22nd November 2013, 3:11am (GMT)
#15. Comment posted by taismo4ever on Friday, 22nd November 2013, 3:12am (GMT)
#16. Comment posted by Ratchet 0203 on Wednesday, 8th October 2014, 6:03pm (BST)
#17. Comment posted by Anonymous on Sunday, 16th August 2015, 10:51pm (BST)
#18. Comment posted by items on Monday, 23rd January 2017, 7:39am (GMT)
Hide Notes

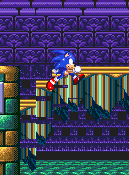
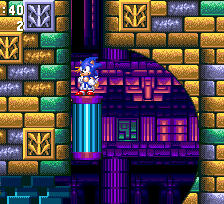
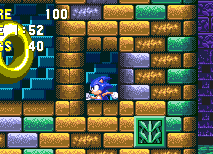
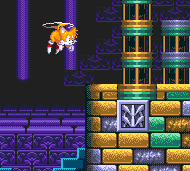
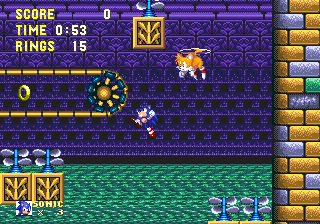
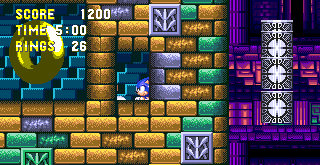
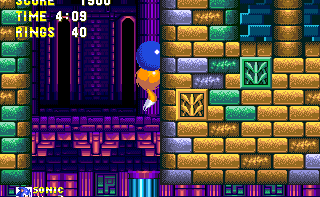
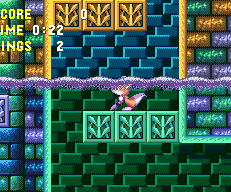
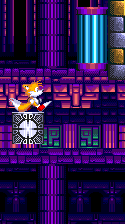
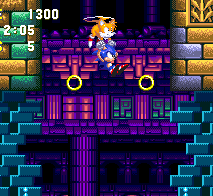
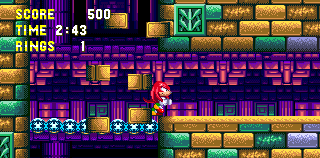
The whole zone is encapsulated within a huge open temple that was left to ruins long ago. It would appear to collect all the water deposited by the island, so as you can imagine, it's pretty wet. The background is dark, with features such as huge stone pillars and patterned brickwork cast in a dimly lit purple. I always considered this place to be far underground, considering that the water is being tipped into it from many places, but you can clearly make out long, bright windows letting light through in the far distance, so who knows? Closer sections are decorated with large, candle-lit displays, and special brownie points for any of you who noticed Sonic's image mysteriously carved into some of the stone at the very top. When above it, the water can be seen as a large green-ish pool, and the perspective on it cleverly changes once you dive in. The underwater portions are quite dark and murky, but you can spot more pillars, suggesting a whole other huge floor down there.
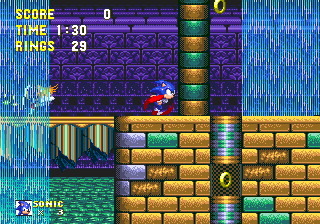
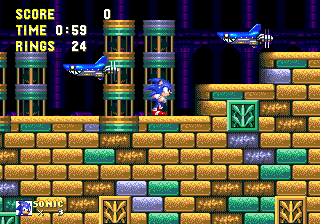
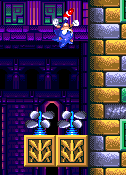
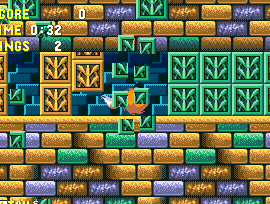
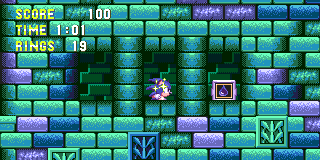
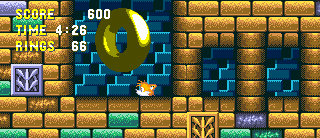
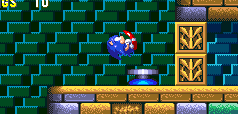
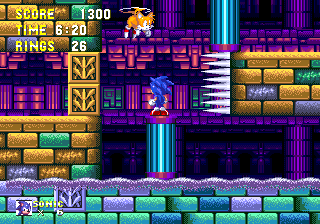
Both acts share the same foreground patterns, which really give the level its own visual kick. The ground is composed entirely of gravelly rectangular bricks of mostly warm yellow, also with green, brown and purple coloured blocks and a thin layer of yellow road above. The water adds a turquoise overtone. Interior sections of path hold a wall of green bricks behind the action, oddly peppered with gaps between them. Old, cracked pillars support the road surfaces of the speedy slopes above water-level, and embedded everywhere are squares of stone with symbols on them, reminiscent of those found in Labyrinth Zone. Sometimes on straight paths, you'll also find abstract pillar-like structures along either side, with swinging pendulum balls in them, and of course, waterfalls are a common sight too, long and tipping down from the top into the pools below.
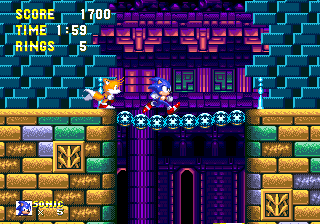
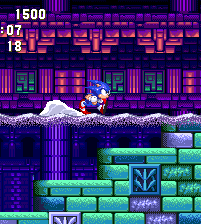
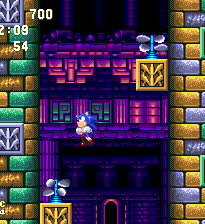
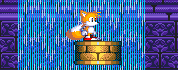
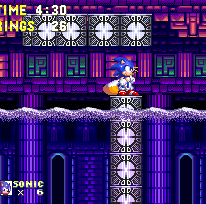
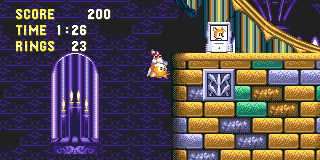
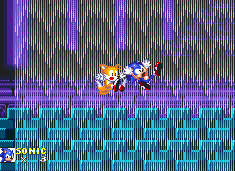
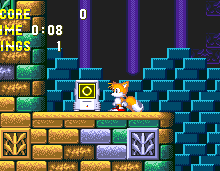
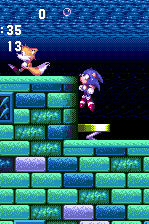
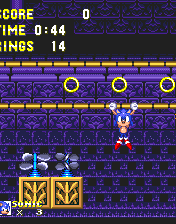
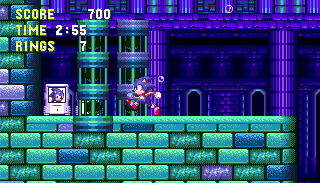
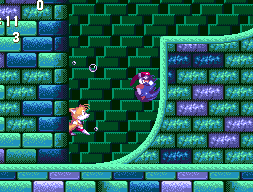
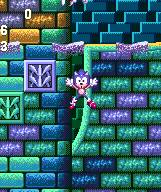
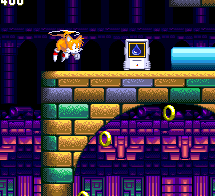
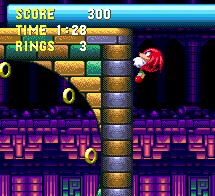
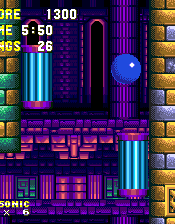
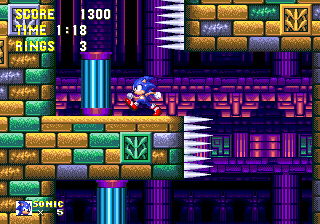
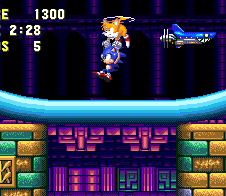
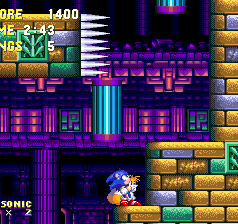
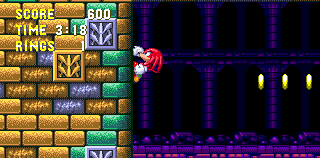
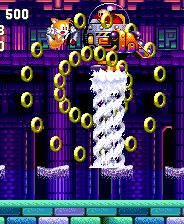
Act 2 carries a number of visual differences, with a whole new, much more colourful and vibrant background. The huge pillars are now more detailed and all the bricks seem to glow, reflecting a brighter purple light from underneath. There are a number of different vertical levels in the background, each supported by the pillars and dark windows can be seen further behind. The top level appears much darker and further away. There are now also rope bridges to cross, and long, winding water chutes that are bright blue and have little glass covered sections. Also look out for the little extra graphical touches such as the occasional drop of water falling from ceilings.
View Notes(4)
Go to..
#1. Comment posted by SpeedingHedgehog on Friday, 22nd January 2010, 9:00pm (GMT)
#2. Comment posted by LiQuidShade on Saturday, 23rd January 2010, 2:31pm (GMT)
#3. Comment posted by Anonymous on Tuesday, 6th July 2010, 5:24pm (BST)
#4. Comment posted by Sonicfan32 on Saturday, 7th August 2010, 7:28pm (BST)
Hide Notes

While this is a water level, you'll probably find that you spend most of the time on dry land, particularly in Act 2, as it only takes up about the bottom third of the stage, and won't rise and fall at all. While both acts can be very fast and contain a mix of open areas and smaller corridors, there is quite a substantial difference in how they're laid out, and what characteristics they have.
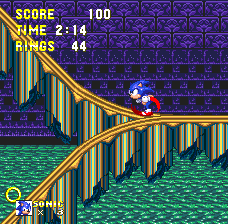
Act 1 is generally based in a number of fairly large rooms within the setting, and a few smaller corridors under the water. Above it, the area is crammed with loads of loop-de-loops and twisting, sloping paths. Quite often there are two paths leading into a loop, and you'll enter it through one of them, then hit a spring at the end of the loop that sends you back through it, and you'll exit on the other path, so there's a lot of back-and-forth action there, but you're generally going mostly to the right all the way through. You can find some of this kind of thing underwater as well, but it's mostly more slow-paced down there, with more tricky formations of objects and small platform-based puzzles to contend with, based on straighter paths with steps. While your trips underwater aren't as long as they have been in past levels, you'll want to keep an eye out for air bubbles to keep you going. Remember that your character runs out of air and will drown after 30 seconds, so look out for small bubble clusters that produce large air bubbles, which you can suck up to fill those lungs again. If you're moving fast enough, you can actually sprint right across the surface of the water without falling in, in some areas. Act 1 has two main alternative routes in addition to the regular one, but their entrances are not quite as obvious to find. One begins on a high ledge at the very beginning and so is only accessible by use of Tails or Knuckles (see Point #1 below). This reunites with the main route about halfway through, but is an easier option that skips the first water section. Another is detailed in Point #2, and takes you right to the end on a whole other path, though it does have a long but speedy underwater section all to itself. All of these routes dip in and out of the water at various points, but you can switch between them in some places, particularly if you're playing as Tails, so it's possible to mix and match to find the quickest route, or just keep yourself out of the water completely.

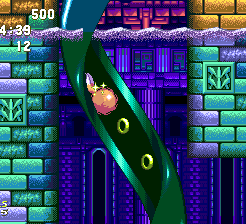
Act 2 has a few substantial differences regarding the way its been arranged, but an emphasis on both long curving loops and tricky platform-hopping puzzles remains. One of the main differences is that the speedy sloping roads are now replaced by long blue water chutes. These twist and twirl up down and around, and you often have to use a speed-boost object to spin your way up them when they meander up a thin vertical passage. The layout tends to be more enclosed in this act, and while there are very big open spaces as well, these are mainly used for the water chutes as they tip you down a long diagonal stretch, dumping you in the water at the bottom, where you'll run across the surface. You'll also find three or four tall rooms that you are thrown up into from a speedy path in the water below. Typically in these instances, the quickest and often safest shortcuts are found at the top. If you don't make it that far and fall back down, a series of snaking black platforms can deliver you back up, or through the full route to the right. In most other places however, you'll find yourself working your way through narrow horizontal corridors and in particular, long vertical shafts, making use of the various platforms and fans to get you to the top of them. There are brief shortcuts every now and then, more easily accessible with the ability of flight, but there is largely only one main route through the whole act this time. Not only that, but this long route abandons the basic right-ward direction and weaves back and forth and up and down all over the place, using up just about every bit of available space on the map. Though there are lots of new hazards to watch out for (including a large crushing wall hot on your heels at the beginning), the good news is that there's less water to deal with in this one, with most submerged sections consisting of little more than a quick dash along a water chute.
View Notes(4)
Go to..
#1. Comment posted by Sonicfan32 on Monday, 9th August 2010, 5:26pm (BST)
#2. Comment posted by Super Volcano on Friday, 22nd October 2010, 9:01am (BST)
#3. Comment posted by Oobo on Wednesday, 6th February 2013, 5:20pm (GMT)
#4. Comment posted by SonicTailsKnuckles on Wednesday, 11th September 2013, 11:38pm (BST)
Hide Notes

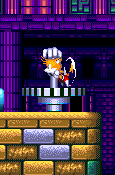
Parts of these thin old paths in Act 1 have a nasty tendency to crumble to pieces upon your landing, especially when you're thrown upwards from underneath them, which is a common occurrence. Speed wheel boosts have an odd feature - a gloved hand on a pole that reach out from a straight piece of ground and grab hold of your head, placing you on the spinning wheel. It might seem like an odd first impression to make, but it's actually charging you up for a nice bit of speed along the following stretch. It'll release you after a couple of seconds and you'll shoot off. Small vertical fans nabbed from Oil Ocean Zone can either be found on the ground or on small square blocks and may also pop out from a wall when you get near. When you land in the space directly above them, they'll propel you upwards to a certain height, where you should be able to move across to the next ledge or object. In Act 1, conveyor belts can often be found nearby, in groups above the path, and above water or below, but unlike normal conveyors you cannot run on the tops of these. You actually just hold onto and hang from either the top or bottom tread and it'll take you along to the end in the direction it's going. Be aware that when you reach the end, you'll fall off the belt, so you either need to jump off to something, or to the other tread. Sometimes a couple of little spikeballs will be taking the ride around it too, so watch out for those.
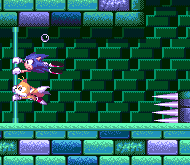
Moving platforms are small and when underwater, be really careful of those that just sit there on the ground, with only their top edges visible. Like in Labyrinth Zone, when you touch them they'll move upwards and will crush you into spikes or the ceiling if you're still standing on it. In some small underwater corridors, a large propeller will suddenly appear behind you and start churning, forcing you along the path where you'll grab onto a pole, again like in Labyrinth Zone. To the right of the pole will be some horizontal spikes on the side of a step, so you have to press the up button to move your character upwards along the pole, to prevent him from flying right into them. When you're happy with that, hit a jump button to break the pole, and you'll fall to another further along. The pole can break automatically after quite a long while. Usually at the end, a large burst of water will throw you out, either through a large pipe in the wall, up and out of the water or to the right.
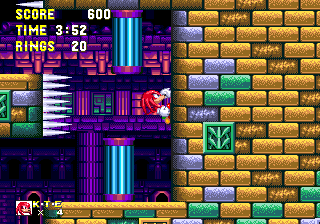
Act 2 likes to replace some of these objects with a couple of its own exclusive ones, including the big revolving purple and blue column blocks. These move up and down or left and right slowly, very much like the kinds of moving blocks you get in a pinball-type level, but a bit smaller and thinner. Land on top and you'll move along (and revolve) with it, but watch out that it doesn't crush you into something, as some of them do. Quite regularly, you'll find one that moves up and down through a small gap to the left of a curved wall. You have to spin dash up this wall in order to get on top of it, but make sure you do so at the right time or you'll get caught between the block and the ledge, so it's best to go for it when the block is near the bottom. If you get stuck in a large pit, usually half submerged, and you need to get upward, there may be a few groups of several black blocks moving around in a square pattern nearby. When stationary, they combine to form one block, but while moving, they spread out and follow each other, creating a snake-like formation that offers more area for you to try and land on. You'll need to spin dash through a lot of barrier blocks in your way in the narrow corridors, some of which are then replaced by a more solid barrier that appears behind you and prevents backtracking. In this act, use the fans to make your way up the long vertical passages as they pop out from either wall.
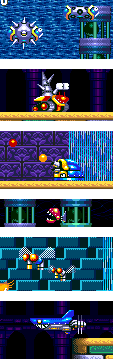
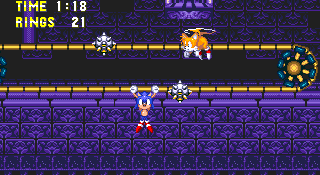
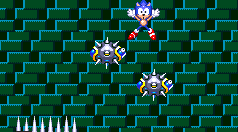
On top of all that, Hydrocity has an absolute tonne of badniks to piss you off from start to finish. There are six of the little robotic buggers to contend with, both aquatic and otherwise. Pointdexter are blowfish badniks that move back and forth slowly over a set area underwater. Spikes emerge from their shells periodically, at which time they cannot be damaged. Turbo Spiker are red snail bots with a spike-covered shell diagonally mounted to their rears. Get near, and it'll fire off with rocket power, at which time the badnik then begins to quickly dash back and forth across the ground. In Act 1, immobile Blastoids sit on thin ledges, firing projectiles from their diagonal cannons, three at a time. The part of the ledge they're sitting on will only give way when you destroy the Blastoid, allowing you to continue (often to another one below). They can also be found on various other ledges where destroying them won't be mandatory. If you happen to be wearing a shield at the time, the projectiles will just bounce off of you, but try and jump over their line of fire during a break between rounds, and go for him then. Watch out for the Mega Choppers; they are small, but being based on piranhas, they are also extremely dangerous. Underwater, they swim towards you and latch on, during which time, you cannot jump or roll, and what's worse, one by one your rings will start to deplete until it sucks them all out and kills you. The best remedy is to quickly move left and right to try and throw them off. Bugernaut are weird dragonfly things that hang out in "families", and act like Sonic 2's Whisps, and just generally badger and pester you when you get near. I say families because there's usually two together, and they're accompanied by little baby Bugernauts whom you cannot kill, but just fly away once you've made scrap metal out of their parents and orphans out of them, heartless beast that you are. Last but not least are shark bots named, appropriately enough, Jawz. These can exist above water as well as under it, and just fly towards you, from the side, though usually in groups. Interestingly if you run into them, aside from getting hit yourself, they will also explode, but without producing the little trapped animal inside, who has presumably met his grisly death in the explosion.
View Notes(3)
Go to..
#1. Comment posted by theblackferret on Thursday, 28th November 2013, 10:20am (GMT)
#2. Comment posted by SonicTailsKnuckles on Friday, 31st October 2014, 7:32pm (GMT)
#3. Comment posted by Kyle on Sunday, 3rd January 2016, 12:08am (GMT)
Hide Notes


On a couple of occasions underwater, there are two thin pathways stacked in a shaft, each guarded by a Blastoid badnik. In order to get through each, you need to kill the Blastoid, and the area below it will collapse for you.
In the first instance of these Blastoids-on-collapsing-paths, don't forget to look out for the bubble shield in a tunnel at the top. Will definitely come in handy here, especially as the shield actually deflects the often tricky fireballs thrown by said enemies.
Take Tails' route from Point #1 and this curious extra life may tempt you as you speed by on the path above. It's accessible by taking a tunnel just before you get there, when you're thrown upwards by a red spring in the floor. Walk through and drop down, and a fan will catch you and deliver you to the 1-up

A treat for Tails. A total of 90 rings are suspended high up here in a big bundle on the main route, a little over halfway through. When you dash across the surface of the water, there should be a system of conveyors and fans around - look out for the arrow made of rings among them that point you up to this jackpot high above.
View Notes(5)
Go to..
#1. Comment posted by Super Volcano on Friday, 22nd October 2010, 9:08am (BST)
#2. Comment posted by Animal Zero on Friday, 30th September 2011, 12:33am (BST)
#3. Comment posted by Anonymous on Sunday, 18th November 2012, 8:16am (GMT)
#4. Comment posted by Anonymous on Thursday, 22nd August 2013, 2:24am (BST)
#5. Comment posted by Ratchet 0203 on Wednesday, 8th October 2014, 6:11pm (BST)
Hide Notes

Special Stage Rings
The first Special Stage ring can be found by taking the alternate route described in Point #2. Follow this up, go down the slope and through the loop, out the other end. Walk over to the thin road ahead of you and stand carefully on the left edge of it, as it's about to collapse. While falling through, stay close to the left wall below and you should be able to fall into the alcove containing the ring.
If you follow the main route through the act then this one is handed to you on a plate. Very near the boss, shortly after Point #3, you'll head upwards and then be invited to take a stroll to the left into the alcove where a spring in the wall will normally send you up to the boss. There's a ring floating very clearly just above, as long as you don't let the spring send you away, it's all yours.
View Notes(4)
Go to..
#1. Comment posted by somerandomuser on Sunday, 27th December 2009, 1:18pm (GMT)
#2. Comment posted by somerandomuser on Sunday, 27th December 2009, 1:41pm (GMT)
#3. Comment posted by Michael on Tuesday, 30th October 2012, 2:17am (GMT)
#4. Comment posted by joe on Saturday, 8th December 2012, 5:53pm (GMT)
Hide Notes
After plummeting down from the waterfalls of Angel Island Zone, Act 1 begins with a longish drop down into a small pool below for all characters. A few things worth noting.. When falling, I'd first recommend you move all the way to the left as soon as the act begins, so that you land neatly on a ledge there, which contains a 10 ring box plus several more above, instead of splashing in the pool. If you don't make it and fall straight in the water, there are a pair of Pointdexter badniks and some spikes toward the left side, and because you won't have any rings, you need to aim instead to fall into the middle or right of the pool. Using Tails' flight or Knuckles' glide/wall climbing abilities, you can head all the way over to the wall on the top right of this room, and find another ledge a little higher than the left hand one. There, a handy (no pun intended.. well alright, it was a bit) speed-up wheel will whisk you off along a speedy, water-free alternate route for the first half of the act. Sonic alone will have no choice but to get wet though. In this case, jump down to the right side of the pool and jump on the button to open up the doorway to a propellor corridor.
View Notes(4)
Go to..
#1. Comment posted by Adam on Friday, 5th August 2011, 11:16am (BST)
#2. Comment posted by Dan on Saturday, 7th April 2012, 4:49pm (BST)
#3. Comment posted by Anonymous on Thursday, 29th November 2012, 5:24pm (GMT)
#4. Comment posted by SonicTailsKnuckles on Thursday, 12th September 2013, 12:03am (BST)
Hide Notes
After taking the lower, underwater route described in the previous point, you can access another alternate route which takes you right to the end of the act, on hidden paths. After the propeller blasts you through the corridor and out the other side, you'll fall back in another pool of water, where you would normally carry on along a submerged path to the right. The alternative is positioned high up on a righthand ledge above the start of this pool, and you need to use a series of fans and conveyor belts spread out across the space above the water to get to it. Where you see three platforms leading up to the surface of the water, ignore them, because it's easier to use a hidden spring located at the bottom of a step, right after the platforms. This will throw you up to some fans that will pop out the side of the wall. Allow each fan to take you as high as it can, then inch over to a conveyor toward the next fan, and follow this winding path to the top, being careful not to fall.
View Notes(0)
Go to..
No notes have been posted in response to this section.
Hide Notes
Near the end of the main route, you'll find a pair of fans sitting on the floor of a submerged section. They'll only switch on when you hit the button next to them, which is guarded by a set of slotting spikes occupying the same space. Careful timing is required to press it without getting an unpleasantly sharp surprise, so trust me when I say that you need to make your jump on the button when the spikes are up. Given the slow water mechanics, they should slot back down just before you land, thus leaving the button available. Quickly jump off and use the newly activated fans to go left on the conveyor belt above.
View Notes(1)
Go to..
#1. Comment posted by SonicTailsKnuckles on Thursday, 29th November 2012, 5:26pm (GMT)
Hide Notes
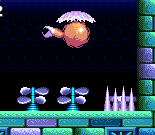
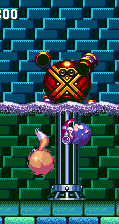
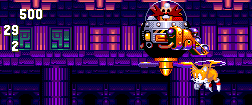
Act 1 Boss
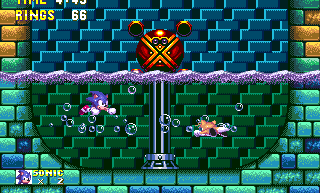
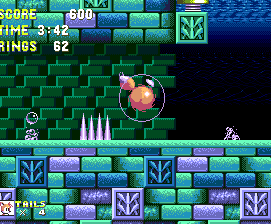
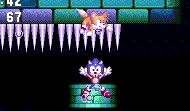
You'll find yourself in a round-bottomed bowl arena, half submerged in the water, and with a small grey column in the middle. The robot, who is a strange red orb-like thing with a slight resemblance to the Doctor himself, will appear from above and he's surrounded by four large missiles that are rapidly moving around him. He'll then dash off again, and be ready to jump up over him, because he's about to come down the left wall, across the bottom and back up the other side, and you won't want to be mowed down by him. Playing as Knuckles, you'll want to time the jump very carefully, due to his comparatively weak jumping capabilities, though Sonic and Tails should be able to dodge him more easily. He'll then repeat the process from the right this time, and then land on top of the column, and his missiles will stop moving, creating your opportunity to attack. You may not be able to get all six hits in at this time though, because he'll start rotating the column, which will cause a big whirlpool in the water for a brief time, which you'll become caught up in and won't be able to fight out of it. Finish him off afterwards, before he repeats the whole thing again. Don't let yourself drown in the water either.
View Notes(5)
Go to..
#1. Comment posted by Oobo on Wednesday, 9th February 2011, 6:51pm (GMT)
#2. Comment posted by Andrew on Monday, 16th May 2011, 9:32am (BST)
#3. Comment posted by adam on Friday, 5th August 2011, 11:22am (BST)
#4. Comment posted by Anonymous on Sunday, 18th November 2012, 1:39am (GMT)
#5. Comment posted by Anonymous on Sunday, 18th November 2012, 1:40am (GMT)
Hide Notes


On the couple of occasions that two of these long diagonal water chutes cross paths over a huge open area, Tails and Knuckles can actually fly/glide from the left hand one, over to the top of the right, cutting out some serious chunks of level. Tails should fly from the point where they intersect, while Knux is better off gliding from the start of the left one.
Immediately after flying over to that right hand chute, in the first instance, jump and fly off the bottom end of it to snag a few of these bonuses on a left hand ledge. Tails and Knuckles certainly get an easy ride in this level - Sonic got ripped off big time on this one.

There are many times where you're thrown high through the air and out of the water by these chutes. In the second case (or first, if you took the above shortcut), don't be so quick to leap out. Take some snaking black platforms to the left and you might just find this little 1-up waiting for you out of the water, on a short detour.
Similarly, in the last of these tall rooms that lead up and into a corridor toward Point #8 and the boss, if you go left instead of right or up, when hanging around the platforms underwater, another extra life can be found over here, with 10 rings. There are springs underneath each, mind.
View Notes(2)
Go to..
#1. Comment posted by Kyle on Saturday, 28th September 2013, 7:24pm (BST)
#2. Comment posted by Ratchet 0203 on Wednesday, 8th October 2014, 6:20pm (BST)
Hide Notes
Special Stage Rings
At Point #5, take some time out to explore a little while riding around on those snaking black platforms and you might spot this Special Stage alcove on the left hand wall, a little above the water. The highest platform will take you there.
In yet another alcove, the final Special Stage ring can be found just before Point #8. There are two of these column platforms moving in the shaft here, against either wall, above the corridor that leads down to Knuckles and the boss. If you get on the right hand one and jump as high as you can when it reaches its highest point, you should make it.
View Notes(0)
Go to..
No notes have been posted in response to this section.
Hide Notes
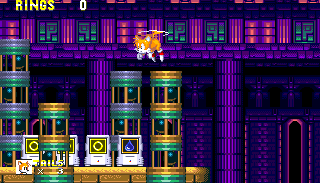
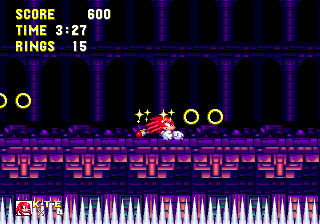
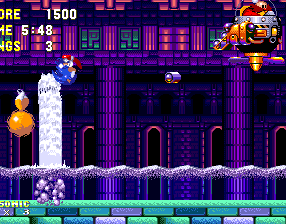
After beating the Act 1 boss, Act 2 begins by flushing you down into a small, submerged tunnel. Break down the barriers to your right with a spin dash (preferably a highly charged one) and at the end, you'll find that a huge wall to your left is beginning to rumble. It's moving slowly but surely towards you and will crush you against the walls on the right, so get moving as fast as possible! It's not going to be easy though, because to start with, you have to make spin dashes up three consecutive curved walls, two of them underwater, and if you arse anything up (easily done) you may not be able to recover quickly enough. If you'd started with a powerful spin dash through you should be able to hit the first curve and go straight to the highest one, clipping the top of the checkpoint on the way. After that, there's a corridor where you must break down some more barriers, but watch out for the spring at the end. Drop down the gaps, avoiding the vertical spring at the bottom, and use your spin dash to get up some more curves, being careful to land to the right of any spikes that might be sitting on the ledges. You can now breathe a sigh of relief as all you have to do is knock down some more barriers and the tunnel will close up and the wall will stop rumbling, allowing the awesome Act 2 tune to be heard loud and clear. The Sonic 3 & Knuckles version of this segment makes a few object placements changes, such as replacing that horizontal spring at the top with a handy 1-up (presumably because too many people were dying on this section?), after the first batch of curved walls, but it also adds a spike set below where there was none before. Just to balance things back a little bit.
View Notes(2)
Go to..
#1. Comment posted by Oobo on Wednesday, 9th February 2011, 6:53pm (GMT)
#2. Comment posted by Hyper_Sonic on Saturday, 14th May 2011, 12:51pm (BST)
Hide Notes

Point #6 can be a little tricky and intimidating, but fortunately there are a couple of handy shortcuts beforehand, the first slightly less obvious than the second. You'll come to an invincibility concealed within the wall on the left, above a bridge and then a loop over to the right. You'll notice a water chute sitting right above this loop. Tails can fly up there, and Knuckles can climb the right side of the loop. Sonic alone is not left to face the music though, what you can do is go through the loop, down the first slope of this water chute that comes out of it, then stop and start up a spin dash back to the left, facing the slope. Release, and when you get back to the top of the slope, a jump should be powerful enough to go straight up to the higher chute.
If you ignore this option, you'll head downwards instead of up, thrown through one of the high speed twirling underwater chutes, and thrown up and out of there into a large, half submerged space. There are moving black platforms in the middle, a Special Stage ring in a hidden ledge on the left wall, and two possible exits. The main one on the right wall leads you right into the hardest part of Act 2, explained in Point #6, but you can skip it completely by taking the shortcut on the ceiling of this room, in the vertical shaft with rotating column platforms on either side. When you're thrown out of the water at speed, you should be able to make it up to the bottom one of these platforms on your momentum alone, but if that's not enough, use the black, snake-like platforms below to get up there.
View Notes(0)
Go to..
No notes have been posted in response to this section.
Hide Notes
This is the first of a couple of really tricky bits in Act 2 where there are a series of vertically stacked narrow corridors, separated by thin ledges with gaps on alternate sides. You start at the bottom and have to make your way up through the gaps to the top. However, horizontal spikes have been placed on the side of each gap, and the corridors themselves are each patrolled by a column block that moves all the way left to right along it, and whose height equals that of the space of the corridor. You can very easily get crushed between one of these blocks and the wall, but when in the gap, you have to jump on top of the moving block in order to reach the next ledge. Sounds nasty? Make sure you take the advice of the previous point to avoid this particular instance.
When you start this segment you'll be on a step above the bottom corridor, with the gap in front of you, so you can get on the column block just below. A door will close behind you, so I'm afraid the only way is up now. Immediately jump to the next ledge on the right, and you'll find that you're behind the next column as it moves right. As soon it enters the gap that's above, jump up onto this block. When it moves back to the left, you can jump up to the next ledge, following behind the next column and then basically just repeat this pattern for the following two corridors above. If you wind up below a gap, and on the other side of a block as it's moving away from you, you'll have to be very careful with your jumping when it comes back. Try and get on it as soon as you can, and if your jump is too weak and you don't make it, you may find yourself crushed into the wall.
View Notes(0)
Go to..
No notes have been posted in response to this section.
Hide Notes
Not long after that first tricky segment in Point #6, you'll come across another, shorter and slightly easier one, but based on the same idea. Fortunately this also has a shortcut just before it that enables you to skip it completely, but only with the use of Tails, I'm afraid. When you arrive at this checkpoint, stand to the left of it, on the bridge. Above is a line of rings at the bottom of another long vertical shaft. Tails can fly right up there to a chute on the main route at the top. From there, you're heading left.
If there's no twin-tailed flying fox sidekick around, then you'll just have to face the music this time. See Point #6 for more general details on how this feature works if you missed it the first time. This particular one, though, begins on some steps below the first corridor. Jump onto the top step on the right when the column block is moving to the left, and wait for it to come back. You'll have to make a careful jump onto the top of it as soon as it goes past the spikes and enters the gap. If you mess up, then you can probably kiss a life goodbye. When on it, wait until it starts moving back towards the spikes and quickly jump up onto the next ledge on the left. Follow the block, jump on it when you can, then go to the next ledge on the right, which is arranged differently, with no ledge above it, just horizontal spikes on the walls above. Use this final column block to make your way to the high ledge on the left, being careful of the Jawz badniks around.
View Notes(0)
Go to..
No notes have been posted in response to this section.
Hide Notes
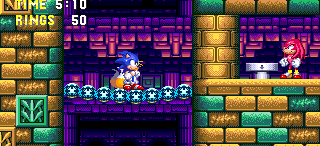
When Sonic and Tails arrive at the end of Act 2, they drop down onto a bridge in a shaft, with the corridor to the right sealed off by a large block. Knuckles appears behind the block and hits another of his magic buttons, which destroys the bridge and sends you down into the water below. Proceed forward and another propellor will appear to blast you along the corridor. Do the usual pole grabbing thing and at the end, you'll arrive in the boss arena, with the last checkpoint.
View Notes(0)
Go to..
No notes have been posted in response to this section.
Hide Notes
Playing as Knuckles, when you arrive at the place described in Point #8, your spiked fists will allow you to walk right through the block as it crumbles before you, opening up a brief path just for Knuckles before he meets the boss. After a while along this, you'll have to use your gliding expertise to get over a longer-than-usual set of spikes, then up a tall curved road, you'll find a frankly ridiculously long set of spikes along the floor. Climb up the wall on the left nice and high and glide off of it all the way along to the right. Try and get the perfect position so that you grab the gently descending lines of rings that are arranged above the spikes. At the end, you'll drop down into another set of those horrendous corridors with moving blocks inside, as in Points 6 and 7. The difference this time is that not only is there no alternative shortcut whatsoever, you also have to do it backwards, as you start from the top and actually work your way down! Avoid landing on the first column block, and instead, stand to the right of it when it's moving left. The gap is on the left side, so when it becomes open to you, try and time your drop so that you land on the next column block below. Jump off to the left of it when it's moving right and then follow it towards the gap, and then try and do the same with the next block below. It's tricky to describe, but I think if you try and follow this technique you should be alright. If you need to, you can also cling to a wall, in the safe spot opposite a set of horizontal spikes where an approaching column block can't squish you. There are only three of these corridors to make your way through, and the final checkpoint is at the bottom. Head through this last passage into Knuckles' own boss arena to go one on one with Eggrobo.
View Notes(2)
Go to..
#1. Comment posted by Andrew on Sunday, 8th May 2011, 8:05am (BST)
#2. Comment posted by Ratchet 0203 on Wednesday, 8th October 2014, 6:24pm (BST)
Hide Notes
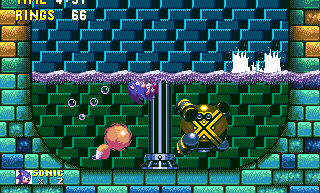
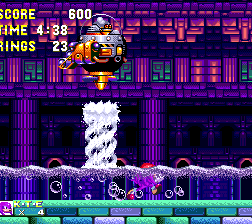
Act 2 Boss
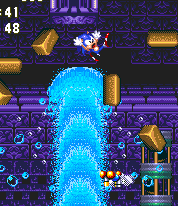
The boss arena is on a flat surface, but with a shallow pool at the bottom. There are a number of points where you can attack this boss, so if you want to make short work of him, try and squeeze in every attack you can muster. Eggman will come down from the top/middle, his eggmobile equipped with a propeller on the bottom and bomb dropper on the back. He'll slowly creep downward (hit him) and the propeller will begin spinning. It starts creating a whirlpool in the water, with a thin section of H2O twirling, following the propeller upwards as Eggman ascends back to an unreachable point. The whirlpool will try and suck you in, so keep running and jumping to avoid it. Should this happen, you'll be brought, paralysed (interestingly they've chosen to recycle the dying sprite to express this), up towards the propeller and attempts to resist pain from that will be futile. Eventually, the propeller will stop and Eggman will begin flying back and forth across the very top of the screen, and the big twirling sprout of water will slowly shrink back into the pool. However, the top of it now acts as a platform. Be quick, before it disintegrates entirely, and use it to hop up to him and land your next hit. You need to be quite quick with that, but it helps if you're fairly close to the whirlpool when the propeller stops, and also if you're already on the side that Eggman starts to move towards.
Now, as he's moving back and forth, he'll start dropping bombs into the pool. When these explode, they send a burst of water high into the air, which can actually catapult you upwards, if you jump at the right time. Leap up above it just before it explodes and you should get a good boost from it, which should be used to reach the enemy. Leap on it too early or stay standing over it on the ground and it may explode on you, possibly sending you flying obscenely high, way beyond the vertical reaches of the screen and losing valuable ring retrieval time, so you'll have to wait until you come back down. There's a certain knack to getting this bit right, as you work out which bombs would be most useful for you, and if you can get right up onto Eggman's craft, you might be able to bounce off of him repeatedly for a few hits, if you're lucky. When fighting the Eggrobo, as Knuckles, the only difference is that he doesn't actually drop down to collect the sprout of water when in the whirlpool, so you'll have to rely on the other two methods to cause damage.
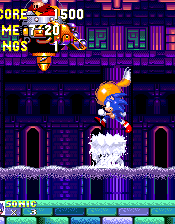
After opening the animal capsule and completing Hydrocity, the ground will start to rumble as a massive blast of water bursts out of the ground below, throwing you upwards, not just to the surface, but high into the air, and over the deadly Marble Garden...
After opening the animal capsule and completing Hydrocity, the ground will start to rumble as a massive blast of water bursts out of the ground below, throwing you upwards, not just to the surface, but high into the air, and over the deadly Marble Garden...
View Notes(5)
Go to..
#1. Comment posted by smiley225 on Tuesday, 22nd December 2009, 3:19pm (GMT)
#2. Comment posted by Mike on Sunday, 17th April 2011, 1:35am (BST)
#3. Comment posted by Dan on Saturday, 7th April 2012, 4:55pm (BST)
#4. Comment posted by angelthehedgehog on Thursday, 22nd August 2013, 2:30am (BST)
#5. Comment posted by Anonymous on Wednesday, 12th November 2014, 9:41pm (GMT)
Hide Notes

- In an odd musical glitch, the music for the Act 1 boss, when playing Sonic 3 alone, is actually the boss music for Act 2. However, if you stay in the water for long enough so that the drowning music begins, and then get out, the Act 1 Boss music for Sonic & Knuckles begins instead, which isn't even supposed to be used anywhere in Sonic 3. This also goes for the Act 2 boss as well.
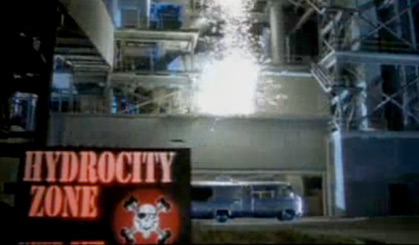
- Hydrocity Zone is the only Sonic level to be named in the music video of a British pop song. Yes, that's right. Wonderman, by Right Said Fred was a 1994 release as part of the promotion for Sonic 3 in the UK, and the video is interspersed with a few short glimpses of the game in action. The band themselves are hanging out in a dark factory area that is signposted as Hydrocity Zone, despite appearing nothing like it at all. Think I'm making it up do you? Catch all the madness here.
It came in at #55 in the charts for one week. Oh.
It came in at #55 in the charts for one week. Oh.
View Notes(3)
Go to..
#1. Comment posted by SpeedingHedgehog on Thursday, 22nd July 2010, 9:36pm (BST)
#2. Comment posted by Sonicfan32 on Saturday, 7th August 2010, 7:26pm (BST)
#3. Comment posted by Cf on Thursday, 4th November 2010, 4:36pm (GMT)
Hide Notes
Each section of this page allows users to add their own notes to fill in any missing details or supply additional research etc.
View general notes for Hydrocity Zone (18)
#1. Comment posted by Tailsspain on Tuesday, 15th December 2009, 7:13pm (GMT)
#2. Comment posted by LiQuidShade on Tuesday, 15th December 2009, 8:11pm (GMT)
#3. Comment posted by sonictails1189 on Friday, 18th December 2009, 9:21pm (GMT)
#4. Comment posted by smiley225 on Tuesday, 22nd December 2009, 3:07pm (GMT)
#5. Comment posted by Anonymous on Tuesday, 22nd December 2009, 3:14pm (GMT)
#6. Comment posted by smiley225 on Tuesday, 22nd December 2009, 3:15pm (GMT)
#7. Comment posted by Sonicfan32 on Monday, 9th August 2010, 5:30pm (BST)
#8. Comment posted by Oobo on Wednesday, 9th February 2011, 6:58pm (GMT)
#9. Comment posted by Andrew on Friday, 22nd April 2011, 4:39am (BST)
#10. Comment posted by Sonicfan32 on Tuesday, 12th July 2011, 6:43pm (BST)
#11. Comment posted by Nate on Saturday, 31st December 2011, 7:35pm (GMT)
#12. Comment posted by MetaRyan on Thursday, 5th July 2012, 11:45pm (BST)
#13. Comment posted by SonicTailsKnuckles on Tuesday, 22nd January 2013, 12:25am (GMT)
#14. Comment posted by taismo4ever on Friday, 22nd November 2013, 3:11am (GMT)
#15. Comment posted by taismo4ever on Friday, 22nd November 2013, 3:12am (GMT)
#16. Comment posted by Ratchet 0203 on Wednesday, 8th October 2014, 6:03pm (BST)
#17. Comment posted by Anonymous on Sunday, 16th August 2015, 10:51pm (BST)
#18. Comment posted by items on Monday, 23rd January 2017, 7:39am (GMT)
Hide Notes
- Origin
- Storyline
- Comments
Gameplay - Basics
- Items
- Common Objects
Stages and Story - Angel Island Zone
- Hydrocity Zone
- Marble Garden Zone
- Carnival Night Zone
- Icecap Zone
- Launch Base Zone
Other Modes - Data Select Menu
- Bonus Stage
- Special Stage
- Super Sonic
- Competition Mode
Miscellaneous - Ports and Compilation Appearances
- Sonic 3 and Michael Jackson
- Cheats
Downloads
Last Updated
Content for this page last edited:
16th December 2009
Files last uploaded for this page:
15th December 2009
16th December 2009
Files last uploaded for this page:
15th December 2009
Recent Notes
General Notes
Posted by items on 23rd January 2017
Features and Obstacles
Posted by Kyle on 3rd January 2016
General Notes
Posted by Anonymous on 16th August 2015
Act 2 Boss
Posted by Anonymous on 12th November 2014
Features and Obstacles
Posted by SonicTailsKnuckles on 31st October 2014
62 notes posted on this page in total