Tidal Tempest-Sonic the Hedgehog CD
Tidal Tempest
Sonic CD's take on the classic Labyrinth Zone, an aquatic cavern level complete with heavy use of typical underwater segments, and winding, narrow passageways loaded with steps and vertical drops. There are plenty of puzzling objects to contend with, including water currents that carry Sonic in one direction, manipulated by switches that also open many a doorway, and lots of tricky moving blocks and spikeballs. Straight paths above the water take you across the most part of the zones, with several gaps to drop down to submerged routes below, and while this is not a fast level, there are a few areas that provide easy time travel between two springs.

Game: Sonic the Hedgehog CD

Stage Number: 3

Level Division: 3 Zones

Boss: End of Zone 3

Playable Characters: Sonic

Difficulty Rating: 3

Music:
- The Japanese version has a great Present tune. Quite slow and ancient-sounding, with a melodic climax and the sounds of running and dripping water. Don't listen to it if you need a pee. The Good Future tune is quite similar, but with a kind of strange fire crackling effect throughout its duration, and the Bad Future is much more mechanised, active and deadly, and doesn't really have much in common with the other two. The Past mix goes a bit more tribal with its drums, and is a slower, more plodding piece of music.
- The US soundtrack doesn't do too bad for itself this time. The Present theme has a similar effect to its Japanese equivalent, but less of the ancient theme and melodic climax, and more snazzy vocal doo's and daa's. The Good Future tune is a faster, more upbeat version, while predictably, the Bad Future's is much slower and, well, downbeat.

Typical Length:

Zone 1: 50 seconds - 1 minute, 30 seconds
Zone 2: 1 - 2 minutes
Zone 3: 1 minute, 15 seconds - 1 minute, 45 seconds

Available Items:

Rings Checkpoints Past Posts Future Posts 10 Ring Item Box Shield Item Box Invincibility Item Box Speed-Up Item Box Extra Life Item Box
Zone 1
Present 106 3 5 5 17 4 1 0 0
Past 106 0 0 5 17 2 0 0 1
Good Future 106 0 5 0 18 2 1 0 1
Bad Future 106 0 5 0 18 2 1 0 1
Zone 2
Present 111 2 5 5 11 4 1 0 0
Past 111 0 0 5 11 2 0 0 1
Good Future 111 0 5 0 14 2 1 0 1
Bad Future 111 0 5 0 14 2 1 0 1
Zone 3
Good Future 30 0 0 0 7 2 1 0 1
Bad Future 30 0 0 0 7 2 1 0 1
Top Tips
- Sonic cannot survive more than 30 seconds without air when underwater, and a countdown from 5 to 0 will appear on the screen during the last 10 seconds. In Sonic CD, this countdown is not accompanied by a scary drowning piece of music, so it might be easier to miss it or to not take it as seriously as in other games. Whenever you see a bubble cluster on the ground, it's a good idea to stop and refill your supply by touching the large bubbles they produce. Some submerged segments can last a long time, so you have to think strategically about your air. They take a few seconds to start producing them too, so if you arrive at one when the countdown is at 2 or something, you might still be unlucky. Don't wait for the countdown to start, get bubbles whenever you can!
Look for bubble clusters on the ground to produce large bubbles of air for you, before you drown!
- The easiest and quickest ways through the zones tend to be above water anyway. Both Zone 1 and 2 have a long, straight path running above the water at the top of the map, and these can also be used for time travel. To race through the zones in time attack, I'd highly recommend finding your way up there and staying there, rather than dropping down the many gaps in the path. You don't really need to delve far into the water to find the machines either.
- If you're stuck in a room or the end of a passage with no visible way to get up and out, there is quite often a vertical spring hidden in the ground on the far (usually right) side, which will catapult you upwards. That usually does the trick, so when in doubt, just wander around a bit.
Each section of this page allows users to add their own notes to fill in any missing details or supply additional research etc.
View general notes for Tidal Tempest (3)
#1. Comment posted by Andrew on Sunday, 29th May 2011, 3:53am (UTC)
At point 3, does the 106 rings count in the "shower of rings" outcome?
#2. Comment posted by Anonymous on Tuesday, 10th July 2012, 8:02pm (UTC)
In the PC version, it uses the PC hardware to color the water. The Gamecube doesn't have whatever it is that the game calls upon to color it, so the water remains uncolored.
#3. Comment posted by Anonymous on Thursday, 10th January 2013, 5:58pm (UTC)
As you said about the crab enemies, yes, the spikes DO in fact harm Sonic, however, they're quite easy to dodge, since they're so small. You can still get hit by them if you're not careful, though.
Hide Notes
Appearance
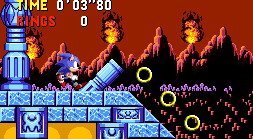
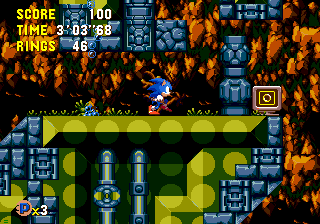
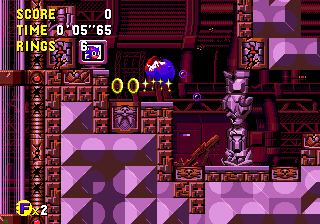
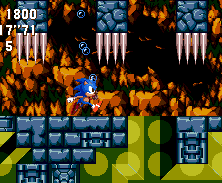
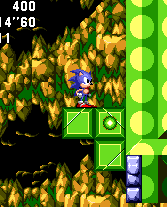
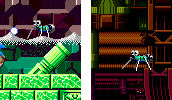
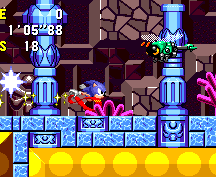
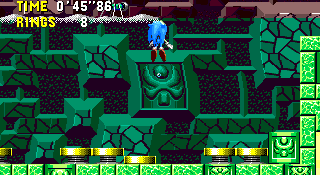
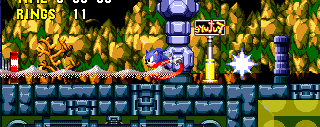
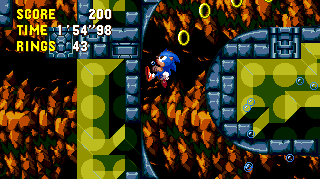
This water cavern level is clearly modelled on Sonic 1's Labyrinth Zone, but that's ok, because it brings plenty of original visual content too. In the Present, you'll start off in a small external area outside, before plunging into the rocky passageways that occupy the rest of the stage. This brief view of the outside, exclusive to the Present, is a rather dark affair, featuring rocky volcanoes that periodically burst with fire and magma with uncanny synchronisation, a spectacle that briefly lights up the otherwise dark night sky. The rectangular peaks of red and blue rocks spread for miles, below it.
The outer location of the level is only seen briefly at the very start of the Present, but depicts a harsh, volatile world with volcanoes and gloomy, rocky terrain.
A solid wall represents the background, while colourful yellow polka dot stone and blue cracked bricks are your foreground when above water.
The water gives everything a bright green makeover when you delve into the depths, however.
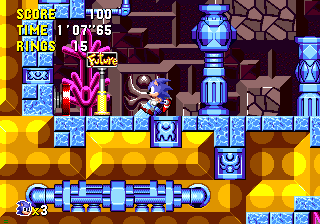
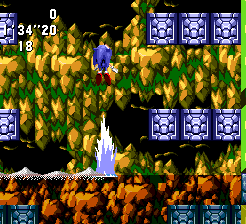
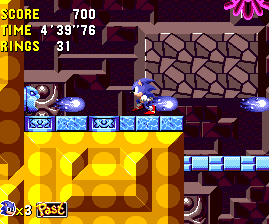
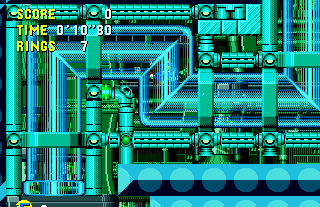
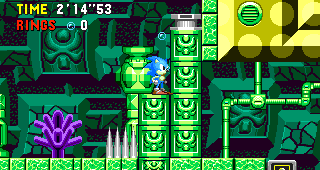
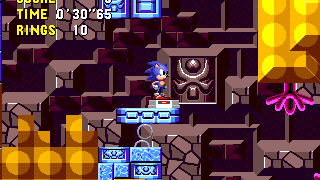
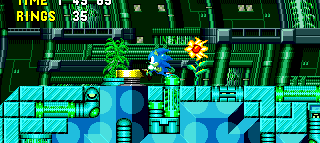
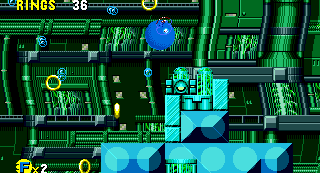
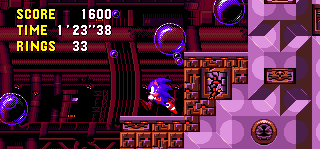
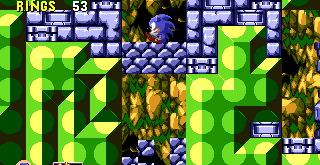
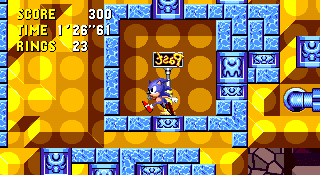
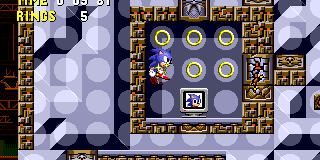
Meanwhile, the background for the internal caves that occupy the majority of the stage relies, much like Labyrinth, on a basic wall of large stone blocks, some depicting patterns, others are covered in a network of large cracks. They are all either intruding or extruding from the wall, which is a very dull brown-ish red sort of colour that becomes green and constantly ripples when you view it from underwater. As for the foreground on which the paths are cut into, it's mostly a mix of odd orange and yellow polka dot blocks that extrude in thin, Tetris-like strips, and light blue cracked bricks and patterned blocks that largely cover the paths that Sonic can walk on. There are occasional light blue pipes stretching across the foreground and out of ceilings, and various stone pillars and structures standing along the paths, mostly decayed and some slanted, alongside strange purple cave-dwelling plant-life on both the floors and ceilings.
The Past - background has gone much more natural with a bit of a traditional cave-like approach, though the foreground's change is mostly one of colour.
A rather murky overtone while underwater.
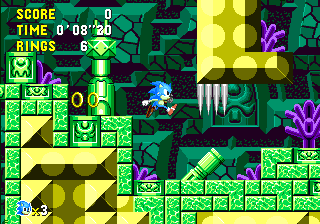
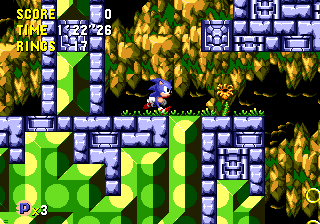
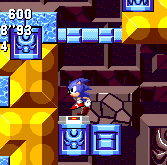
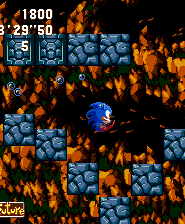
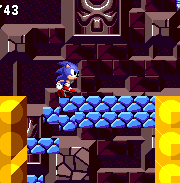
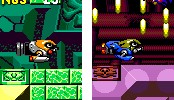
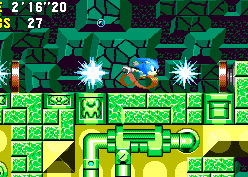
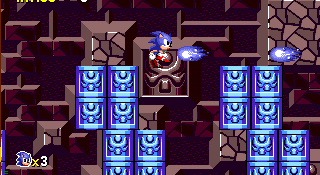
Things are a bit less man-made in the Past, as you would assume, and what will one day be a wall of huge patterned bricks is now just more of a collection of spiky cave rocks in the background. They're light brown and green, with large gaping black holes appearing quite regularly. The foreground has changed from orange and yellow polka dot to lime green and yellow polka dot, while the bricks along the surfaces of the paths are grey and quite old-looking, and similar tall pillars stand along the paths. Replacing the weird plant life from the Present are small, withered brown plants with thin vines. You can also find occasional patches of stubby grass and smaller plant-life along floors and ceilings, and despite this being the Past, there are still a few questionable pipes sitting around, for some reason. The water here seems to give everything a darker tint than normal.
The Good Future is a rather pretty eco-friendly factory that appears to be sustaining the lives of the plantlife by keeping them in glass containers, all over the place.
The underwater colouration is a nice light blue/turquoise tint.
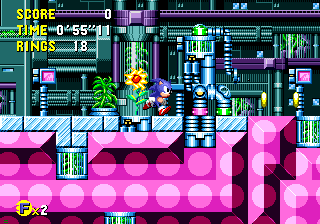
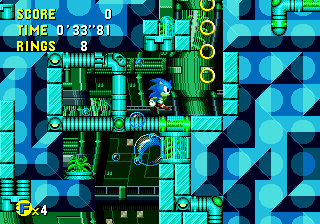
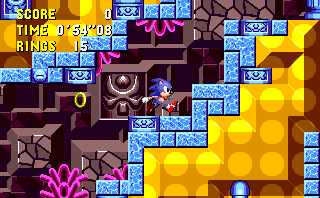
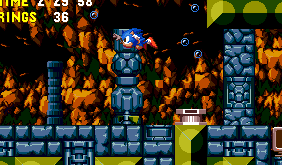
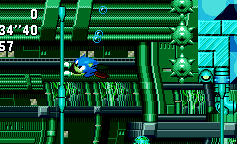
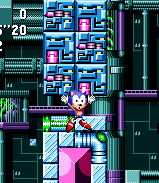
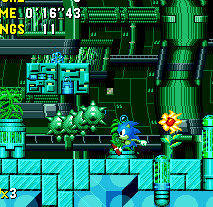
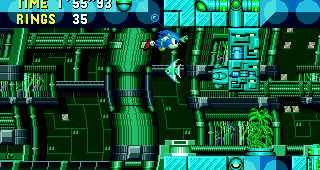
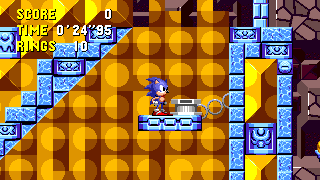
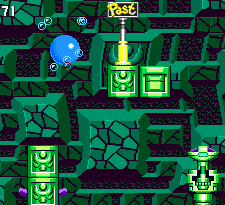
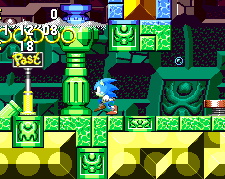
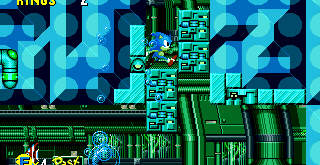
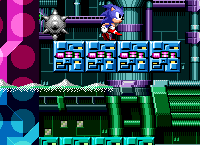
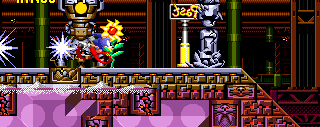
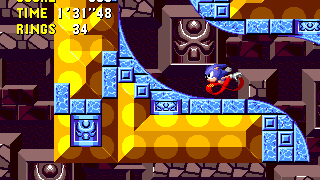
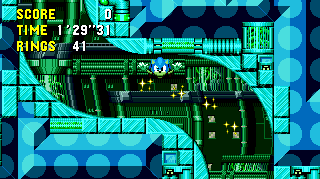
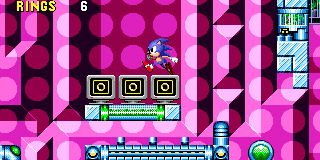
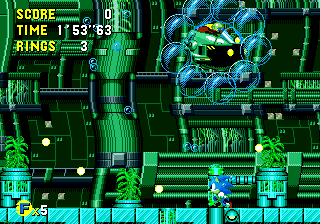
The Good Future is very much more mechanised, but a good kind of mechanised, obviously. It's kind of a healthy containment area for plants and the water, and the background wall, dark green and purple, is now filled with containment tubes for the plants, and pipes and other little technical paraphernalia run throughout it. The polka dot foreground is now pink/megenta-ish (blue when viewed underwater), with shiny light blue panels to walk around on across the surfaces, and formerly rocky patterned blocks are now made up of hi-tech gubbins. Technical piping and meters act as typical pathway decoration, and plants, both inside and outside small glass containers pop up all over the place, even in small platform blocks that you can stand on.
The dystopian take on Tidal Tempest presents an old, grey rusty factory.
All the surrounding pillars and stones are now corroded and falling apart.
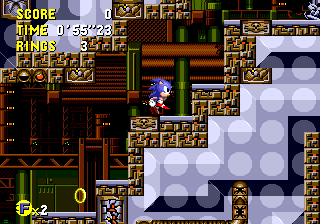
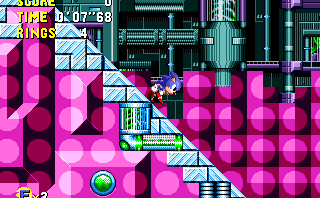
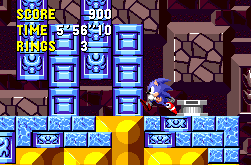
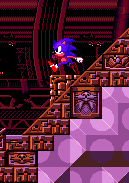
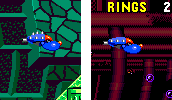
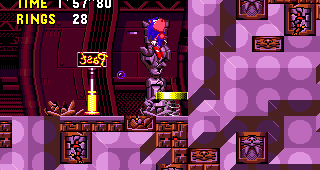
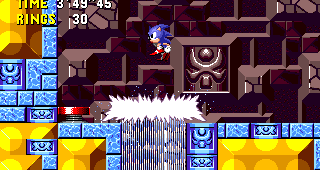
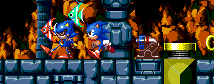
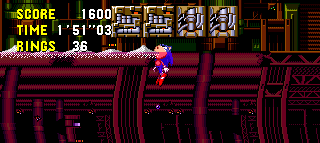
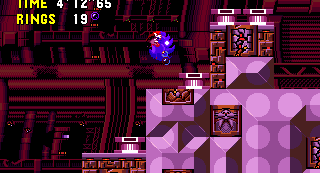
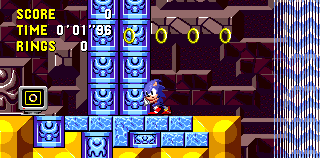
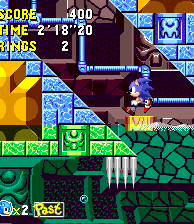
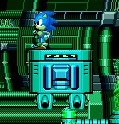
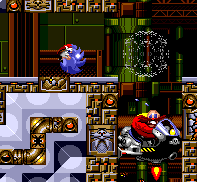
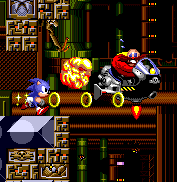
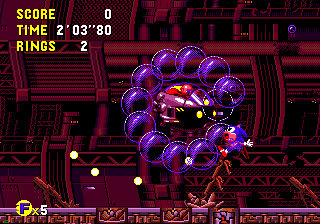
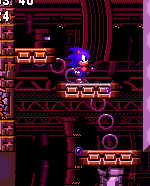
The Bad Future meanwhile is essentially a darker and much more decrepit version of the good alternative. The mechanical background wall has no trace of healthy plant containers and is more of a mass of orange, black and green piping and panels, some old and broken, with a few small, static lights. The polka dot patterned foreground has settled on a plain grey colour now, and bricks along the floors are a rusty brown, with mechanised gubbins and lights, and there's usually a thin metal panel along the absolute surface of the floors. Blocks sporting Eggman's face also appear quite regularly. Pillars are now mechanical and in a condition that's far from new, pipes have become extremely rusty, and the last few plants hang dead from the ceilings and floors, their parts barely clinging together. The water is also much darker and murkier, and gives the level a dark purple tint when under.
#1. Comment posted by David on Monday, 7th February 2011, 4:15am (UTC)
Tidal Tempest Time Names
Don't Copy
Past Ancient Adeaqet Present Ancient Abyss Bad Future Toxicwater Tank Good Future Tidalwave Tank Delete If Not Wanted
#2. Comment posted by Ratchet 0203 on Monday, 13th October 2014, 9:00pm (UTC)
Okay... that was somewhat helpful, even though it wasn't making any sense.
Hide Notes
Structure
Tidal Tempest employs a real maze structure if ever I did see one. The paths operate much like Labyrinth Zone, so don't expect speedy, looping roads or curved walls, and do expect flat pathways, plenty of steps and separated block platforms to climb up and down vertical passages, and occasional slopes that are always at the same angle, and awkward to climb back up. All this takes place inside small, slow-moving corridors and chambers, most of which are covered by water, making them even slower. While Labyrinth Zone had an individual, enclosed path meandering its way through a large chunk of ground with little deviations, Tidal Tempest is much better at using its space efficiently, and crams multiple pathways across the whole map, most of which primarily lead right, with an upper path and a lower path running at the same time in most places. Common for both Zone 1 and 2, the upper path is usually very straight and simple, and spends much of its time above the water level, though it has plenty of gaps in the path to drop down below. The Lower path engages you with a variety of obstacles underwater, where you'll constantly have to keep an eye out for more oxygen to keep you going (more on that in a mo, if you're a bit rusty with your water stages). Meanwhile, a series of vertical passages link the two together in the middle, so you can switch between each route at certain places, using a range of objects and structural designs. So obviously, the ideal solution is to stick to the top routes, and you don't even have to delve too far into those lower regions to find the hidden machines in the Past, or even opportunities for time travel either.
Fairly typical, labyrinthian structures and pathways of jagged corridors creeping up and across the terrain, with many steps to traverse.
There are steep slopes now and then, always at this angle, which make them just about climbable, if a bit slowly. Use elevator blocks when available.
You must know the drill by now. Large air bubbles = 30 seconds of air. Suck em up from smaller pockets of air on the ground.
A drowning Sonic. Avoid.
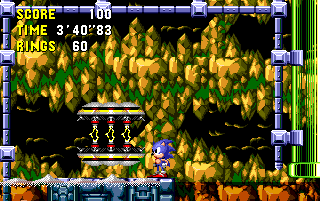
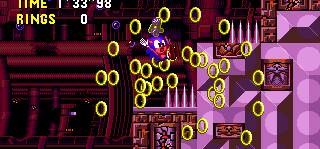
The water level rises and falls at various points, but largely occupies most of the map, so inevitably, you will have to dip your toe in now and then, where you'll notice that Sonic's actions become much slower as he wanders around down there. When you drop in, you only get 30 seconds worth of air before you run out, and during the last 10 seconds, an on-screen countdown going from 5 to 0 will alert you that you're running out of air and need to get your ass in gear. If you reach the end of the countdown, Sonic will drown and you'll lose a life. To prevent this, either get out of the water or locate a small cluster of bubbles on the floor. Make contact with the big bubbles that they produce to suck up another 30 seconds worth of air. Sonic is quite prone to being caught up in water currents which will propel him uncontrollably in various directions, either around a large chamber so that you can access a high ledge, or through a long winding passageway, etc. Long, large glass tubes can also offer a transportation method from A to B, and there are occasional hidden rooms and routes inside the ground containing hidden items and soforth. The Past versions of both zones tend to be able to offer better ability to backtrack across the stage, while other time zones may not allow you to re-visit previous areas due to high ledges or passageways that close behind you as you leave them. This is particularly true of the Present, and means you'll only get a limited chance to take advantage of the available time travel posts.
No notes have been posted in response to this section.
Hide Notes
Obstacles and Features
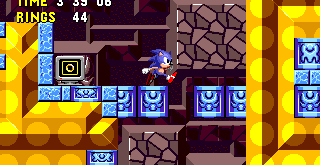
Tidal Tempest has a huge range of different objects to encounter, some of them just one-offs and several can only be found in a particular time zone. They're quite difficult to organise into a few paragraphs, so forgive me if I miss anything or skip some details. First and foremost, grey switches that are triggered by standing on them are an extremely common, puzzle-oriented object that have a variety of uses. They typically open nearby doorways, either small horizontal or vertical hatches in passageways, or thick blockades that are made up of a number of long vertical doors (those usually lead to hidden power-ups, often in hidden rooms in the wall). Sometimes you may need to stay standing on the switch in order to get past the obstacle, such as in Zone 1 Present where a switch is positioned on a chained platform that swings around 360 degrees, going through a door that only opens when you're standing on the switch. Further underwater, a switch is placed on a pair of long thin platforms that only rise up to the upper ledge when you're standing on it.
Hit switches to open thin horizontal or vertical strips, acting as doors that invariably close behind you again once you go through.
Heavily blocked passageways or hidden tunnels in walls (leading to items, more often than not) can be opened up with a switch right in front of it.
Switches also trigger small propellers to start up when underwater, which creates a strong current along a particular, invisible route around a large room or through a corridor.
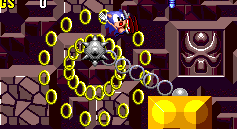
The current of the water in some submerged sections is also controlled by switches. Nearby, small propellers in the floor or walls will activate, creating an invisible force in the water that can carry Sonic along a particular direction when he jumps into it. This is commonly a one-way route through a series of corridors, or it may take you in a circular or zigzag fashion through a large room. You usually have little control while this is happening, but sometimes you can break free of the current using the left and right buttons, perhaps to get off at a ledge. When being thrown through a corridor, it's usually possible to alter your vertical co-ordinates using the up and down buttons, but you can't stop until the current's had enough with you. Sometimes you may find two switches either end of the path of the current, each one changing its direction so that the current will take you to the other end. While we're on the subject of water, I hope I can assume that you know by now that Sonic can only last 30 seconds without air down there. To refresh your supply, look for the small clusters of bubbles that sit on the ground in submerged sections. After a few seconds of waiting (if you have them to spare that is), it'll start producing large bubbles that you can suck up for another 30 second refill.
Each time zone has its own standard square block, used in various moving formations or clusters.
Blocks are collected together in clusters to form all varieties of moving platforms and larger blocks.
Statue faces on the sides of walls continually force you, rather convincingly might I add, away from them with a constant stream of water jets.
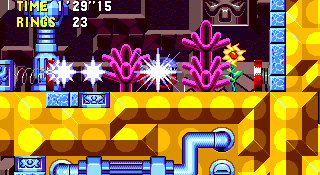
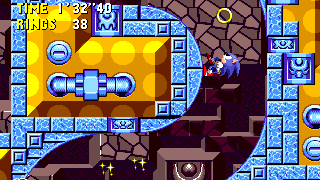
Moving blocks and platforms come in all shapes and sizes across the time zones. Some large and square, others thin and horizontal, but there tends to be several of them in one place, moving in a particular pattern, so you may need to try and study it first to see where you can best make your move. They're often solid so they will be able to crush you into a wall or another block. Watch out for statue faces on the walls, near the floor. Similar idea to those in Labyrinth Zone, but these shoot a constant stream of water blasts which aren't directly harmful, but will force you in their direction along the ground if you make contact, and this can often mean falling down pits and vertical passages. Watch out for the odd small spikeball on a long chain, swinging all the way round, and other spikeballs will just sit there in the air completely motionless, like mines waiting for you to come along and get hit. These may often appear when a water current is forcing you along a submerged corridor, though fortunately there may be a pole right in front of them that Sonic will automatically grab onto. As is commonplace in these water levels, you can move Sonic up and down the pole with the up and down buttons to get out of alignment with the spikeballs, and then press a jump button to release him and evade them. Leave him hanging on there too long and he'll let go by himself after a few seconds.
360 degree chained spikeball. Simple, but a classic, especially for this type of level.
When spinning through a water current, Sonic latches on to any poles that come his way. Move him up or down them and release with a jump button, avoiding the mines.
Collapsing ground is pretty easy to spot. You often need to drop down through it anyway to progress.
Slowly falling pillars come down when you pass by underneath and can crush. May also move up and down repeatedly.
Ack! Past and Futures use a stack of blocks as very tall moving crushers. If you're not careful, you'll be under its path without realising.
Some slopes in the lower, submerged regions of the zones feature a small elevator block that carries you along when you stand on it.
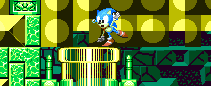
Weak ground is identified by a thin, cracked section of rock that will collapse when you stand on it, but this is often necessary to progress either downwards or upwards through vertical passageways and shafts. Be aware of long, thin hanging pillars with sets of spikes pointing downwards just above the floor. These will fall in a rather stop-starty fashion as you pass by and are easily avoided, but they can instantly crush you should you be foolish enough to get caught underneath. Same for large vertical crushers that appear in the Past and Futures, which move up and down fluidly and can catch you off-guard due to the height of the gap that they can create before coming down. Underwater, you can progress up steep slopes using a small platform block that acts as an elevator. Starting at the bottom of the slope, it'll begin rising as soon as you step on it, but won't go back for the return journey afterwards, so try and stay on it. If you fall back down the slope, you'll just have to try and jump back up it as best you can. At one point in Zone 2 Present, the water level will rise as you step on a small wooden platform that floats on the surface. You can control the direction of this platform by running left or right, which you'll have to use to navigate a zigzagging corridor. see Point #7 for details. In Zone 1, there are two long transportation tubes, one at the start of the zone leading to a brief alternate route, and the other surrounding the machine towards the end. This delivers the same affect as the regular water current features, and will carry you along it when you jump in, only delivering one way.
Transport tubes - much the same effect as the water currents and take you from A to B when you jump in.
These L-shaped platforms in the Past flick around when you jump off of them.
Groups of spikeballs float around in the Futures, circling round an area.
Chained platforms circle an area, going in behind the foreground, which will force you off of them.
Many of these more diverse objects are only found in the Present, while the other time zones have a few small tricks of their very own. One feature the Past has that other time zones don't are small L-shaped platforms made up of three blocks. There will always be two blocks aligned vertically in the middle, but the third block typically alternates between the top right and top left sides of the the pair whenever you stand on it, so it's easy to fall off. You can stand on the top middle block without anything changing though. Other versions of this object basically have an L shape that can rotate all the way around when you step on the block that's sticking out of the side. The Good and Bad Futures have groups of three, chained platforms moving quickly around a circular path. These often go through walls, so you'll need to jump off to a ledge quickly or get pushed off, and groups of spikeballs are also known to float around a similar circular or oval-shaped invisible circuit. See Point #8 for a one-off platform block that constantly descends until you step on it, where it'll take you upwards, near the end of Zone 2.
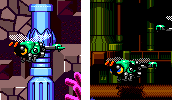
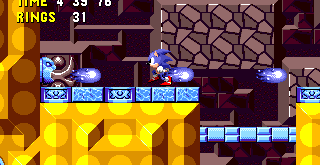
Enemies include both underwater and.. overwater attackers. Large green dragonfly robots hover around in the upper regions of the level, above water, and just buzz back and forth over a set area, with the older ones buzzing a little slower, with much less bounce to their hovering. The blue crab-like enemies that jump out of waterfalls in Palmtree Panic make an encore appearance here, only with a completely different sprite that sees them swimming around underwater in profile. When they lock eyes on you, they release several really really tiny spikes from their back that fly out all around them, but I'm not convinced that these teeny spikes hurt you or have any effect on you whatsoever, so it's a rather pointless action on their part. In addition to that however, they also charge towards you rather quickly, which is much more effective, and the damaged ones have no spikes, so they don't even bother to attempt either attack. On the surface of the water are small thin green insect bots that glide across it, and occasionally shoot out small light blue projectiles straight ahead, which the damaged ones are predictably incapable of doing. Rather ugly crayfish robots hang around near the floors of submerged routes. When they see you, they'll dive in your direction in a huge leap, while the much more damaged-looking ones at least make an effort, but their lunge is significantly less impressive. The flowers these enemies produce feature yellow, wavy petals, a zig-zagging green stem and red stigma.
Dragonfly enemies, new and old.
Crab enemies, new and old.
Insect enemies, new and old.
Crayfish enemies, new and old.
No notes have been posted in response to this section.
Hide Notes
Zone 1
Zone 1 Present Map (PNG format)
Zone 1 Past Map (PNG format)
Zone 1 Good Future Map (PNG format)
Zone 1 Bad Future Map (PNG format)
No way out? Always look for hidden springs just under the floor. They're normally against the right hand wall.
In the Futures, a large submerged room features a winding water current whose direction is toggled back and forth with a switch either end.
This is an odd one. Stand on the switch to make this whole structure rise up near the top of the room. In theory you should then be able to pass underneath into a hidden room with 20 rings, though it comes down as soon as you step off, and the slow water movements plus those slotting spikes prove it an impossible task - or at least a very very difficult one. Any other ideas?
At the end, a burst of water throws you upwards from below. If you're not ready to leave yet, take the spring.
#1. Comment posted by Ajavalo on Saturday, 23rd May 2009, 11:49am (UTC)
The "odd area" with that switch on a rising platform is odd, indeed, and the room to the right is completely impossible to access. I've confirmed it: the platform falls too fast!
#2. Comment posted by DigitalDuck on Tuesday, 7th December 2010, 2:56pm (UTC)
The room to the right of the "odd area" with that switch on a rising platform is, in fact, accessible. The trick is to run off the switch BEFORE it gets to the top - the platform follows underwater momentum and gravity physics, and thus it must first slow its ascent. This, along with some very tricky timing with the spikes, gives you access to the area behind it.

It's not worth it, though; just two ring boxes and a red spring back up to the main path.
Hide Notes
Point #1
At the start of Zone 1, you'll plunge into the water from the outside, and as you fall down the slope, you can move to the far left to take the sub-route through the tube, which will carry you to a lower section. If you fall towards the right, you'll take the regular route, and in the Present, you won't be able to return upwards, to the tube entrance.
At the start of the zone, you're given a choice - down the tube, or to the right.
Still in the Present, if you took the non-tube route, you'll arrive at this somewhat puzzling bit above water. A platform will swing 360 degrees around a chain, going through a tall, thin piece of ground which is in the middle, and a closed door at the top. On the platform is a button that opens the door, but only when you're standing on it, and it'll close again when you step off. The platform swings clockwise, so you have to leap onboard, and remain standing on the button as it passes through the doorway, in order to get to the other side. It's perhaps more puzzling if you took the tube sub-route, as the two meet at the bottom of a narrow vertical drop that's just on the other side of this area. For some reason, at the bottom of it is a spring that will propel you back up to the right side of this swinging platform bit, but because the platform is going clockwise, there's no way you can go back through because of the wall. The spring is placed in such a position that you're likely to leap on it when you're coming up from the tube route, but it's not the correct way. Just carry on right, next to the spring instead. In the other time zones, there's no swinging platform or door here, but beware of a giant vertical crusher instead, in the Futures.
This platform swings round and round, through a doorway above that will only open while you're stood on that switch..
..Simple enough. Perhaps more complex if you've accidentally come up from the other direction and are wondering what's going on, as the platform swings clockwise, and there's no way backwards through it.
No notes have been posted in response to this section.
Hide Notes
Time Travelling Tips
The first Past post is on the route starting at the transport tubing in Point #1. Use the falling pillar as a leg up to this platform. A strong current is to the right, which will pull you away from it.
Go to the long, top path across the zone and drop down the first gap right next to the checkpoint for this one. The springs can send you right back to that path for easy time travel.
As this isn't a fast level, there aren't exactly a whole load of options for time travelling, but those that are available aren't too difficult to utilise, and for the Past and Present at least, there's a fool-proof method. The hard part for the Present however, is that although there are an abundance of Future Posts, Past ones (which, lets face it, are far more crucial) are a bit rarer. Once you reach the last third or so of the zone, with the large tube curling in a big open, half submerged room, backtracking to earlier points becomes impossible as far as I can see, making all but one Past post inaccessible. So when in the Present, it's best to find a Past signpost in the first half of the zone, for later use. The first one is available if you take the tube sub-route at the start, as mentioned in Point #1. You'll find a Past signpost on an upper platform in the area it takes you to, after you use a falling spiked pillar as a stepping stone up, but don't go to the area to the right until you've got it, as a water current will carry you away. Another two are available when you reach the highest path along the top of the zone. This path runs straight across, but has several gaps in the floor where you can fall down into submerged routes. If you drop down the second gap from the far left (the first being the one you used to reach this area, coming up from below), you'll find a Past post at the bottom on the left, and another on the path just below it, in case you missed it. A fourth post can be found at the bottom of the second drop from the far right side of this long run. If all else fails and you end up along the furthest regions of the zone without the power of time travel, there's a top secret Past post in a hidden tunnel in the bottom right hand corner of the map, just at the pinnacle of a slope with an elevator.
This secret post can be found in the very bottom right corner of the zone, in a hidden passage just at the top of a slope with an elevator. There are platforms to the left and the end of the zone is just a quick hop to the top.
The first time travel opportunity, for all timezones, is the long path stretching right across the top of most of the zone. Just jump the gaps and keep your speed up.
Slightly easier. Find these two springs to the right of the curling tube/machine area, near the end. Past and Present only.
There are two methods I recommend for warping when in the Present. If you got the first Past post I mentioned, then you can utilise the long path across the top of the zone. Starting from the far left, if you run along this path at top speed, leaping over the gaps in the floor without stopping, you should be able to warp, and there is a Future post at the start of it if you want that instead. There are dragonfly badniks along the way so you may need to take a slow trip across first to eliminate them, and then head back to start the run, but I think they tend to stay just above you anyway. An easier method can be found to the right of the large tube that curls in the big open area towards the end. Two horizontal red springs are facing each other on the ground, so you can very easily just zip back and forth between them without even touching the controls once you get going. In order to get here when underwater, follow a vertical line of rings leading upwards, just before the last checkpoint. This will take you into the tube, which will deliver you to the springs.
Despite some significant object changes, the Past offers much of the same opportunities regarding these two methods if you want to warp back to the Present, but with the added bonus of more backtrack-ability. Springs are included at the bottom of drops and you can pretty much get back to any place from anywhere else, so finding Future posts becomes an easier task. They're mostly located in various places underwater. Warping is a bit trickier in the Good and Bad Futures because there are no horizontal springs in the area to the right of the large curling tube, meaning that your only decent option is to head towards that top path across the middle of the zone, and run along it. Fortunately the Futures provide better opportunity for backtracking than the Present, too.
#1. Comment posted by tjmachado on Friday, 24th June 2011, 12:29pm (UTC)
Here's a suggestion for getting the machine: Get the secret past post at the end, let the water current take you up. Then use the red spring next to it and jump over the gap, dodging the spikeball. Then, fall to the left and you should be near the set of back-and-forth springs. Use them to go to the past. Then go left, jump up and out onto the platform in the curve of the tube to destroy the machine! If you want to actually get to the good future in this zone, keep reading: After that, go to the right of the back-and-forth springs and there's a yellow spring hidden in the ground on the top step. Use that to go up and grab the future post. Then fall back down and use the springs to travel back to the present. Once in the present, go left and down the slope to ground level. There should be a bubble and a future post near the edge. Get the bubble if you need it, and grab the future post and go right. Enter the tube and you should end up near the springs use them one more time... and viola! you're in the good future!
#2. Comment posted by Anonymous on Friday, 11th July 2014, 9:02am (UTC)
It is actually possible (but difficult) to backtrack from the large tube area in the Present. Go to the small ramp immediately to the left of the tube, and get Sonic to stand still, facing left, on it (you may have to fidget a bit to do that). Then charge a peel-out to the left and jump immediately before reaching the horizontal ground. If you time it right, you will gain enough momentum to reach the ledge to the left of the pit, giving you access to the rest of the level. If you fail, you will probably bump into the ceiling. Usually takes me a few tries to get right.
Hide Notes
Metal Sonic Hologram Location
In the Past, go to the long straight path along the top, and drop down the second available gap from the left, which is on a diagonal slope. Take the following submerged path on the left, and at the end of this, drop all the way down to the bottom of the large room. You'll find the hologram on the floor next to a spring. In this level, the free animals consist only of nifty tropical fish.
In the Past, from the long top route, drop down to the depths as far left as you can go to happen across your Metal Sonic hologram.
No notes have been posted in response to this section.
Hide Notes
Machine Location
Machine Location
The machine is found near the end, surrounded by a curling transportation tube.
The machine is an easy one this time. You'll find it on a platform surrounded by the tube that curls around in the large room towards the end of the zone, on the upper route. It's left unguarded by badniks, and you can get to it on the right side, near the tube's exit.
No notes have been posted in response to this section.
Hide Notes
Point #2
In the Futures, this spring, just next to where the machine was in the Past, is your only quick way out of the now very deep water..
..Problem is, the spring sends you right up to the underside of this platform. The water levels bobs up and down there, so you might be lucky enough to snag some air, but to get out completely, aim left a bit while springing.
Getting out of the water in the large room with the tube can be a little bit of a problem in the Good and Bad Future as the water level is much higher now, so that it completely covers the tube. Unless you want to delve into the lower route, the only spring to the surface now is to the right of the tube's exit, and using that sends you directly towards the underside of a platform that sits on the surface of the water above, and blocks your exit. This can be frustrating if you happen to have a countdown going and need some air desperately. You can avoid the platform by pressing left while you're springing upwards.
No notes have been posted in response to this section.
Hide Notes
Point #3
Toward the bottom right of the zone, the Future gives you this set of six buttons. Press any one of them and all will disappear, leading to one of four possible outcomes, chosen at random..
One possibility is that it will start raining rings from above..
Sticking with the Good and Bad Futures, it's only in these time zones that you'll come across this unusual series of "guess the outcome" switches. They're located on the lower, submerged passages below the large open room near the end, and four of them are each seated on different steps leading upwards, with two additional ones at the top. When you press any switch, all six will instantly disappear, and one of four different things will happen; All of the switches except the one you pressed will be replaced by one or two large air bubbles that float up from the ground, or, a series of slotting spikes will emerge instead. More rarely, you'll get 1000 points from all of the other five switches, or lots of rings will begin raining down on the area from above, possibly causing some slowdown. Bubbles seem to be the most common one, but the outcome is decided completely at random when you press any of the switches. Very unusual.
Quite common is for all the switches other than the one you pressed to be replaced by a large air bubble that floats upwards..
..Or they may just be replaced by slotting spikes!
No notes have been posted in response to this section.
Hide Notes
Zone 2
Zone 2 Present Map (PNG format)
Zone 2 Past Map (PNG format)
Zone 2 Good Future Map (PNG format)
Zone 2 Bad Future Map (PNG format)
It's not actually that easy to get crushed between these moving blocks through this gap, but it certainly seems a bit threatening nonetheless.
This particular statue head can be annoying as hell, as you're at the start of the long pathway across the top of the zone and if you're trying to start a run up, this constant stream will get in the way. Make sure you start well away from it.
Near the end in the Past, you can get out of the water by hopping up this series of collapsing platforms.
..The Futures meanwhile offer you four moving blocks up and down the shaft. Just switch between them to ascend or descend, but watch out at the bottom, as they reach all the way to the floor and can crush if you're not careful.
No notes have been posted in response to this section.
Hide Notes
Point #4
When Zone 2 kicks off, you'll find yourself being pushed to the right by a moving wall in the corridor you're standing in. This will force you into a never-ending vertical drop down a wide shaft, with a waterfall tumbling down in front of you. This is another one of those places in Mega Drive Sonic games where a part of the level loops for infinity, so that when you fall to the bottom of the level map, you'll instantly reappear directly back at the top, without even realising it. This long shaft goes straight down the zone from top to bottom, and there are platforms along the way that are somewhat hidden from view by the waterfall, but it's fairly easy to find your way onto one sooner or later. The first platforms from where you begin to fall are located right in the middle of the shaft, and lead only to a Future post and items, in an alcove in the right wall. Keep falling and some platforms on the left will allow you to leap toward the start of the main route on the right. Alternatively you can drop again to some platforms below on the right, which lead straight into an alternate sub-route which, although slower and submerged, probably has less of a chance of you losing a life, as I will illustrate in the next point. In the Futures, platforms are made up of fewer blocks, so they can be significantly harder to land on, and in the Past, they are replaced by those turning L-shaped platforms.
At the start of Zone 2, Sonic is slowly forced off of his perch by a large moving column.
You'll tumble down forever and ever until you can land on a platform behind the waterfall, which lead to one of two possible routes into the stage, on the right hand side.
#1. Comment posted by Metropolisishard on Sunday, 11th December 2011, 8:52am (UTC)
How do you get the 10 rings, then?
#2. Comment posted by vmk89 on Sunday, 8th January 2012, 1:08am (UTC)
You can only get in the future maps.
#3. Comment posted by david on Thursday, 5th July 2012, 12:49pm (UTC)
and past do a spindash when you are exactly close to the rocks a the begining
Hide Notes
Point #5
If you took the main route into the Zone, described in the previous point, you'll find yourself dropping into a large room with precarious crushing hazards. In the Present, a stream of water blasts from a statue face on the left will force you down into the large room, which contains two rows of large square blocks that move horizontally in opposing directions, coming out of the wall continuously. The water level will drop to a point below them, but the floor is covered with springs with only a couple of gaps between them, and these will be happy to throw you back up toward the blocks, where you can get crushed into the wall or between the corners of blocks moving against each other. It's best to try and land in one of those gaps, or to the very far left side, then leap over the springs to the exit on the bottom right of the room. Also beware of a lone badnik that skims across the water surface, who can also be annoying, and when springing back up, try and aim away from the walls, to avoid crushing. On the top right of the room is a Past signpost, but another statue produces water blasts that can easily knock you off of the top set of blocks and away from it, and it's not worth the bother really.
A large room, appearing along one of the routes from Point #4. Careful not to get crushed between these moving blocks.
Avoid the springs, and try and make your way to the ledge on the right.
In the Good and Bad Futures, this room instead features long, thin horizontal platforms, and on the far side of the direction at which each row is heading, there sits a stationary spikeball waiting to be a pain in the ass for you, so watch your step. There are fewer springs on the floor, and they're only in the middle of it, but in order to get up from the floor to the higher ledge on the right of the room, you have to fall into it from above, as there are no longer any steps there to take you up to it. Use the springs to carefully launch yourself up to the lower row of platforms, then try and drop off them, staying close to the right wall as you fall. A Past post is on the left of the floor.
In the Futures, long moving platforms force you toward spikeballs. The ledge below is now too high to reach from the ground, so you must carefully drop down while staying close to the right wall.
No notes have been posted in response to this section.
Hide Notes
Time Travelling Tips
Time travelling is piece of cake in the Present, as long as you follow these instructions; After you finish with Point #5, or the alternate route, you'll find yourself heading down more underwater passageways and whatnot. When you re-emerge out of the water at the top of the level, head right, and you'll find another statue head spitting water blasts continuously, but to the right of that is a red vertical spring. Use this to find an ideal area above for time travel, which features two horizontal springs facing each other, and there's even a Past signpost in a hidden room to the right of them. Fantastic! If you bypass this however, you will not be able to return to it while in the Present. Instead, you'll have to pull off a similar technique to one I described in Zone 1, as Zone 2 also has a long straight path running along the top of the level with plenty of gaps in it. To get there, see Point #6, which can advise you on one or two easy ways to get from the bottom floor all the way to the top. If you start at the far left side of this long upper path, and run along it full speed to the right, whilst jumping over the gaps, you'll be able to maintain a good warp without too much interference. One more of those blasted statues is there on the far left side though, so I'd advise starting your run a little bit away from it, to prevent it from spewing its water at you, and be sure to allow any remaining water blasts to bugger off, as they'll become a nuisance otherwise. Another Past post for this can be found when you arrive at the bottom floor of the zone, not long after you foolishly bypassed the first, preferable method.
After dropping in the water and coming back out again, take the first red spring you find. Past the two horizontal springs, a Past post can be found in a hidden corridor on the right.
..Just fire away between these two horizontals for an easy ticket to the Past.
Surprisingly, time travelling in the Good or Bad Future is even easier, because both of those methods are still open to you, and better still, you can actually backtrack to the first method if you want, using springs to bounce back up through those vertical passages that you could only tumble down when in the Present. Look for one of these necessary springs hidden behind a ten ring item box, and the hidden room in the wall next to the horizontal springs of the first method still contains a Past signpost. Things are a little bit different in the Past, but just as easy because the two horizontal springs have been relocated to the floor directly below where they normally are, as part of the main path, and they even have a handy Future signpost smack bang in the middle of 'em. An almost identical instance of this can be found on the floor of Point #5, complete with Future post, and of course, the whole Past of Zone 2 is more or less completely backtrack-able, so just make your way back to either of these places, or use the top path again. Fortunately, warping is not much of a difficulty in this zone.
There are two of these spring areas in the Past. One along the path that's just below the one in the Present and another on the floor of Point #5.
In all timezones, you can still find your way to a long straight path across the top of most of the zone, just like in Zone 1.
#1. Comment posted by David on Monday, 7th February 2011, 4:07am (UTC)
Hi Here's Some Thing That The Team Was Probably Going To Make It Easier In The Past Of Act 2 Where?In The Area When You Go Through The Huge Rip In The Background As In You Can See Sonic,In Other Words The Bottom Route In The Begining Of The Stage. What Happens? Well Use The Two Springs In The Water Just Under The Rip or Hole In The Ground In Just The Right Angle Then You'll Come Out Of The Water Where Those Springs Above The Hole Are
And It Almost Impossible To Do So I Don't blame You If This Gets Deleted Like My Mini Sonic Glitch Did. I'm Sorry I Couldn't Explain It Better );
Hide Notes
Metal Sonic Hologram Location
Catch Metal in the act by dropping down to the bottom, just after the ideal time travel spot from the Present.
Sonic's metallic look-alike is fairly hard to miss, and can be found on the bottom floor in the Past, just after you drop all the way down the steps and vertical passages from that first time travelling method I mentioned in Time Travelling Tips. Put a stop to his evil ways, will you?
#1. Comment posted by SonicTailsKnuckles on Wednesday, 5th November 2014, 10:32pm (UTC)
His evil ways have been stopped.
Hide Notes
Point #6
After dropping down toward the bottom floor, partially underwater in the Present, you'll find a couple of switches along the ground that appear to do absolutely nothing upon being pressed. What you can't see, however, is that each switch magically opens a hatch in a different vertical passageway directly above them, and these two passages lead on up to the top floor, which is just a long, straight path above water that is quick and contains the hidden machine, so taking that upper route to the end is recommended. In order to get up, you need to make use of hidden vertical springs in the ground. The first switch has a spring located immediately to the left of it, and this leads you up to a simple step-based passage, taking you to the start of the upper route. The second switch has its spring hidden in the ground on the immediate right, and this takes you up to a winding passageway, the only one of its kind in the level. In the Present, you'll need to Spin Dash or Peel-Out up the curves to make it to the top, and in both passages, the hatch doors close behind you as you progress upwards, so there's no turning back.
Hit a switch on the floor below to open up this winding route..
Use a Peel-Out or Spin Dash to run neatly up these winding curves.
In the Past, the doors and switches are abandoned in order to allow you to return to the area, and the first spring is hidden, but the second is not. However, the water is at a much deeper level in the Past, and goes all the way up to cover about half of the winding passageway. While you can use Spin Dash/Peel-Out to climb the first twist, you'll find that you just can't build up enough speed to get up the second one, as the water surface seems to interfere, so this passage is only useful for descending. In the Futures, the water reaches up all the way to the top route, but the winding passageway has strong currents going through it, which you can use to travel on. You can change the direction of the current by hitting the switch on either end of the passageway, so if you want to ascend from bottom to top, you may need to press the switch first to let the current suck you up when you jump. If you're on the top route and want to go down, the water will keep throwing you back up until you press the nearby switch up there.
The Past's water level occupies the bottom portion of this route, which makes it impossible for Sonic to gain enough speed to run up this way. Try another route.
In the Futures, each end of the tunnel provides you with a switch. Flicking either switch toggles the direction in which the current carries you all the way up or down.
#1. Comment posted by david on Saturday, 17th April 2010, 3:54pm (UTC)
your wrong about the slide in the past you can climb it (look above to see what i'm talking about just use sonic's figure eight peelout and as soon as sonic climbs the way then jump repeat this until u reach the top and by the way thanks... i forgot your name heh heh... i'll check then i'll post another comment to thank u
Hide Notes
Point #7
Instead of heading up to the top route at Point #6, you can also carry on along the bottom one where, in the Present, you'll find this curious block of wood floating on the surface of the water just a little bit above you, and to the right of the switches I mentioned in the previous point. Hop on it, and the water level will instantly begin to rise. Much like the Tornado plane in Sonic 2's Sky Chase Zone, this block of wood will now follow your horizontal coordinates as you move left and right or jump, and you can effectively steer it using the left and right buttons, as Sonic walks, with the block staying underneath him constantly. The water will rise up towards a zig-zagging pathway above, so you'll need to steer through it, in order to avoid being crushed into the diagonal ceilings. At the end, the water level will remain still and you can jump off, and this doesn't apply to the Past and Futures, as the diagonal slopes feature steps that you can climb instead.
Hop on this floating wooden block and just move it left and right as the water rises, avoiding the diagonal walls.
No notes have been posted in response to this section.
Hide Notes
Machine Location
Machine Location
The machine is conveniently located towards the end of the long path at the top of the zone, just at the foot of a slope. You can even roll right into it if you like.
In the Past, the machine is located on the top path, towards the end of the zone, just at the foot of a little slope. A few dragonfly bots are nearby. If you're on an underwater route and not sure where you are, just keep going to the end, then when you reach the goal signpost, backtrack and take the upper path leading into the exit. Watch out for a large crusher on the way that can surprise you.
No notes have been posted in response to this section.
Hide Notes
Point #8
Reach the end of the submerged route in the Good or Bad Future, and you'll find another one-off object. This time a forever descending mechanical platform that will only ascend when you step on it. This area in the Present and Past is filled with various moving blocks and objects, but in the Futures, you need to wait for one of these platforms to come down. If you miss it, it'll disappear into the ground and another will replace it soon. Jump aboard and it'll begin floating up at a quicker pace, and will descend again should you jump off. Make sure you do so toward the left-hand ledge at the top, or the platform will crush you up into the ceiling.
This platform descends down to the floor and will reappear again if you miss it. Jump on to make it ascend, but remember to jump off to the ledge on the top left, or it'll crush you.
No notes have been posted in response to this section.
Hide Notes
Leap straight off the first gap you come to into the wall to find this little gem.
Just before you face Eggman, spend some time over to the left from where you first drop in, as there are hidden rooms containing useful rings and also a shield.
No notes have been posted in response to this section.
Hide Notes
Boss
Boss
This is quite an interesting boss, and not too tough, but first, you'll need to negotiate a small course of non-submerged corridors and actually chase Eggman toward the battle arena, reminiscent of Labyrinth Zone's boss, which only consisted of chasing. on the way, there are several hidden rooms containing rings and items that will no doubt come in handy. As you head down the first slope, drop into an invisible hole in the ground near the foot of the slope for a shield, and if you then leap off of the high step to the right, and toward the far wall across the gap, you'll find an extra life in a hidden room. A handy 30 rings and another shield can be found in two hidden rooms on the far left of the area as you drop down the gap, with springs at the bottom of a narrow, walled pit next to them. The three 10-ring item boxes are located in the higher room. There are plenty of rings on the usual path, but the more the better really, and a shield is always nice to have.
You'll come across Eggman soon enough, who will promptly make an escape down through the winding corridors and drops.
You need to keep up with him and hit him four times. The level keeps looping over and over from top to bottom and he doesn't wait for you, so if he does get away, it might be easiest to just go upwards and meet him coming down.
After four hits, the nearest of two exits will open up and Eggman escapes down into a large, submerged arena. Follow for the proper battle!
Continue along the main path and Eggman will be hovering over another gap, seated in his Sonic CD style Egg-mobile. As you get close he will begin flying through the following passages, which largely consist of vertical drops. This area loops continually, like the start of Zone 2, so whenever you or Eggman reach the bottom of the map, you'll reappear at the top without noticing the difference. In order to break out of this loop, you have to hit Eggman four times, and you may notice the boss music hasn't started yet, so this isn't even really part of the actual boss. Whenever you have to drop down a gap as you're pursuing Eggman, make sure you JUMP down it, don't just walk off the top ledge, or you may land on him and you won't be spinning to protect yourself. There is one long drop that connects the two top sides of the map, and other areas mainly consist of steps. When you land your fourth hit, Eggman, while exploding, will retreat towards the nearest of two different exits leading into the arena, located on the right sides of two different areas of the passage. These remain blocked by walls until then, and lead into another long drop, which dips into deep water. At the bottom, a final 10-ring box will be to your left, just in case you've gone and lost all your rings by now, while the boss battle arena awaits to your right.
Eggman, too high to reach, summons up a rather large supply of air bubbles that surround his craft. It's only one hit to kill but how on earth are you going to get to him?..
Sonic must suck them all up one by one to get through. Given that the boss arena is entirely submerged, these, cleverly, are your only method of staying alive too.
This arena is completely submerged in water throughout the whole battle, but fortunately, Dr. Eggman has taken considerations for your air supply. He's encased himself in a pod machine that's hovering on the upper right side of the screen, summoning water bubbles from below. As they float up and grow in frequency, they begin to move outwards and surround Eggman, preparing to act as a moving shield of air bubbles that Sonic will have to consume in order to remove them. Kind of like an underwater version of the boss from Metropolis Zone. There are sixteen bubbles, and as Eggman will move around the arena, you've got to leap up and touch one at a time, so that you can open a large enough gap to land one single hit on the scientist, who will then retreat. He'll move either left to right above you, or dip down lower as he goes, and the bubbles will constantly spin around him at varying speeds. As Eggman travels above, their circle will also expand and contract, making it hard to reach them. That's all well and good, but there is a catch, of course. As the machine moves across, it emits four small yellow projectiles from its underside, which slowly head downwards and aren't all that fun to touch. Jump over them or try and stand in the gaps between them, the size of which can vary. A common problem is that as you jump up and suck in an air bubble, Sonic immediately falls backwards, and if you're not careful, you may fall back towards one of these projectiles, as Sonic is unable to defend himself in his "sucking up air" sprite. You'll probably have to get through most of the bubbles before you can land your hit, as they tend to space themselves out more effectively as you remove them, in order to protect Eggman in as complete a circle as possible.
Making things a bit more difficult, Eggman repeatedly produces four flashing projectiles that slowly fan out across the arena. You should be able to stand between them without too much hassle.
Bubbles cover any big gaps in the armour quite quickly, but sometimes you can get a shot in there before they're all depleted. Just the one will do.
#1. Comment posted by chicobo329 on Friday, 3rd February 2012, 8:32pm (UTC)
Playing as Tails in the 2011 port, you can do a very mean trick to get a single hit on the boss without touching any of the bubbles surrounding him. Grab the Invincibility monitor just prior to this boss and hurry up to the boss arena (make sure you got all hits on Eggman prior so that the door opens up!).

When Eggman starts to gather the bubbles around himself, start to swim and keep yourself around the center of Eggman. As soon as the bubbles move into position and as long as you are still under the effects of the Invincibility monitor, you can nab Eggman in a single hit!. Try not to start swimming at Eggman too quickly at the start of this battle or else Tails will tire out before he is able to be hit.
#2. Comment posted by Kabam! on Saturday, 5th May 2012, 4:21am (UTC)
This may be a useless note, but I got to thank chicobo329 for his awesome discovery.
#3. Comment posted by Melody Pond on Monday, 28th July 2014, 3:28am (UTC)
This boss... Is just pathetic.... I bet when Eggman's was plotting he's like "oh! I know, I'll trap sonic underwater and hit him with lasers! But my ship will be completely exposed.... I'll need a shield... I'll use an air bubble shield! Brilliant!" It's just..... *sighs*
Hide Notes
Miscellaneous Notes
- In the Sonic CD on Sonic Gems Collection, someone has seen fit to tinker with all the colouration in the water in each time zone. In the Present, the water should be coloured green, dark yellow-ish in the Past, light blue in the Good Future, and dark purple in the Bad. In Gems, the water isn't coloured at all, and the graphics look exactly the same as they do when seen above water, except for the ripples in the background, which give away the difference. I've no idea why they were taken out, but there's probably a good reason. In the original Mega CD version and even the PC version, which is actually used in Sonic Gems, the water remains interestingly coloured.
No notes have been posted in response to this section.
Hide Notes
Each section of this page allows users to add their own notes to fill in any missing details or supply additional research etc.
View general notes for Tidal Tempest (3)
#1. Comment posted by Andrew on Sunday, 29th May 2011, 3:53am (UTC)
At point 3, does the 106 rings count in the "shower of rings" outcome?
#2. Comment posted by Anonymous on Tuesday, 10th July 2012, 8:02pm (UTC)
In the PC version, it uses the PC hardware to color the water. The Gamecube doesn't have whatever it is that the game calls upon to color it, so the water remains uncolored.
#3. Comment posted by Anonymous on Thursday, 10th January 2013, 5:58pm (UTC)
As you said about the crab enemies, yes, the spikes DO in fact harm Sonic, however, they're quite easy to dodge, since they're so small. You can still get hit by them if you're not careful, though.
Hide Notes
Last Updated
Content for this page last edited:
18th May 2009

Files last uploaded for this page:
30th May 2009

Recent Notes
Metal Sonic
Posted by SonicTailsKnuckles on 5th November 2014

Appearance
Posted by Ratchet 0203 on 13th October 2014

Boss
Posted by Melody Pond on 28th July 2014

Time Travelling Tips
Posted by Anonymous on 11th July 2014

General Notes
Posted by Anonymous on 10th January 2013

18 notes posted on this page in total