Metallic Madness-Sonic the Hedgehog CD
Metallic Madness
Eggman's last stronghold on Little Planet happens to be his biggest and deadliest, and can stand as one of the toughest and most intimidating 2D levels of the series. A Fairly typical final factory lair for the doctor that has bucketloads of obstacles and features, a small number of which in common with Scrap Brain Zone. One of the more memorable is an extremely unique moment in Zone 2, where Sonic has to walk into a laser beam that will shrink him down to half his size, in order for him to fit through tiny passageways! As scary as this place is, you wouldn't want to miss that though, would you? Successful time travel is a complex challenge, but it all culminates in the final, operatic battle with Eggman to decide the fate of the planet!

Game: Sonic the Hedgehog CD

Stage Number: 7

Level Division: 3 Zones

Boss: End of Zone 3 (final boss)

Playable Characters: Sonic

Difficulty Rating: 5

Music:
- The land of the rising sun gives us quite a hectic but entertaining score for the game's final stage. The Present is technological, fast-paced and chaotic, with sprinklings of fairly indecipherable lyrics, in keeping with the spirit of the soundtrack. The Good Future is a fantastic contrast, as although it maintains the basic tune, it has a much calmer, pleasant and distinctively utopian feel about it. Very much a Good Future vibe going on there that suits the appearance of the timezone perfectly. The Bad Future is best described as a standard remix of the Present, with more synthesised-sounding and techno bits and pieces, and slightly more coherent lyrics that appear to represent Eggman's voice, encouraging Sonic to give up! The Past is quite similar to this, and maintains the usual pace and chaos.
- To be honest, one of my least favourite bundles of music for any Sonic level is the US offering here. Slow, mechanised, quiet and rather dull music that struggles to make the level come alive, for me, and Good and Bad Future versions only vaguely point to the required emotion/theme. I supposed they're livened up a little bit as the tracks go on with longer, more interesting notes but they've always struck me as way too cinematic and slow for a Sonic level, and they just don't fit with the action.

Typical Length:

Zone 1: 1 - 2 minutes
Zone 2: 2 minutes, 30 seconds - 4 minutes
Zone 3: 2 - 3 minutes

Available Items:

Rings Checkpoints Past Posts Future Posts 10 Ring Item Box Shield Item Box Invincibility Item Box Speed-Up Item Box Extra Life Item Box
Zone 1
Present 151 8 5 5 9 3 1 1 0
Past 151 0 0 5 11 2 0 1 1
Good Future 151 0 5 0 8 2 1 0 1
Bad Future 151 0 5 0 8 2 1 0 1
Zone 2
Present 157 7 5 6 14 3 1 1 0
Past 156 0 0 7 13 2 1 1 1
Good Future 156 0 8 0 14 3 2 0 1
Bad Future 156 0 8 0 14 3 2 0 1
Zone 3
Good Future 90 0 0 0 1 1 1 0 1
Bad Future 90 0 0 0 1 1 1 0 1
Top Tips
- Grey crushing blocks move at a variety of speeds in corridors, frequently within indentations in the ground, so it's therefore usually safer to jump above them and go through rather than go underneath. No matter how quickly they're moving, it's always possible to slip through without being crushed - just make your move as its on its way down, rather than up.
Crushers of varying speeds are a trademark for the level. Usually better to quickly cross them over the top rather than underneath.
- In Zone 2, take care of your time travelling needs as soon as possible, because once you get past certain points, and to the second half of the level, you'll be unable to backtrack.
- Want a top tip? Die. In Zone 2 anyway. See, Zone 2 is nothing but a headache when it comes to time travelling and everything associated with it. Sometimes, if you have enough lives to spare and don't mind taking the easy way out as it were, it's best just to kill yourself when you're in the Past or Futures and want to escape to the Present, because at the beginning of every timezone, there are ample time travel opportunities thanks to spinning wheels and opposing horizontal springs, but fewer opportunities exist afterwards. Because there are no checkpoints in the Past and Future, you'll always return to that point, and previously used time travel posts will be restored too.
These doorways only open if you're on one side. Watch out for sneaky ones whose only purpose is to force you to backtrack.
- Beware of misleading doorways that close behind you in Zone 2. Landing next to one makes you want to go through it, but in some cases, they actually just simply lead back to an earlier point in the level, forcing you to redo a hefty chunk of it, whereas the correct route was just in the other direction all along. During the latter stages of the zone (during and after the shrink ray bit, mainly) always look around to see what other routes are open to you in the opposite direction, before wandering through any doorway.
- In the latter areas of the level, where you meet the rooms with slowly descending long grey platforms with spikes underneath, remember that five is the magic number. You need to climb each one as it comes down (by jumping through the dull area on each), but you might be able to get out of the pit you're in once you're on top of the fourth. If you attempt this, you'll have to be pretty quick to avoid being crushed into the corner of the top ledge by the fifth spiked platform following closely behind. I advise that you wait for it, and then jump safely out of the pit, from the top of it.
There will always be five of these slow moving spiked platforms falling slowly on top of each other. If you try to get out after the fourth, you might be in for a nasty surprise.
Each section of this page allows users to add their own notes to fill in any missing details or supply additional research etc.
View general notes for Metallic Madness (11)
#1. Comment posted by david on Monday, 5th April 2010, 11:40pm (UTC)
hi it's david i'd like to know have you deleted my comments? because i can't find them anywhere and if u did then why?
like the one about the metallic palmtree and the gitch in metallic madness and speaking of which i haven't played sonic cd for a while(cause it's my friends) but i checked and it does work only thing is you only have about 3 seconds before it turns on for good.
#2. Comment posted by LiQuidShade on Tuesday, 6th April 2010, 12:27pm (UTC)
Hi David,

Sorry, but I've been cracking down on comments lately to make sure only relevant and useful comments remain. Your glitch would have been fine, if you had explained it more fully. You just said that it was possible to complete the zone as shrunken Sonic but you didn't say how, at all. I get a lot of people making the most ridiculous, obviously untrue claims that they just seem to make up. Your glitch may well have been true but without any sort of explanation I had to be fair, and remove it. You're welcome to rewrite it, with a very clear explanation of how you managed to achieve it.

I plan on making posting guidelines clearer soon, but it's come to a point where I need to clean out some areas of the site, to ensure a high standard of quality. I hope you understand.

Thanks.
#3. Comment posted by Sonicfan32 on Tuesday, 12th July 2011, 5:36pm (UTC)
Is it possible that this map could have been salvaged from bits and pieces of scrap brain zone?
#4. Comment posted by Chris on Saturday, 28th January 2012, 5:30am (UTC)
About the bit involving the gray spiked platforms... You don't need to wait for 5 platforms. I always jump at the 2nd one, just as it comes down close enough to jump onto.
#5. Comment posted by Stuart on Monday, 6th February 2012, 3:43pm (UTC)
Are there any Metal Sonic Holograms in Metallic Madness?
#6. Comment posted by SKSonic on Monday, 16th July 2012, 1:11am (UTC)
There are no Metal Sonic Holograms. If you have gotten all the Time Stones, just focus on getting to the Good Future. There's no point in going to the past.
#7. Comment posted by Dan on Sunday, 4th November 2012, 2:54am (UTC)
note: in the 2011 release of the game, the "teetering on the edge" mentioned in point no. 5 is 'fixed', making the area much, MUCH harder than the original.
#8. Comment posted by Anonymous on Thursday, 10th January 2013, 6:35pm (UTC)
yes, in the original Mega CD version, the diagonal spring in Zone 2 (point 1) is actually placed lower in the past than the other time zones. However, in the Futures it is completely possible. This was fixed in the PC version onwards, and in the 2011 release, 4 spinning platforms were added to further your chances of successfuly geting to the top of that ledge.
#9. Comment posted by Anonymous on Wednesday, 21st August 2013, 2:52am (UTC)
In the japanese bad future music, the voice says "You cant do anything, so dont even try it. Get some help. Dont do what Sonic does."
#10. Comment posted by Ratchet 0203 on Monday, 13th October 2014, 9:36pm (UTC)
Wait, I JUST said that David's or anybodies comments can't be deleted! I'm confused right now!
#11. Comment posted by Tent2 on Sunday, 4th January 2015, 5:57am (UTC)
Metallic Madness probably used some objects that were scrapped for Sonic 1 but no one know it except developers, talking about that, Sonic CD released after Sonic 1 in Japan, that's why i'm talking about it. Especially Scrap Brain Zone, It's like it haves something for it.
Hide Notes
Appearance
This is actually the only level in the game to feature a different background for every timezone of every zone, making for a whopping ten different backgrounds for just one level, as opposed to just four normally. In the Present, Metallic Madness is your typical final level factory environment, full of doom and gloom and more mechanised doo-hickeys than you know what to do with. In Zone 1, the background is your usual wall of machinery, this time featuring various stretches of piping and assorted paraphernalia stretching horizontally in stacked rows, each row a different colour, including purple, lime green and red, all with dark, shadowy areas to them. The hot, dark red area at the bottom is filled with high tech gadgetry and flashing bits, while the purple area at the top is colder and more spacious, featuring danger panels and other bits and bobs. As you go higher into the level, the background repeats and the dark red area and green pipes reappear. The Zone 2 Present background features tall, cylindrical objects in the background not unlike alien buildings. These are green and purple amidst the darkness and continually changing lights, and above and below are far stretches of blue machinery. The foreground is largely made up of thick dark green/turquoise panels arranged together with all the usual technical trimmings decorated around the place, including various shapes, flashing bits and active generator machines working away even when you pause the game. Unlike most mechanical levels, this one does feature some visual elements along the paths to brighten them up a bit, ranging from small and sometimes slightly futuristic pillar-like gadgets to taller, abstract structures made up of tiny, multi-coloured patterned squares, all of which are connected up to the ground by various tubes and pipes. There are also separate formations of orange pipes with what appears to be constantly spinning lights attached to them, and you can also stand on thin raised platforms in certain corridors.
Blocks of plain turquoise panels make up the Present's foreground and in Zone 1, the background features a variety of pipes coloured red, green and purple.
Zone 2 forges into the heart of the complex with tall, slightly alien towers in the distance amidst a technological nightmare!
The Past is much the same except the factory is in the process of being constructed, so the backgrounds are fortunately a bit more interesting, and allow us glimpses of the outside at the top and bottom of Zone 1. It's sunset here, with a purple sky and numerous yellow clouds floating by, and at the bottom, you can just about see red cranes and tall buildings being worked on in the distance. In the middle is the more typical wall of technology, this time all dark blue, though some bits reflect the red colours from the outside. Zone 2 is set seemingly later in the evening, and you're now in front of an open, blue-ish purple sky filled with many small light clouds. Below, miles of mechanical wasteland, featuring regularly flashing lights, and there are crane silhouettes far off in the distance, and closer factory walls at the very bottom. The foreground is the same sort of thing as in the Present, only the main, dark green/turquoise colour has been replaced by a much friendlier light purple. All the various bits and pieces also feature a wider range of bright colours too, with greens and oranges being mixed together regularly, as well as many patches of blue panels amongst the main foreground. Some of the path decoration has changed too, and we can now find small construction or roadwork style orange cones and flashing barricades, and arrangements of stylised structural framework, reaching up in small towers. The formations of orange pipes are still here, though more vibrant in colour, and the immediate backgrounds of rare internal areas consist of small square bolted panels of varying purple colours. All in all, it's a much nicer and more colourful variation of the Present, although Zone 2 is a bit more desolate, and almost Bad Future-ish with its background.
Eggman has already secured even the Past with his machinery, although the factories are still very much in development. Zone 1 is set against a pleasant maroon sunset that appears through the mighty walls.
Zone 2 is set later in the evening as cranes work tirelessly into the distance to build the miles of undulating tech. Occasional foreground decoration is coloured bright green, yellow and red amongst the calmer purple tones of the main panels.
The Good Future is a prime example of what this timezone should be all about, as the once ugly mechanical factories have turned into a very pleasant, plant-filled utopian city with grand gardens and fountains. Light blue is very much the order of the day throughout, and Zone 1 features a background wall of this colour that's similar to the Present in its construction of horizontal pipes, and though it still contains various bits of the same technical gadgetry and flashing lights, it also houses containment tubes for plantlife, much like Tidal Tempest Good Future. Perhaps some are windows looking out into the gardens outside, which is exactly where Zone 2 happens to take you, as the gloomy factories are all gone, and tall, thick purple towers line the horizon, joined by large, abstract ring shapes. The sky is dark blue, featuring hazy light purple clouds, and a vast, tree-filled garden spreads across the land, with light green buildings and structures popping up throughout, and close to the foreground at the bottom. Zone 3 also has its own background, but it's essentially a zoomed-in version of the one for Zone 2, as the far buildings are now larger, and smaller structures are clearer as they appear out of the garden greenery. The foreground is a light blue variation of the Present, containing the same sort of internal doo-hickeys and machinery. The pathway decoration though is very different, featuring tall, somewhat trimmed palmtrees, various potted hedges and green plants, and small fountains. There are also a few abstract pole/ring structures and thin, cylindrical pillars.
Good Future is still mechanical, but more as an aide to preserving life rather than destroying it as the cool blue factory begins to sprout much plant-life, with neat palmtrees and fountains.
Zones 2 and 3 in this timezone take you outside into one of the most beautiful locations in the game. The land has recovered into a huge botanical garden with utopian futuristic structures across the horizon.
As usual, the Bad Future is essentially an old, rusty, broken down variation of the Present. Zone 1's background features the common horizontal pipes, amidst a large wall of various technical devices, a lot of them battered and bruised with gaping holes. Main colours used are all dull greens, browns and blues. Zone 2 includes those tall, alien-like buildings that are quite dramatically lit, with yellow and orange on one side and blue on the other. Lights are flashing all over the place and a vast array of dull green technology spreads out above and below. As with the Good Future, Zone 3 has a zoomed-in version of this background, where the cylindrical alien buildings are larger and clearer, while a tall, blue wall looms behind. All the foreground walls are a very plain brown colour and many of the panels that make it up are all cracked and worn down. Similar pathway decoration to the Present, and the pipes that occupy certain areas, once orange, are now magenta.
Typically rusting away, the Bad Future is little more than a hellish bronze version of the Present.
Large, alien-esque pillar structures in Zone 2's background remain here and looking even more threatening thanks to dramatic lighting.
#1. Comment posted by David on Tuesday, 8th February 2011, 2:26am (UTC)
Hi Don't Copy
Past Refining Robotics Present
Robotics Rampage Bad Future
Rusty Robotics Good Future
Futuristic Forest Delete If Not Wanted
Hide Notes
Structure
Like Wacky Workbench, Zones 1 and 2 are structured very differently, employing unique methods, so I'll be looking at each zone separately. Zone 1 is a simpler affair, with up to four routes stacked up, leading on their own linear paths to the right. You can make your choice as the second, third and fourth routes begin to emerge after a large open area in the start, and all of these additional routes feature a number of gaps in the path, where you can fall down to a lower one and continue on your way, but there are fewer opportunities to progress upwards instead. The separate routes converge towards the very end, where they begin to drop down into a vertical passage. As you would expect, corridors are plentiful, though it isn't all enclosed as some higher routes feature suspended platform objects to use, above an open area for the route directly below. Path surfaces can be quite varied, and a section of floor broken up into small, connected chunks that are set at different heights is a common occurrence throughout the level. Short, steep slopes on platform edges make them difficult to clamber up to from below, and this is common in tall thin, separated chunks on higher routes, and small curved pits in the pathways can be quite annoying, as they'll invariably contain a set of spikes in the middle that can be tricky to avoid. It's best to spin dash or peel-out straight across from one edge to another, rather than dropping in the pit and attempting to leap over the spikes. Longer areas of road are either straight or sloped to various degrees. There are relatively few structural differences between the timezones, except that the Past allows you access to an entirely new, dead-end route at the bottom, before the exit, which contains the hidden machine.
A recurring feature of the corridors of Zone 1. Tricky acceleration up these kinds of curves make it difficult to not jump into the spikes when trying to get out. Best to run straight across the dip with a peel-out from the left side.
The level has all kinds of slopes in its otherwise flat surfaces. Usually quite gentle, some can be more short and sudden, dropping you straight toward traps or drops.
Zone 1 is mostly a stack of corridors leading to the right. Many feature segmented pathways set at different heights, with crushers a very common appearance inside the small indentations.
Zone 2's route system is much more separated and complex, and in the first half, it employs high speed transport tubes to deliver you between different areas. Four-way junctions giving you a choice of where to go add to the confusion, as the tubes can twist and turn just about anywhere.
Now Zone 2 is quite complex, and varies much more significantly across its different timezones. Most Sonic CD levels feature plentiful, but relatively linear and simplistic routes in terms of their general directions, and the player can switch between them fairly easily at regular intervals. While Zone 1's design was similar to Scrap Brain from Sonic 1, Zone 2 is designed more like a Sonic 3/Sonic & Knuckles level, where the routes remain separate much of the time, and they may tend to weave a long and intricate pattern, back and forth and up and down towards the end. In this case though, the winding pathways are more squashed in together, seemingly due to less available space on the map. Still, this is a much longer and more enduring zone than what you've encountered throughout the rest of the game.
Areas of Zone 2, particularly the beginning, are quite open. Suspended in the air are these tiny little block platforms to jump/squeeze between, as well as other obstacles such as conveyor belts and crushers.
You'll notice one or two of these very long straight shutter areas on the top and bottom of Zone 2. Stepping inside the revolving contraptions alters your z-axis plane, allowing you to pass either side of the shutters to collect rings or clear a wall that's on the other plane.
Corridors can be just as tight in Zone 2 - sometimes just a bit too tight for regular-sized Sonic..!
High speed transportation tubing is a defining feature of Zone 2, and junctions where four different tubes meet are key points where alternate routes can both separate and converge, respectively. The first occurs early on in the level, allowing access to the lowest route across the initial, linear part of the stage. There's a long, straight high route along the top, and a middle route when in the Present, and these meet via a second arrangement of transport tubes and four-way junction, or nearby it. The exact structure of routes and paths can change quite significantly across the different timezone variations, and in the Past and Futures, there are vast areas and long, but dead-end routes that occupy this middle space. They may only lead to power-ups or nothing at all though, and can only be entered either from the beginning or the end. These are perhaps intended for when you have time travelled to a point within these routes and wish to get out, but when playing normally, they can serve to be an ultimately pointless distraction from the main task ahead. Furthermore, it would appear that it may be impossible to complete the Past all the way through on the Mega CD version of the game. See Point #1 to read all about it. Throughout the zone there are plenty of smaller hidden areas and passages dotted around the place, so it can be quite the maze. All routes largely lead right though, until they meet later in the level, where you will then have to wander through a very long, winding passageway that weaves back and forth and up and down on its final journey to the end. When the passageways get extremely narrow, Sonic will only be able to fit through them once he's shrunk himself with a special shrinking laser beam! Have fun with that, below.
No notes have been posted in response to this section.
Hide Notes
Obstacles and Features
Exactly as they function in Scrap Brain, little blue platforms on diagonal conveyor belts spin around when on the underside, and singular ones give a short spin every three seconds or so, throwing you off if you're on it.
A range of tricky platform features and nasty, spiky obstacles to encounter, with many objects exclusive to individual zones. Long platforms made of a string of grey circles will continually alternate from horizontal to vertical alignment every two or three seconds, with a short moment between where the circles are drawn in and out of the central one. A couple of other platforms are nabbed straight from Scrap Brain Zone, namely the small grey squares that disappear and reappear at regular intervals (either in alternating steps or separate blocks), and the small, spinning blue platforms. The latter can appear either by themselves or moving around a chain, and you'll fall through them if you try and land on them while they're spinning. When by themselves, they'll spin around briefly every 3 seconds, and when moving along a diagonal chain, they will remain stable on the top of it, but spinning while moving along the bottom.
These little spheres rearrange themselves between horizontal and vertical alignment.
Arrangements of these Scrap Brain style blocks disappear and reappear out of thin air in various patterns.
Vertical crushing blocks vary in terms of distance covered and speeds - some are very quick indeed!
These tacky-looking poles have spinning blades either end that alternate frequently enough to be a real pain in the arse.
Circular saws pop out and retract slowly on diagonal poles, either from the floor or the ceilings, and often in pairs.
One of the biggest dangers are the many vertical crushers on offer. They're square, shiny metal drums moving up and down inside tight corridors, but they all move at varying speeds and heights, and some may not even touch the floor or ceiling, but can still go low or high enough to crush you. You really need to stop and look at their pattern for a moment before tackling each one, in order to get the best idea of when to make your move past them, either above or below. More of a big nuisance than a big danger, odd and slightly tacky-looking white poles will move back and forth across the ground on a little wheel, with twin spinning blades at the top and bottom, though they alternate every couple of seconds, with the inactive blade folding away onto the pole. Nine times out of ten, these things always find a way of hitting you, no matter how well you think you can time your movements. Large spinning circular saws constantly extending and retracting via diagonal poles from the ceiling also require your evasion, commonly found in pairs. Make quite a racket too.
See-saw objects are quite odd here. They're not the conventional horizontal ones, no no, these use some fancy perspective effects as one end appears within Sonic's 2D plain of movement, the other, holding a large yellow spikeball, appears behind it. When you stand on the nearer, raised platform, your weight will flip the spikeball in the air and lower your platform while you're standing on it. Don't hang around on it too long, as the spikeball will, of course, fall down onto the nearer platform within 2 seconds, and you won't be able to do anything to send it back to the other side, so just leap off as soon as possible. Watch out for many a crumbling ledge, and there are even springs on little wheels rolling back and forth along a set area. Jump on them at the right time or angle to be propelled up a vertical shaft or to a high platform. Jump on them at the wrong time or angle to be propelled into a set of ceiling spikes or something equally unfriendly.
Crumbling ledges - you know how these work by now.
See-saws are a bit odd here. As soon as you land on the closer end, you'll need to get off pretty quick as this will throw upwards the end that's in the background, thus flinging a spikeball on top of you.
Be careful with little vertical springs on wheels. There's often spikes just above if you happen to hit one at a slightly incorrect angle.
Another item nabbed from Scrap Brain while it wasn't looking. These large cog wheels start spinning you round their circumference if you land on their upper sides. Great for time travel.
Conveyor belts force you along in one direction. Nothing out of the ordinary here.
Vertical stacks of three crushers surprisingly form a kind of spring if you stand on the top side as it moves upwards. Can still crush if you venture into a corridor underneath though.
Moving onto Zone 2, and you'll see that some of Scrap Brain's suspended rotating cog wheels have also made the journey. If you jump onto one of these on its top half, you'll automatically run around its edge as it rotates. Use it to leap off to nearby square platforms, but it can be quite easy to fall off, particularly if you're holding a directional button, so try and just let Sonic move by himself on it. They are also useful for creating a time warp, as you can hit the down button and roll around and around on it with increasing speed. Sets of three of the shiny grey crushers connected in a vertical line, moving up and down slowly inside a shaft of their width, can be used as a powerful spring, believe it or not. There's a ledge along the top, and/or a corridor which they intrude into below. They can crush you if you wander through the corridor, but there's often a time travel post at the end of it, as a reward. Above, you can jump on the top of them and be sent flying in the air if you remain standing on them as they're moving upwards, usually to a high up ledge above. Also make use of the old favourites of the factory level; the suspended conveyor belt platforms, forcing you in one direction when you land on them, though your speed can easily overpower them.
These doors always open on the sides that have the two small glowing rocket type things..
..But they remain closed if you attempt an entry from the other side!
These tube hatches are your entrances and exits to the high speed transport tubes. They can only be opened with the nearby buttons but some exits don't have a button with you which you can go back in.
At these junctions in the tubes, you need to press up, down, left or right to take the corresponding route. Usually, only one is the correct route, and the others are dead ends or just lead you back round.
Two thin, grey doors with flashing lights on them will open when you approach them on the side of the flashing lights, but will remain closed when you come from the other side. These are most commonly found either side of the small chambers that hold entrances to the transport tubing system, but they can also be found on the main routes to serve as a devilish distraction. Their presence makes you want to walk through because it seems to be the right way, but in a few cases, it actually leads you straight back to an earlier point, due to the winding nature of the level design, and of course, you can't go back through afterwards. These bits are noted below, but be cautious anyway. You can find entrances to the transport tubes all over the place, but you'll first need to stand on a nearby button to open the vertical entrance, then jump in. Unfortunately although you move at the speed of light through these things, you cannot produce a time warp while inside them. You'll come to four-way junctions where Sonic will stay spinning in the middle until you choose a direction, either up, down, left or right, with the D-pad. The tubes that lead in these directions don't always maintain them, and may make sharp turnings away to other areas, some of which are dead ends.
You'll notice that long straight areas with constantly rotating shutters have objects (usually rings and spikes) behind the shutters that initially appear to be inaccessible..
With the shutters come large revolving doors which alternate the plane that you're on. By entering these contraptions, you can toggle whether you're in front of, or behind the shutters..
..Now, the rings will be accessible. Return to the contraption to switch back.
On the very top and bottom routes of Zone 2, and at the end of Zone 3, you'll find long, straight stretches of pathway that feature forever turning vertical shutters. These represent the separation of two different planes along the z-axis (like in Stardust Speedway) that you can walk along, one behind the shutters, the other in front of them. You can alter the plane you're on by standing inside large revolving devices that can spin you around. Though you'll be facing the opposite direction when you come out, you'll also be on the opposite plane, and the separate planes contain their own rings, floor spikes and other items and objects that are only active when you're on the applicable one. There are also walls on either plane that you can't get through, so it's a small puzzle to figure out which one you should be on at each stage through the shutter area, and then adjust accordingly using the revolving devices that appear regularly. A really nasty feature of both Zones 2 and 3 are a series of five long, grey, spike-bottomed platforms that move downwards, one by one, into a small enclosed area, threatening to crush you rather painfully (as the act of crushing tends to be) into each other. You can't escape, but you can jump through each one by finding the dull area in each platform, which appears in different positions along it for each. As the first one is coming down, jump through the dull area and land on one of the sides on top of the platform as it continues to the floor, and wait for the second platform to come down on top of it. Move towards and jump through the dull area on that and repeat for all five platforms that slowly move down on top of each other, but remember that there are FIVE of them. You need their support to get up out of the pit, but you may only need four to do so. I would strongly advise waiting for the fifth to come down before attempting to get out, as it'll suddenly appear above the pit, and can easily crush you into the corner of the top ledge if you're too impatient. Press up twice to scroll the screen up a short way, in order to get a preview on where the gap is in the next platform.
Solid walls standing on either plane force you to go back and switch.
A wall on the rear plane.
These long spiked platforms come down gradually to an enclosed area, and stack up one by one. To get through you have to squeeze through the dull coloured hole in each. Look upwards get the best view of what's coming.
Always remember that there are five of them in total. It's possible to leap out to the top after four, but you're likely to get caught on the corner of the ledge by the fifth, which will kill you.
At one point in Zone 2, you must make these dumbbell things walk across the ground by jumping between them. See Point #2 for more.
Shrinking Sonic? Point #3 has the whole scoop!
See Point #2 for details on a one-off set of walking platforms that are necessary in order to reach a high ledge in the stage, and shortly after, Sonic will arrive at the shrinking ray; a vertical laser beam that shrinks him down to his "Continue" sprite. He'll still have all the same abilities except that he'll be a pint-sized version, allowing you to squeeze him through extremely narrow corridors until you arrive at a second laser beam, which will restore Sonic to his original form. See Point #3 for the whole scoop.
The range of badniks for Metallic Madness consist of a rather insect-ish selection, containing some familiar faces. Firstly, blue, yellow and red beetle robots roll backwards and forwards slowly along the ground with a spinning circular saw that raises and lowers at their front. They are unable to turn around and damaged ones are identical except for the handicap of being unable to move their saw. The yellow and black bee robots from Wacky Workbench reappear here, but with a different, rather uncharacteristic attack. Healthy ones remain with their stingers poised and from them swing two large spikeballs on long chains, as they bob back and forth above. Unhealthy ones are slower and swing only one chained spikeball. Green and red ground-based robots with grabbing arms on their backsides will force Sonic into his spinning move for a moment, and then throw him backwards into whatever danger happens to lurk there. Occasionally, you'll find them clutching item boxes and dragging them along with them, and older ones look the same, but move slower. The same rolling armoured bugs from Stardust Speedway are back in exactly the same form, except now they're brown instead of luminous green. Hit them when they're unrolled, as in their rolling state, you'll bounce off of each other on contact, and older models move more slowly. Remember the little walking bomb badniks from Sonic 1? There's a much bigger version that appears regularly in this level and he's not to be messed with. Technically speaking, he might not be considered a badnik, as he doesn't produce a flower when destroyed, and appears in the Good Future, when all others have vanished. Regardless, these large bomb robots will walk back and forth over only a small area and when you come within close range, they will remain still and light their fuse. Being a bomb, they will self destruct seconds later, causing large flashing projectiles to rain down upon the surrounding area. A nasty attack, but you're actually safest if you remain close to the bomb when it explodes, rather than far away from it. There's one along the top, shutter-filled route of Zone 2 that will actually walk quite a fair distance pretty darn quickly to the right, as soon as you come close, before exploding himself. Why, I don't know. Finally, just before battling the final boss, the lightbulb enemies from Stardust Speedway reappear, but with an entirely new strategy of attack. See Point #7 for details. Metallic Madness robots leave behind flowers with green stems, orange stigma and yellow petals.
Circular saw beetle robots. New and old are identical.
Bee robots, new and old.
Grabbing robots can latch hold of item boxes or Sonic himself. New and old look identical.
Rolling armoured bugs, new and old.
Giant bomb - uncertain if this is technically a badnik or not, but very dangerous nonetheless.
Lightbulb flies. Appear in one form, only at the end of Zone 3.
No notes have been posted in response to this section.
Hide Notes
Zone 1
Zone 1 Present Map (PNG format)
Zone 1 Past Map (PNG format)
Zone 1 Good Future Map (PNG format)
Zone 1 Bad Future Map (PNG format)
In anything but the Present, there's an extra life right at the start of the zone, in the first little hole in the path.
Watch out for series of diagonal springs on sloping paths, making it difficult to climb without being thrown back.
The bottom route leads upwards at the end using belts of spinning blue platforms and singular ones to join with the route above. If you find yourself fallen to the bottom at any point, it's only here that you'll be able to rise high enough to start backtracking.
The zone ends with a series of steep slopes heading towards the goal in a narrow passage, decorated with some nasty circular saws. There is also a crusher at the bottom where it meets a lower route when in the Present.
No notes have been posted in response to this section.
Hide Notes
Time Travelling Tips
Going by the regular structure of the level alone, time travel appears to be almost impossible because there are few open stretches of ground where you can barely get a decent start of a time warp, let alone complete one. Fortunately though there is one place (two in the Futures) where you can zip back and forth between two horizontal springs, available in all timezones, providing you take the correct route. If you wind up on the lower routes, you'll have to proceed across most of the zone before you're able to backtrack, which is a pain.
For efficient time travel, you need to leap this first gap successfully, just after the shield item. falling down it will put you on the bottom route with no escape til the end.
On this higher path, you'll pick up a Past post on the way.
When you arrive at this moving spring, use it to go straight up on the left side or very carefully aim as far right as possible on it..
..This is an easy obstacle to hit from that spring, but try to reach that ledge to the right, or just go straight up to the highest route to the left of the spikes.
In any timezone, from the start, leap on past the first gap and hit a red spring to ascend up the high wall with a shield item at the top. Do NOT fall down past this high ledge to the area on the lower right of it because this leads directly to the lowest route, and getting back out is impossible at that time. Plenty of Future posts down there in the Present, but completely useless for warping anywhere. What you want to do is leap straight over the gap to the other side, which is just visible when you stand at the right edge, and this will take you to the higher routes. Here, carefully avoid a series of red diagonal springs up a slope, which will send you sailing back towards the start if you touch them, and you'll find a Past post immediately after them, when in the Present. In the Futures, there's an additional pair of horizontal springs here that you can use for time warping, but not in the Present or Past, where you should instead continue until you find the red vertical spring on a wheel, shortly afterwards. This spring allows access to the very top route and also the upper middle route, just below it. The time warping location that you seek is on the upper middle route, but you can get to it from the top route too, which might be the easier option. Just use the vertical spring to go straight up when it's on the left side of its path. Carry on along this top way until you find an open gap containing two of those odd see-saw/catapult objects. Rather than using them, drop directly below them to land in the time travelling area, which consists of a pair of horizontal springs that are available in all timezones, although a grabbing badnik will need to be disposed of first. To get to this area coming along the upper middle route, which contains an additional Past post, you need to use the moving spring to just pass carefully underneath a set of hanging spikes on the ceiling. Try walking towards the spring by coming from the left, when it's on the right side. In the Past, there's a Future post right at the start of the highest route.
In the Past, there's a Future post on this highest route. Up here, carry on until you find two see-saws, then just drop down to the area below them..
You should eventually arrive at the two opposing springs, available in all timezones.
An alternative pair of horizontal springs appear in the Futures only, at the same place where the first Past post was found in the Present.
Should you take the wrong route somewhere, namely the lowest one, you will be unable to backtrack until you reach a point towards the end of the zone. This point is signified by one or two belts of small spinning blue platforms along the lowest routes. Continue upwards from there, then you can start heading left along either the top route, or the one below it, though watch out for gaps in both these routes along the way. On the top route, be on the lookout for those catapult objects, and drop below them to find the area you want. If you want to see the Good Future, you're going to have to backtrack, after destroying the machine.
#1. Comment posted by Anonycat on Saturday, 29th May 2010, 8:49pm (UTC)
I always liked to use a different time travel spot, right below the one you have marked but on the bottom route. The two claw enemies that shoot you back and forth will also put you in (and retain) time warp mode for some reason.
#2. Comment posted by Lucas dos Santos on Saturday, 5th December 2015, 1:37am (UTC)
An easy way to time travel to Past:

1. Just past the diagonal red springs, kill the badnik and touch the first Past post;
2. Do a Spin Dash from right to left towards a diagonal red spring;
3. Hold Left D-Pad button.

If you do it correctly, Sonic will time travel just before reach the ground.

Good luck and sorry for my English!
Hide Notes
Machine Location
Machine Location
In order to get to the machine in the Past, you'll need to follow the bottom route, and head to the end of it. Below the area where a chain of spinning blue platforms leads you upwards, there is an entrance into an exclusive area that no other timezone can access. In the Present, the room that contains the machine is visible to the right of the chain, but completely blocked off. The route to this room in the Past begins at a small, internal area where two springs move back and forth on wheels, on two separate bits of path. Proceed past this and follow the heavily spiked route below, and quickly climb a vertical arrangement of disappearing/reappearing blocks. The machine is just a vertical spring away, but this route is a dead end, so you'll have to go all the way back through it afterwards.
In the Past, along the bottom route, follow your way through this additional portion found only in this timezone, rather than going upwards as usual. Pass the moving springs and spiked areas..
You need to quickly jump up this alignment of blocks before they all disappear..
..From there, it's a short spring's journey up to the machine, though you'll then have to backtrack out of this whole area to resume the zone.
No notes have been posted in response to this section.
Hide Notes
Zone 2
Zone 2 Present Map (PNG format)
Zone 2 Past Map (PNG format)
Zone 2 Good Future Map (PNG format)
Zone 2 Bad Future Map (PNG format)
The zone kicks off with this little awkward bit where you must balance yourself on this spring between the two crushers, without slipping in between one while they move up.
The beginning of the zone places you in a tall open area with many small platforms, cogs, crushers and conveyors. There may be a lower exit open to you on the right, but otherwise you can use a spring and spin around on the crushers, leaping off at the right time, to progress up to the very top.
Near the bottom of the Futures, not far from where the machine would be, a couple of conveyors lead to a secret area with these two delicate ledges. If you leap between them successfully, a hidden entrance on the high right wall hides an extra life. You need to leap between them with plenty of momentum to the right, so take a run up on the conveyor from the far left.
The Past also boasts a 1-up of its own. Take the transport tube mentioned in Point #1, go down at the junction and in the room you come out in, go as far top right as you can to find your way up to this alcove.
No notes have been posted in response to this section.
Hide Notes
Time Travelling Tips
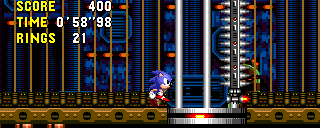
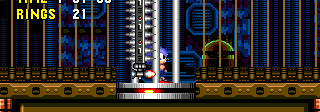
This entire situation is very complicated to sort out (hence this excessively long section), but I will do my best in explaining it. Time travelling back and forth between the Past, Present and Futures whenever you want, using relatively easy to access time travel points, is usually not beyond achievement in other levels, and I have based my previous explanations on the ability to do this, so you can choose where you want to go at any particular point. This zone, however, is designed in a very complicated manner, with lots of routes that are closed off from each other, and there are worlds of differences between their exact structures across the timezones. Furthermore, it all takes place entirely within the first half of the zone, as the moment you begin to explore the long, winding route of the second half, you've gone too far and will find that backtracking is difficult. In fact, it's only possible at the very end of the zone, as explained in Point #4. Essentially, if you want to go into the Past, find the machine, then travel to the lovely Good Future successfully, you'll need to pretty much follow step-by-step instructions, as they're very hard to figure out by yourself because of many areas that deny backtracking at certain points, and limited time travel opportunities. My research also suggests that Mega CD users are at a slight disadvantage compared to Sonic Gems Collection and PC users of the game. In the MCD version (though possibly just the emulated version of it, I cannot yet confirm), it doesn't even seem to be possible to get all the way through the zone in the Past without having to return to the Present (see Point #1). Let me say that without assistance, this will probably be your toughest time travelling challenge, but luckily, you have me and my wonderful guide to help you..
These spinning cog wheels are perfect for time travel. Just hop on, start rolling and you're away. Problem is, they're all mostly at the beginning, and are therefore not that useful.
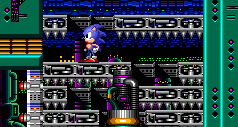
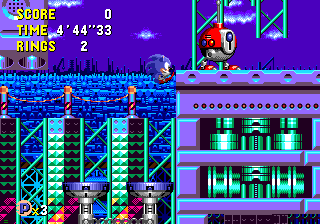
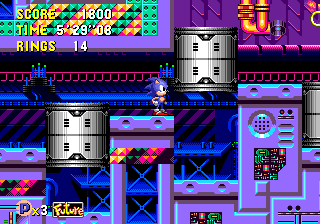
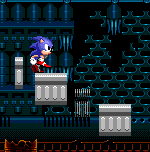
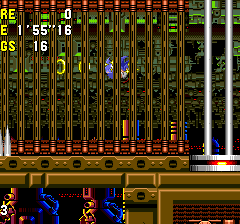
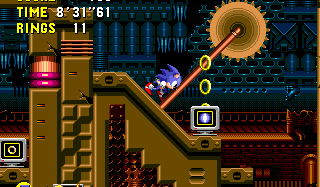
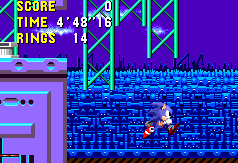
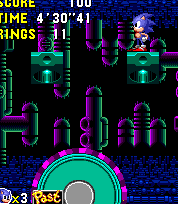
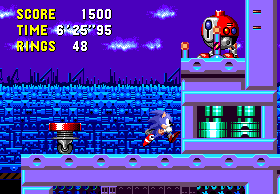
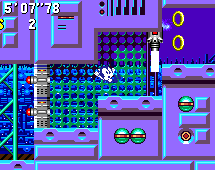
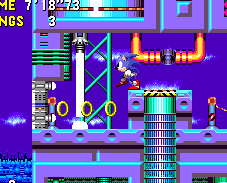
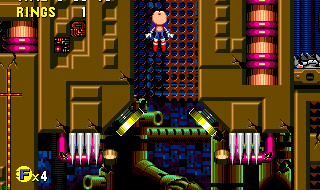
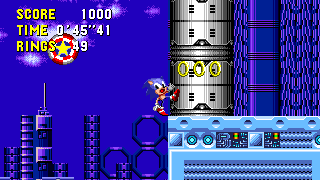
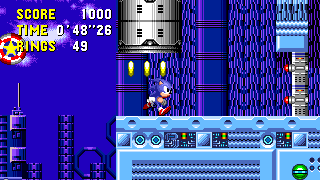
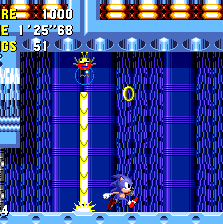
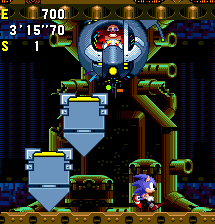
Firstly, in terms of time travel opportunities, things are very similar to the situation in Zone 1, in that there are only a couple of fool-proof places to time travel using two opposing horizontal springs, but this time you can also use a zone-exclusive object to your advantage. These are the rotating wheels suspended in the air, mostly found in a tall open room right at the start. If you land on the top half of one of these wheels, Sonic will start to run around its circumference, preferably if you leave the left or right buttons alone, otherwise he tends to fall off. Instead, press down once and Sonic will spin in a ball with increasing speed as he goes round and round, and this is perfect for when you've got a warp activated. Otherwise, if you jump off with your speed increased at the right time, you should be able to gain more height upwards. Using these for time travel is not necessary, but it is an option open to you.
To begin your time travel quest from the Present, head up straight to the top, by way of springs and spinning cogs. Find this Past post up here..
..Just next to the Past post, there's a handy dandy pair of springs.
When you arrive in the Past, take the first transport tube you come across, very shortly after.
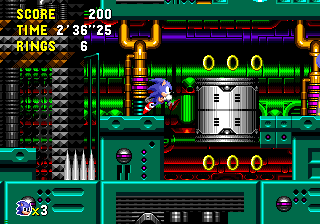
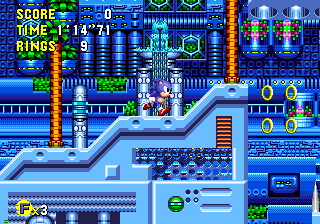
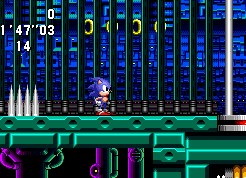
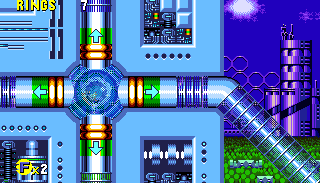
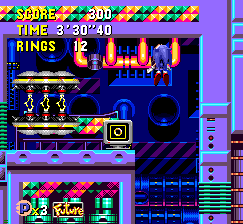
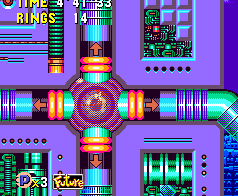
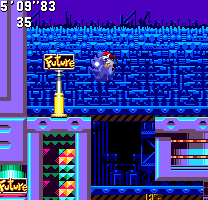
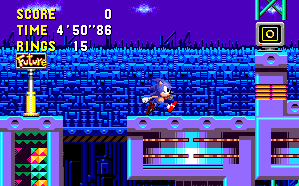
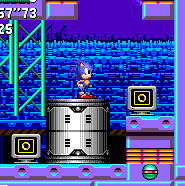
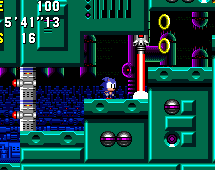
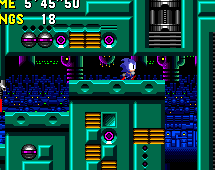
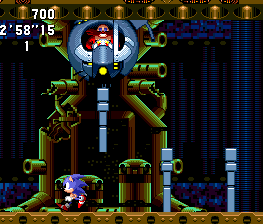
Now, the step-by-step guide to time travelling and Good Future-earning in Zone 2.. Starting from the beginning in the Present, you'll proceed upwards into the tall room filled with rotating wheels and various platforms etc. This room continues off to the right at a couple of exits on the way up, but what you want to do is use the techniques described above to ascend to the very top route, using the spinning wheels to propel you. A short way along this top route as it begins to the right, you'll find a pair of horizontal springs and a Past post to go with them, so you should have no trouble there. There is a Future post on the way up through this initial room, and I suppose you could accidentally activate it using the wheels, but in the Futures, you can easily use the same mechanisms to return to the Present, at this point. All being well though, you'll arrive in the Past, and you'll find there are no horizontal springs at the same point, and you cannot return to the tall room because a high ledge on the left prevents it. Go to the right and press the button to open up the hatch into the transportation tubing network. When you arrive at the four-way junction, press left to be taken to the bottom route. When you reach the exit hatch, you need to drop down to the area below on the right but be careful, as there's a small gap in the floor that you're going to land on, and if you fall through it, you'll miss your opportunity at the machine. Try and drop close to the wall, so that you land by a Future post. Leap over the gap and go to the right to find a slow moving crushing block, and the machine is in a room just above this.
When you're in the transport tube, you'll face a junction. Press left.
When you come out of the tube, there's a drop down to the right, but be careful. On the the floor below there's a gap in the middle which you don't want to fall down or you'll miss your chance at the machine, so aim for the left or right sides. Then go right to find the machine.
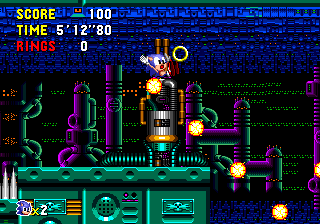
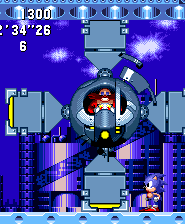
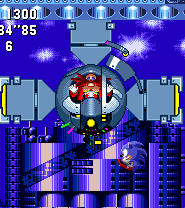
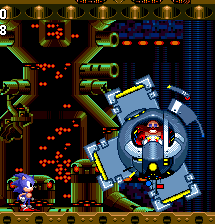
Ok, so the machine is destroyed, but this is where things get really complicated. For me anyway, as I've got to explain it all to you. If you're playing the Sonic Gems Collection or PC version of Sonic CD, you can either continue to frolic in the Past for the remainder of the zone, or you can return to the Present, and there's a slightly less than fool-proof opportunity to do this very soon after the machine. If, however, you are playing the original, Mega CD version of the game, it seems you will be unable to complete the zone in the Past (see Point #1 to find out why), and will have to return to the Present, but only via a time travelling opportunity that appears later in the zone. It's also worth noting that a much easier alternative option exists if you've got plenty of lives to throw around and won't mind sacrificing one by topping yourself. This will allow you to go straight to the start of Zone 2 Past where you can use the spinning wheels to time warp into the Present, and then from the Present, you can use the options available in that area to head on into the Good Future, as the destruction of the machine is saved, even though you lost a life. Bear in mind of course that Zone 3 is hard as nails, so you might need all the lives you can get for it! If you'd rather play it safe and honest, continue reading, as there are long ways around the problem.
Once you're happy the machine is dead and gone, you might like to pick up this Future before finally dropping down the gap to the bottom of the zone.
If you're on the PC/Gems Collection version, you can sneak an extra time travel voyage down here by running from this slope to the right and jumping over the moving spring at the end. There's just enough room, if you just start running rather than peel-out.
If you didn't take that time travel opportunity and stayed in the Past, you'll be halted by this wall..
..Just hop in the revolving machine and go behind the shutters. The ground here will collapse for you.
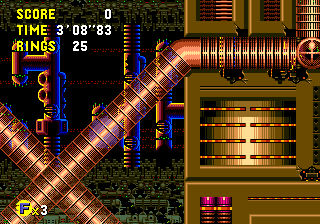
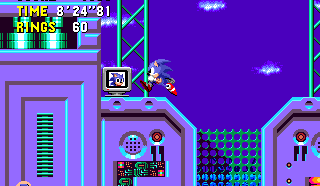
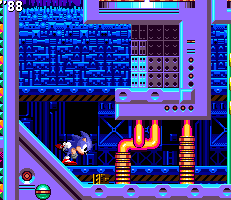
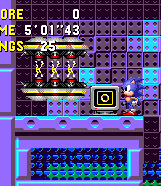
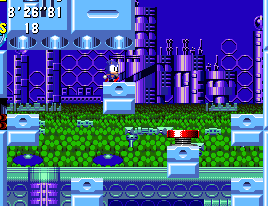
For Gems and PC users only, ensure that you've touched that Future post on the left side of the gap I told you not to drop down to, near the machine, and then.. drop down it. Down a short slope, you'll find a long stretch of open floor. There's a spring on a wheel at the very end of it, but it's just long enough for you to run right across it, obtaining your required three seconds for time warping, if you start from the slope and you DON'T use a peel-out or spin dash this time, as these are too quick for this amount of space. Just pick up speed as quickly as you can while running normally and you'll probably need to jump over the spring at the end - should be just enough room. If you're on the Mega CD, or if you tried that time warp and failed, you can continue on to the next, slightly hidden opportunity that is pretty much a guaranteed success. To get there, head onwards, into a straight section of shutters. Use the revolving device to go behind the shutters and run to the far right end. You'll fall through an invisible collapsing floor to another shutter area below, and you can continue the zone from here. Eventually, you'll reach the area explained in Point #1, with the diagonal spring that lacks enough power in the Mega CD version. Use it, or the moving spring below it, to enter the in-built ledge on the left-hand wall, below the highest ledge, and this consists of a transport tubing entrance that takes you to the second four-way junction in the zone. You'll come in from the right side, and should choose to go down at the junction, which delivers you to a large, but ultimately dead-end area further back. Use the first long moving spring/crusher thing you come across to ascend to the ledge on the upper left. Carry on left, then drop down below and just to the right, you'll find a sight for sore eyes; a lovely pair of horizontal springs and a Future post between them. Get your ass to the Present, pronto.
Still in the Past, keep going until you reach Point #1. Just below the tricky ledge is another tube entrance. Hop in and head downwards at the junction.
..When you come out, head to the upper left area of the room, drop down, and find your ticket back to the Present.
When you reappear here in the Present, you'll find the spring area has both posts, but you'll usually run straight into them, and the one you're left with will probably be Past. D'oh!
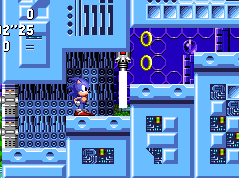
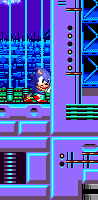
Right, so now you've destroyed the machine, and returned to the Present. You can now complete the zone as normal, but you don't want to do that, do you? You want to take a gander at the Good Future, don't you? That's the spirit, and it's still possible, regardless of which of the two time travelling methods you took, described in the previous paragraph. The area with two opposing springs is actually still there in the Present (and Futures for that matter), but you can't really use it, and here's why: it's got both a Future post AND a Past post in between the springs. Obviously, you have to touch them both and you'll come in running into them, so whichever one you touch second is the one you're stuck with. In my tests, the second one you touch as you appear into the Present often seems to be the Past, unfortunately - the one time we DON'T need it! If it happens to be the Future for you though, then you've struck very lucky indeed, and can safely time travel away between the two springs, and there's also a ten ring box there too, so you could get caught in front of that, then have your choice of posts (remember to get the one you don't want first, then the one you do). Otherwise though, you'll need to get out of the area and continue your quest, as there are no other posts in the vicinity that will allow you to return to these springs. Unfortunately, if you took the alternative time travel method listed above by running across the straight ground just after the machine, these springs are also useless to you because you've appeared on the lowest route. Right above you, the route splits into a higher one that allows access to the area with the springs, but unfortunately, it's too high to reach from where you are now.
Your final time travel opportunity in the Present, before going through the lengthy winding path the to end, occurs here. Before going downwards, stand on one of these small platforms and drop onto the cog wheel..
Use this to spend the rest of the zone in the beautiful Good Future, but cock it up and it'll be your last chance!
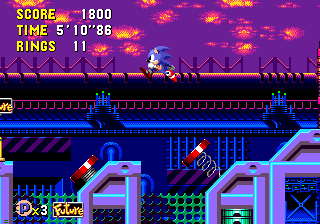
There are two other solutions you can use to time travel from the Present into the Good Future, one of them much longer but less risky, and the other is on the way to the end of the zone, but you might mess it up, and then be unable to backtrack. Regardless of where you've appeared coming from the Past, just continue right until you reach the Present equivalent of Point #1, which now contains handy conveyor belts. If you want to take the longer, but safer method of time travelling, use the conveyor belts to get inside the small room on the left-hand wall, below the highest ledge. In here is the entrance into the tubing network, and at the junction, choose the up option first to grab yourself a Future post in a dead end room up top, then return to the tubing junction and go left. This will take you to the top route, where you can backtrack all the way across the shutter area and platforms to once again find the first pair of horizontal springs, way back near the beginning of the zone. The other option is to continue the zone as normal by carrying on up the highest ledge, rather than going through the transport tubing, and there's a Future post for you on the way. Tread gingerly once you begin to head downwards via a couple of long ledges on alternating sides. Look out for a large spinning wheel object just to your left that's below a couple of small stationary platforms. Do not fall because you won't get a chance to go on the wheel from below it, but carefully leap up onto one of the small platforms and drop onto the wheel from the space between them, then use it to create a time warp by pressing the down button. If you really want to go to the Good Future, I advise the first method. If you're not all that concerned about it, you may as well attempt the second.
No notes have been posted in response to this section.
Hide Notes
Machine Location
Machine Location
I mentioned it in the Time Travelling Tips section, but here it is again for easy reference. The machine in the Past is located at the start of the bottom route, accessible by going left at the first four-way junction in the first set of transport tubing, early on in the zone. When you arrive out at the other end, you'll have to drop down into a lower section, but be careful, as there's a hole in the floor below, and if you fall down it, it'll make life harder for you. Either perform a Peel-Out off the top ledge to land on the right side of the hole, or stay close to the wall as you drop down it, to land on the left of it by a Future post. Having successfully avoided the gap, go to the right, toward a crusher and three sets of 10-ring boxes, and the machine is located in a room above the crusher, accessible by a diagonal spring. If you do fall down that hole before destroying the machine, it may be possible to leap back up as it drops down to a small slope and long, straight area to the right. Dash quickly across the straight area, toward the slope, and leap up as you hit the slope and you might be able to jump high enough. Failing that, you'll have to go all the way back around the first half of the zone by making your way to the second set of transport tubes, and backtracking across the very top route.
The Past's machine is found by hopping into the first transport tube you find and going left at the junction. When you come out, very carefully drop down to the right. There's a gap in the middle of the floor that you would rather not fall down, so you need to aim for the far right side as you fall, to land here..
Carry on right, past all the ring boxes, on top of the crusher and take a nearby diagonal spring upwards.
The final machine of the game is in an alcove above. After bashing it, go back and drop down the hole at the start of this area to continue.
No notes have been posted in response to this section.
Hide Notes
Point #1
In the Past, whether you initially take the top or bottom route, you'll wind up in this tall, open space, which leads up into the beginning of the second half of the zone. At the bottom of the room, there is a tall moving block in the floor that can be used to spring yourself up onto one of several ledges on the right, the bottom of which contains a moving spring on a wheel, and there's a large bomb robot looming on the next ledge up. The idea is that you use the moving block to spring up to these ledges, hit the moving spring and then move right while in the air, to find a diagonal red spring on the wall that is supposed to catapult you up to the high left ledge, where you can resume the zone. This works fine in the Sonic Gems Collection and PC versions of the game, but for some bizarre reason, it doesn't seem to work in the original, Mega CD game, perhaps due to slightly different physics. Bear in mind though, I have only been able to test it on the PC emulated version of the Mega CD game, and cannot yet confirm whether or not it works on the console original. Either way, hit the diagonal spring, don't touch any directional buttons, and see if you make it to the top ledge or not. If not, you will have to return to the Present, in order to complete the zone. Do this by entering the room below the top ledge of the left wall (might be easier if you use the moving vertical spring rather than the diagonal one), which takes you into the tubing network, and choose to go down at the four-way junction. In the area you come out to, use another long moving block to spring upwards and left, then find a pair of opposing horizontal springs and a Future post nearby.
In the Past, so far so good, just hit this spring and aim toward a diagonal one on the upper right side..
..The spring aims you towards a high ledge on the left, which you get to no problem on PC and Gems..
..But for some reason, and it may just be me, on the Mega CD version, it just doesn't seem possible to get on the ledge. Sonic just doesn't go high enough. The only thing you can do is drop to the ledge just below, with the transport tube, and find a place to time travel to the Present. Sorry - I'm stumped!
Bearing in mind that the remainder of the zone is perfectly playable in the Past, it seems unlikely to me that the original console version would not allow you access to it, so maybe it's just the emulated version that's the problem. On the other hand, I have never encountered any other case where the original console version will let you reach a certain place, but an emulated version of it won't. If you know more about this mysterious issue, please enlighten me. Also bear in mind that this point is only relevant for the Past, and the same area is completely possible to pass in all other timezones, and in any version of the game.
#1. Comment posted by Meph on Saturday, 8th August 2009, 2:41pm (UTC)
It's strange. I have this problem as well.
#2. Comment posted by Ajavalo on Sunday, 9th August 2009, 3:44pm (UTC)
I also have this problem. I've heard of it in internet and I think it actually happens in the original Mega CD!
It's maybe because of the spring being too low. Maybe they just moved it upwards for the next versions...
But I think the better choice is forgetting all this and time travel to the present, wich is easy.
#3. Comment posted by mercury on Monday, 10th August 2009, 7:49pm (UTC)
Well, I remember this problem from playing the game years ago, but I busted out the ol' Mega CD anyway to confirm it. It's not an emulation issue, the spring doesn't send Sonic high enough when the game is played on real hardware, as well.

At first, because of this I thought the Past of Act 2 was unbeatable. I took that as a challenge, of course, and searched and searched for a way to beat it. The method I developed was taking the tip top route at the very beginning of the zone, and instead of dropping into that corridor with the multiple layers and the big bomb that follows you, I would dash off the ledge, and sail through the air, off the top of the screen, and run over the whole corridor. Move to the right, jump One more gap, and voila, Sonic can avoid having to take the chutes or hit that spring altogether.
#4. Comment posted by DF on Friday, 1st October 2010, 1:08am (UTC)
This frustrated me to no end when playing this on the Mega CD as a kid, but years later I came across a glitch that lets you bypass that section. I've only tested it on an emulator, but I'm reasonably sure it works on the original version as well.

Just below the problematic red spring is a small ledge with a large walking bomb, and to the left of that, a little way down, is a giant vertically-moving cylinder. The important point is that if you're standing on the top of the cylinder as it completes an upward motion, it springs you into the air.

To get past the spring, trigger the big bomb and let it explode to get it out of the way, then go down and stand on the cylinder, facing right. Charge up a Super Peel-Out as the cylinder moves, and hold it as you're flung into the air at the top of the cycle. You're aiming to land on the ledge the bomb occupied, next to the wall; for some reason, the combination of charged Peel-Out and spring physics at the same time makes the engine glitch. When he lands, Sonic will be slowly drawn through the wall, and come out next to the big walking device at point #2. You miss out on the nice easy time-travel location higher up, but at least it lets you continue the level if you accidentally failed the trip back to the Present for some reason.
#5. Comment posted by Anonymous on Tuesday, 31st January 2012, 9:41pm (UTC)
it's worth noting that the pc 2011 remake does not have this problem.
Hide Notes
Point #2
In all timezones, you'll find a long sloping path with this pair of unusual objects at the start. They're walking platforms, which you need to take across to the end, while you stand on them.
To make them walk, just jump on top of the rear 'leg', it'll rise up over the other one and come down in front of it. Jump to the other to repeat the process with that one and it'll progress onwards. You can jump back on if you fall, but watch out for the rolling badniks below.
This is the point of it all. A high ledge, and you need the added height of the walkers to get to it. Problem is there's a big bomb robot up there that will almost certainly cause damage if you jump to him. Just cause him to self destruct by getting close enough and stay close to the wall. The projectiles will miss you and you can then carry on.
After Point #1, you'll wind your way upwards, across and then down via left and right platforms along one, intricate route. Drop to the bottom and in all timezones, you'll eventually find this one-off object that resembles two vertically positioned dumbbells, connected by a chain. If you stand on the left one, it'll move up and over the other, so if you continually jump between them, you can actually make them walk across the long floor to the right. Rolling bug badniks will be patrolling the floor below, but this walking device will keep you safe above them. Although it makes it all a bit of a slow section, the idea is that you use their extra height to get up to the high platform at the end of the short course, and you have to walk them all the way across it to do so. when you reach the end, you'll find a big bomb robot is standing on the ledge you're trying to get to. Rather than attempting to jump over him in this fairly tight corridor, it's safest to set him off by coming close, and then stay on the dumbbell that's closest to the ledge. When he explodes, the projectiles should miss you entirely, and you can then pass.
No notes have been posted in response to this section.
Hide Notes
Point #3
A laser beam stands in the way. Step in, and.. what the deuce..?
Sonic has shrunk!
Despite his much smaller form, he still has access to all of his abilities and can still jump as high and move as fast. Now however, he can fit inside tiny corridors. Take him through a short course..
Immediately after Point #2, in any timezone, you'll soon arrive at the infamous shrink ray, a red beam of light being emitted from the ceiling and making a lot of noise. Jump into it and Sonic will fall backwards and shrink down to something that roughly resembles his "Continue" sprite, which appears as an icon in other games where you earn a Continue. He's much shorter, and can squeeze through tight gaps in corridors that regular sized Sonic cannot, yet he retains all of the physics and abilities that he had before, and look at him! He's so much cuter too!.. He can jump just as high, move just as quickly, and still perform the patented spin dash and peel-out moves, so there aren't really any disadvantages to this form, but it will only last across the following corridor area. Read the following paragraph carefully, as the route through the corridors contains many sneaky trap doorways or tunnels that simply return you to an earlier point, and you'll be unable to go back through them.
You'll run through a curved tunnel and out into a vertical series of tall rooms. Use springs to progress upwards and meander through these small platforms. May take a moment to get used to your new form.
Watch out for obstacles like this that can force you back down, annoyingly. Try adjusting your position on the vertical springs that send you upwards, to avoid these.
The path goes up, left and then comes back to the right, watch out for a corridor crusher on the way, then you arrive here, where you must pass down through these conveyors with another crusher in between. Careful now.
Follow the path along into a tall, thin room with various ledges, springs, small platforms and in the Past, conveyor belts, which you can use to ascend. Might get a bit fiddly in some places, particularly where a downward-facing diagonal spring sets you back a bit, but solutions are usually just to alter the direction you travel in off of vertical springs. At the top, follow the winding route to the left and then right, past a crusher and then a vertical series of conveyor belts with another crusher amongst them. Get on the crusher as it's moving down to get off at the conveyor belt below. As you drop to the area below this, you will have the option of taking an opening doorway to the right, if in the Present or Futures. Do NOT go through this door, as it's nothing but a trap that will simply take you back to the first tall room and you'll be forced to re-trace your steps, as you will not be able to go back through the door. Instead, keep going left until you arrive at another shrink ray which will return Sonic to his regular size. In the Past, do not get distracted in the area just before the shrink ray, as at the bottom right of this room, there is a separate curving tunnel you can drop down that will also return you to an earlier point, and you cannot go back up through it. After returning to normal size, simply hop into a transportation tube entrance. At the other end of the tube in the Past only, you'll immediately be enticed again by an opening doorway on the left. Unless you really need to time travel, and have a Future post already, or maybe need some rings for the Special Stage, you definitely do not want to take this, as it leads you all the way back to the area just before Point #2! If you do go through, jump straight across the gap for a time travel opportunity. Otherwise, go to the right instead, and when you take the following spring, beware of the ceiling spikes it can easily force you into above.
Tumbling down from the conveyors and crusher, do NOT be tempted by this opening doorway on the right. It's a trap that takes you back to the tall rooms, with no way back through. Go left instead.
Your time as mini Sonic ends when you find another laser, which will return you to normal. Dodge the giant bomb to get there.
When you come out of the transport tube in the Past, there will be a trap doorway on your left. Unless you desperately need to time travel, avoid going through at all costs, as it takes you way back, before Point #2!
No notes have been posted in response to this section.
Hide Notes
Point #4
Just before you get to the end of the zone (at bloody last) you have to avoid one more misleading doorway. First though, after the end of the shrinking incident, you'll have your first meeting with the descending spiked platforms inside a closed-off room. There are two instances in the Past, but you just have to leap through the dull area of each descending platform before it comes down on you. Remember that there are five of them in a sequence, so wait for them all to come down before you use them to get up to the high ledge. More details in the Features and Obstacles section. Anyway, after you've dealt with them, you'll be tempted by the final trap doorway on the left, and if you take it, you'll be sent pretty much back to the start of the second half of the zone, with no way of getting back without having to do the whole thing again. If you wish to end the zone, go right! Otherwise, the only reason you might have for taking the left hand door is if your work isn't yet done and you need to time travel or you need more rings for a final shot at the Special Stage, as it is actually possible to get back to most earlier points of the zone from here. If this is for you, once through the doorway, start up a peel-out to the left and leap off the edge to gain enough distance across the gap, where you can start backtracking wherever you wish. If you mess up, you can't go and try and again without retrying the whole second part of the zone.
Just a hair away from the end, you'll find the first sequence of slow moving spiked platforms descending on you. There's five of them in a row, stacking on top of each other and you just need to fit through the dull gaps.
At the top, you're probably more likely to go right anyway, but do not take this door on the left unless you need to backtrack. It requires you to then repeat the whole second part of the zone!
#1. Comment posted by top secret on Wednesday, 21st December 2011, 1:35am (UTC)
there are 2 ways to finish with small sonic:
>use debug mode
>pass by the lazer exactly whem it´s off(it desactives for 1 second),it´s hard, but i already do it, in futures
Hide Notes
Tumble down to the lower route, and it'll force you into another room with slow moving, descending platforms. Once you've fallen down here, there's no way back for that extra life described in Point #5.
The higher route meanwhile is a bit quicker, as it only confronts you with a pair of these circular saws. Your entrance into the following large, bottomless room however is a tad more precarious than the one on the lower route.
No notes have been posted in response to this section.
Hide Notes
Point #5
Before taking on Eggman for the final time in the game, you'll first have to make your way through a couple more trials of your abilities, the first one being about as tough a challenge as any. It's the only appearance in the whole entire game (hope you're reading this, modern Sonic level designers) of a death drop, whereby Sonic will fall to the bottom of the screen and die on impact if you're not careful. A common tool that's otherwise completely absent in Sonic CD, but it makes up for it quite well here by spreading itself widely at the bottom of a huge open gap in the level, with a variety of precarious objects held above it, and it'll more than likely take you a few tries to complete.
From the start, you can take the alternate top route by way of a moving spring up through this shaft. Hitting the diagonal springs accidentally here may force you to the bottom route instead.
The benefit of the top route is this extra life, over to the far left side from the top of the shaft. If you can make it back up here whenever you die, you effectively have unlimited lives for this zone!
Firstly, you're given two options for where you want to enter this large room of death, a higher and a lower route. For the lower route, you simply proceed on from the start and drop down the gap, and you'll then be trapped inside another room featuring long, descending spiked platforms for which you'll have to jump through the dull gaps each time, as you did at the end of Zone 2 (don't forget there are always FIVE of them). For the following crushing block in the corridor, jump over it as it's moving down. The upper route skips out all this crushing business and allows you access to an extra life that you can keep getting each time you return to the start of Zone 3 after dying, so providing you can always get to it, you'll essentially be able to take on this fiendish zone with infinite lives. To take the upper route, hit the moving red vertical spring you see shortly after the start, roughly when it's in the middle of its platform, in order to be sent up through a narrow shaft in the ground. Be careful though, because there are ceiling spikes on the far outer sides, and just next to the gap that you're aiming for, there are downward-diagonal springs that will force you back down, and could send you into floor spikes or down the drop towards the lower route, from which you cannot get back out. If you hit the moving spring when it's in the middle though, you should be sent sailing through the narrow shaft above. At the top and to the left, past more spikes, you will find the handy extra life that's definitely worth picking up every time you restart the zone. When you head to the right, some collapsing floor will drop you below, but as you drop, you should stay as close to the left wall as possible, in order to avoid dropping straight down to the low route again. From the left ledge you land on, leap the gap, pass the circular saws and you'll enter the large bottomless room at a higher point on the left side. Though the upper route is good for avoiding the crushing hazards of the lower one, it does add confusion to the following large room, as it's not obvious to see where you should go when you enter it...
Coming through from the lower route, you'll enter a huge bottomless room with various floating platforms and obstacles, starting with a string of precarious spinning platforms..
..The first line leads up to more in a vertical pattern and then singular ones straight to the end. They spend most of their time stable, but they rotate at different times, and one slip could mean the end of you!
You'll need quite a bit of luck on your side here, as this bit is flat out mean, but with a bit of practice and fearlessness, you can do it, and don't forget that you can always reclaim a lost life, as described above. It's a wide, bottomless room, and there are strings of small, rotating blue platforms stemming from the exit of the lower route, some in lines of three or four, all rotating in unison within the line, others on their own and rotating separately from those nearby. If you come in from the upper route, it's actually harder to tell where you should be going, so it seems the best thing to do is simply to drop down onto these platforms and hope that they're not spinning. They tend to remain sturdy for about 3 seconds, allowing you to stand on them, and then they rotate for a second or so, at which point you'll drop through so I suppose the odds are technically in your favour, especially as some of them are stacked vertically. Without enough time to wait around and study them though, you just sort of have to leap from one to the other and hope for the best, considering that they don't all rotate at the same time. If you stay on your toes, you should be better off. At the far end, you need to leap to a right hand ledge, but there's a large crusher moving up and down on the very edge of it, which makes matters far more difficult than they need to be. Don't be afraid to jump over to the ledge anyway if the crusher is already down, because Sonic will just about be able to stand precariously on the very tip of the edge, until the crusher finally lifts and you can pass through. Just be careful not to squeeze in under it as it's coming down. In the large room, there are also several other objects dotted around, some more helpful than others. Should you fall off the rotating platforms, there are steps of collapsing ledges leading downwards in the bottom right corner, with a vertical spring at the bottom and a diagonal one at the top, and these are usually quite successful at saving you, but of course the collapsing ledges can only be landed on once. The diagonal spring will send you up to another higher one on the left side of the room, which subsequently bounces you towards moving bumpers above. The very same bumpers from Collision Chaos, but not seen anywhere else in this level. There are some at the top and bottom of the room, either moving left to right or up and down, or completely stationary, but they tend to be more of an obstacle than they are helpful.
If you fall toward the far right side, chances are, you'll be saved by this staircase of collapsing platforms or the vertical/diagonal springs found at either end of them. The collapsing platforms can obviously only save you once though, and the springs will send you back up without being particularly precise, so might be difficult to land on safe footing up there.
This room features the only proper death drop in the game and it's rather easy to fall into!
There are a few bumpers at the top of the area, which the higher entrance leads into, but using them to cross rather than the spinning platforms below can be risky, as controlling yourself off of each bounce is tricky, especially as the upper two are constantly moving.
The exit on the far right side is being guarded by a large crusher, making the whole thing even harder! What you can do though is jump toward it while it's down. If you stay close to it as you fall, you should be able to just about teeter on the edge..
..Wait for the crusher to rise and just squeeze through - you've made it!
#1. Comment posted by Anonymous on Sunday, 8th January 2012, 6:53pm (UTC)
Unlike the original MegaCD / SegaCD version, in the iPhone version you cannot stand on the ledge waiting for the crasher to rise and let you pass.
#2. Comment posted by Tjmachado on Tuesday, 21st February 2012, 12:12am (UTC)
Also, there is (apparently) a death drop in the present at the end of Stardust Speedway Act 1. I believe that it's possible if you're on the "front" plane of the level and you fall through the darker ground on the bottom path, but that's for discussion in the Stardust Speedway page!
#3. Comment posted by Adam on Friday, 1st March 2013, 8:11pm (UTC)
In the PSN/XBLA version you also can't stand on the ledge when the crusher is closed- that has ruined my time attacks.
Hide Notes
Point #6
In this shutter area, a long spiked object will appear, patrolling back and forth in front of the large revolving contraption..
..This thing only hurts you while you're in front of the shutters though. If you're quick, you can step in the revolver before it gets to you where you'll be safe. Then you have to step back in when it's on the left side so that you'll reappear to the right of it, on the front plane.
Following through the corridor after the long crusher on the far ledge of the big room, you'll enter another shutter area, with one revolving device in the middle, but it's guarded by a one-off thin spiked pillar the height of the corridor, which moves back and forth in front of the revolving device very slowly. If it's blocking your way to the revolving device, you'll have to wait for it to move far enough to the right so that you can step in the revolver to move into the background plane, where the spiked pillar can't get you. Allow it to move to the left again, then step back in the revolver to return to the front, so that you may continue. If you're quick enough, you can get into the revolver before the pillar comes too far to the left, then you can simply step back in while it's still heading left on the first time, which is good for time attack mode.
No notes have been posted in response to this section.
Hide Notes
Point #7
Enter into a dark room that closes off behind you, but you might want to leave the single ring hanging in the air, just in case. In here, three small badniks that look exactly like the flying light bulb bots from Stardust Speedway will emerge, but with completely different attack patterns from those in the previous level. One will appear in the room first, and when you've destroyed it, two more will pop in together, and only after destroying those will you be allowed to continue to the boss. They appear in the form of a yellow circular light that you cannot touch, and will dart from one random location to another, within the room. Between each movement, they will appear in their regular, destructible form for just a couple of seconds and fire a yellow laser beam down to the floor, before darting off somewhere else. Hit them in this vulnerable form, but you can only reach them if they're low enough, which they frequently aren't. Can be a little hard to nail them down, but nothing particularly life-threatening.
You'll soon find yourself trapped in this room with a lightbulb badnik from Stardust Speedway. This time though he darts around the arena, lighting it up with a powerful laser blast downwards.
With one defeated, two more sprout out of nowhere! You have to try and jump high enough to take them out, while avoiding their lasers. They'll often be too high to reach.
Between blasts, they zip to random locations in the darkened room, visible only by their lights and they can't be killed during this time.
No notes have been posted in response to this section.
Hide Notes
Boss
Final Boss
This is it, the final battle of the game, and fortunately it's not too hard, providing you maintain rings throughout, as getting hit is almost inevitable, early on. As you exit the room described in Point #7, there are a couple of rings above that you'll want to get hold of, so even if you've lost your shield and all your rings, you'll still be given a chance. Remember that should you die while fighting this boss, you can always head up to the top route described in Point #5 and essentially refund your lost life with an extra one. Proceed forward, past some closed shutters to reach a column in the middle of the screen. The two sides of the column will draw backwards, pulling away the shutters to reveal Eggman sitting in a large spherical machine as the rather smashing opera style final boss music hits (if you're on the JP soundtrack that is).
Shutters draw back to reveal Dr Eggman waiting for you in a large spherical machine surrounded by rectangular panels. The final showdown is on!
The spherical machine features four large square blades protruding from all sides, and Eggman uses them in a variety of ways to attack you, as they are always dangerous to touch. When you hit the main machine, one of the blades will detach from it, and he'll then use a slightly altered set of attacks, depending on how many are left. He is defeated when he loses all four blades, so although a measly four hits doesn't sound too difficult, this is still quite tough and enduring.
Eggman's craft will start to lower after a bit, in the center, and then will begin to roll towards you on those four blades..
..The only way to stay safe here is to keep tight against the corner. The blades should leave a small square of space for you to just be still in, for a moment.
Returning to the top center, Eggman will start to fling the blades at you. He's too high to hit, and they come down on their thin sides, one by one.
The craft comes down a bit and the now reattached blades stretch outwards, either top, bottom, left and right or in diagonal directions if you're standing too far to the side.
This is your chance to attack! If they're spread out non-diagonally, you should be able to leap into a lower diagonal side of the craft, where it's unprotected. If they are in a diagonal formation though you might be too far over to be able to take advantage.
Firstly, he'll move back and forth along the top of the screen, spinning the blades as he goes. In the middle, blades still, he'll then slowly lower, and use the blades to roll towards you on the ground. This occupies a lot of on-screen space, and the only way to avoid him completely is by staying on the very far corner of the side he's moving towards. You can try and hit him at this point to skip right to the second phase of attacks (next paragraph), but you will take damage, as it's seemingly impossible to hit an exposed edge of the machine, without touching the blades. If you get hit anyway, make sure you use your temporary invincibility to hit him back, as well as ensuring you've picked up at least one fallen ring, as you'll need as many as you can get. If you'd rather play it safe, remain in that corner and allow him to roll back away from you, and then he returns to the space above. There, he will eventually remain in the middle, at which point the four blades will flip to their thin sides (don't stand in the middle, as the bottom one will get you) and disappear above him. They then fall down to the floor, one by one, either vaguely following your position, or falling in a variety of set places. These are fairly easy to avoid, and they'll disappear shortly afterwards, but the machine stays too high for you to reach during this attack. His next is slightly more ominous, as the four blades will return in their broader forms and Eggman will move towards you, the four blades stretching out to try and reach you. This can be a tough one to dodge, but it does leave the machine vulnerable to your attack, if you can manage to side step the blade closest to you, and leap up past it. The best method seems to be to stand in the middle as he's coming towards you, then move to the side before he gets too close. He'll remain in the middle, and the blades will stretch out to the top, bottom, left and right, allowing you to make your attack from either of the lower diagonal sides. The blades can also do the reverse and go in all the diagonal directions if you get trapped in the corners of the arena, and if you don't hit him first time, he'll give you another chance by repeating this attack, and then he'll repeat the whole phase.
When hit for the first time, one of the blades will fly off and he'll retreat back up to the top to plot his second phase of attacks, which funnily enough is almost the same as the first, only he now has three blades remaining, so his initial, rolling attack is going to be a bit different. He'll lower himself down onto either the right or left side of the floor (whichever one you aren't on), with the blades on all but one side, and positioned so that he can use them to roll across to the middle of the screen, then roll back. His top side is therefore exposed when he's in the middle of the floor, so if you want to go for a hit here, you'll have to leap nice and high and get him right on the noggin, but it's still very easy to lose rings (perhaps even unavoidable), as the blades on either side remain harmful to touch as he rises up after being hit, while the bottom one falls off. While it's a tempting hit, if you'd rather not lose your rings, you'll have to endure the following two attacks, which are exactly the same as those for the first phase. He'll fling the blades at you like missiles from above, then move towards you with the blades outstretched, which is the safer time to attack and make him lose that second blade.
The second round is almost identical to the first, but now with only three blades, his rolling attack leaves the top side unguarded. It is possible to leap and hit, but ring loss is an inevitable consequence.
When down to two, the blades are flung on their broader sides, so there's a larger surface area for you to avoid.
When the two blades are being outstretched diagonally, just underneath is the perfect place to stand, as Eggman is completely at your mercy.
Two down, two to go. After moving around a bit above you, he'll stop in the middle and perform the missile maneuver with the blades, whereby they fall from the ceiling, but this time they're on their broad sides as opposed to their thin sides, so to make up for the fact that there's only two of them, each is harder to avoid than before. They'll disappear and reappear, and he will then once again repeat the next attack, where he moves towards you and stretches out the two blades, which remain close to each other, rather than on opposite sides of the machine. Use the same strategy of remaining in the middle as he's coming towards you, then side step away and leap over the blades to relieve him of one more of them. The blades appear to only come down in diagonal directions this time.
Down to a final blade, the procedure for throwing this one is the deadliest, as it'll come in at a diagonal angle from the side, making it the hardest to avoid. Best to run away from it, and then try and jump over when it's low to the ground.
A new attack, Eggman starts bouncing around the arena, using the last blade as a kind of pogo stick!
With only one left, it's spinning all the more quickly, but this time Eggman's going to trying something a bit different, as I'm sure this is now becoming a bit of a nuisance for him. He'll stop in the middle one more time, but with no warning, the remaining blade will shortly emerge from either the left or right side of the screen, in a diagonal direction, heading right towards you. The side it comes in from is the one that you're furthest away from, so in order to best counter this attack, pick a side and stand over there so you have plenty of time to jump over it. And now for something completely different. Eggman will make his way over to the side furthest away from you and actually use the blade as a kind of pogo stick, as the huge machine bounces up and down, moving across to your side, then back the other way. The phase will repeat if you fail to hit him here, and it can be quite difficult to time, but you just need to jump at him as he's bouncing down on the ground. That'll see off the machine for good as the arena is overcome by the usual necessary explosions, and Eggman manages to hover away, now fully defeated. You no longer have control of Sonic as a short scene plays, while Amy Rose reappears from the left, jumping around happily and making her way towards you, just as the screen goes white. Congratulations! You've earned a good rest and a cup of tea with optional hobnob, while the superb anime ending plays, featuring a brief bit of story about Sonic and Amy escaping the Little Planet as it breaks its shackles and returns to the peaceful way it was, as well as a compilation of moments from the game's levels, in animation form!
While he's pogo-ing, just jump and land your last hit while he's briefly on the ground. This can take fairly careful timing, but once done, the whole place starts exploding as a shocked Eggman slowly scuttles away in the confusion.
Amy makes a final appearance to congratulate you as the whole place is going up in flames. She's running towards you as we fade to white. Sonic CD: Done!
#1. Comment posted by Anonymous on Sunday, 8th January 2012, 6:57pm (UTC)
The iPhone version contains a small modification to the final battle area: there are forcefields at each end of the screen that keep you from being able to run too far to the left or right. This serves to make sure that the battle area functions like the original version's 4:3 space instead of the iPhone's widescreen 16:9 space.
#2. Comment posted by Cf on Sunday, 29th January 2012, 11:40am (UTC)
To make this boss super easy just jump at him when he's low down and get hit on purpose. Grab a ring and hit him whilst you're temporarily invulnerable. Do again 3 more times. Easy :)
#3. Comment posted by Ratchet 0203 on Monday, 13th October 2014, 9:46pm (UTC)
To comment on what Cf said, that can be very useful! I did that on New Super Mario Bros. When I went through Bowser.
Hide Notes
Miscellaneous Notes
- A couple of pieces of music from this level's Japanese soundtrack are used in other titles on the Sega Saturn. The Present theme appears in an animation in compilation pack, Sonic Jam, in which Eggman runs amuck across a human city dressed in a highly unconvincing Sonic outfit, in order to frame our hero for various evil deeds. The music for the final boss also features in the special edition Sonic Team mini-title, Christmas NiGHTS. In a bonus for the game, Sonic himself battles the large, bouncy opera lady boss from the original NiGHTS game, and this highly appropriate track plays in the background, but with an added, chaotic bit at the end which does not feature in the original version.
#1. Comment posted by Pengi on Saturday, 30th July 2011, 11:13pm (UTC)
Sonic doesn't fight Puffy in Christmas NiGHTS, but rather an Eggman-ised version of the boss.
#2. Comment posted by chicobo329 on Tuesday, 27th December 2011, 8:18am (UTC)
There is an achievement in the 2011 re-release that is awarded when beating the Act 3 boss: 'Eggman Got Served'. Another achievement is awarded along with this 'All Stages Clear!' for completing all of the stages in the game. Thus you will always get both achievements at once.

After defeating the Act 3 boss as Tails, the game will fade out after the explosions and jump straight to the credits, minus the anime scenes as Tails has no opening or ending movies.
Hide Notes
Each section of this page allows users to add their own notes to fill in any missing details or supply additional research etc.
View general notes for Metallic Madness (11)
#1. Comment posted by david on Monday, 5th April 2010, 11:40pm (UTC)
hi it's david i'd like to know have you deleted my comments? because i can't find them anywhere and if u did then why?
like the one about the metallic palmtree and the gitch in metallic madness and speaking of which i haven't played sonic cd for a while(cause it's my friends) but i checked and it does work only thing is you only have about 3 seconds before it turns on for good.
#2. Comment posted by LiQuidShade on Tuesday, 6th April 2010, 12:27pm (UTC)
Hi David,

Sorry, but I've been cracking down on comments lately to make sure only relevant and useful comments remain. Your glitch would have been fine, if you had explained it more fully. You just said that it was possible to complete the zone as shrunken Sonic but you didn't say how, at all. I get a lot of people making the most ridiculous, obviously untrue claims that they just seem to make up. Your glitch may well have been true but without any sort of explanation I had to be fair, and remove it. You're welcome to rewrite it, with a very clear explanation of how you managed to achieve it.

I plan on making posting guidelines clearer soon, but it's come to a point where I need to clean out some areas of the site, to ensure a high standard of quality. I hope you understand.

Thanks.
#3. Comment posted by Sonicfan32 on Tuesday, 12th July 2011, 5:36pm (UTC)
Is it possible that this map could have been salvaged from bits and pieces of scrap brain zone?
#4. Comment posted by Chris on Saturday, 28th January 2012, 5:30am (UTC)
About the bit involving the gray spiked platforms... You don't need to wait for 5 platforms. I always jump at the 2nd one, just as it comes down close enough to jump onto.
#5. Comment posted by Stuart on Monday, 6th February 2012, 3:43pm (UTC)
Are there any Metal Sonic Holograms in Metallic Madness?
#6. Comment posted by SKSonic on Monday, 16th July 2012, 1:11am (UTC)
There are no Metal Sonic Holograms. If you have gotten all the Time Stones, just focus on getting to the Good Future. There's no point in going to the past.
#7. Comment posted by Dan on Sunday, 4th November 2012, 2:54am (UTC)
note: in the 2011 release of the game, the "teetering on the edge" mentioned in point no. 5 is 'fixed', making the area much, MUCH harder than the original.
#8. Comment posted by Anonymous on Thursday, 10th January 2013, 6:35pm (UTC)
yes, in the original Mega CD version, the diagonal spring in Zone 2 (point 1) is actually placed lower in the past than the other time zones. However, in the Futures it is completely possible. This was fixed in the PC version onwards, and in the 2011 release, 4 spinning platforms were added to further your chances of successfuly geting to the top of that ledge.
#9. Comment posted by Anonymous on Wednesday, 21st August 2013, 2:52am (UTC)
In the japanese bad future music, the voice says "You cant do anything, so dont even try it. Get some help. Dont do what Sonic does."
#10. Comment posted by Ratchet 0203 on Monday, 13th October 2014, 9:36pm (UTC)
Wait, I JUST said that David's or anybodies comments can't be deleted! I'm confused right now!
#11. Comment posted by Tent2 on Sunday, 4th January 2015, 5:57am (UTC)
Metallic Madness probably used some objects that were scrapped for Sonic 1 but no one know it except developers, talking about that, Sonic CD released after Sonic 1 in Japan, that's why i'm talking about it. Especially Scrap Brain Zone, It's like it haves something for it.
Hide Notes
Last Updated
Content for this page last edited:
7th August 2009

Files last uploaded for this page:
7th August 2009

Recent Notes
Time Travelling Tips
Posted by Lucas dos Santos on 5th December 2015

General Notes
Posted by Tent2 on 4th January 2015

Final Boss
Posted by Ratchet 0203 on 13th October 2014

General Notes
Posted by Ratchet 0203 on 13th October 2014

General Notes
Posted by Anonymous on 21st August 2013

28 notes posted on this page in total