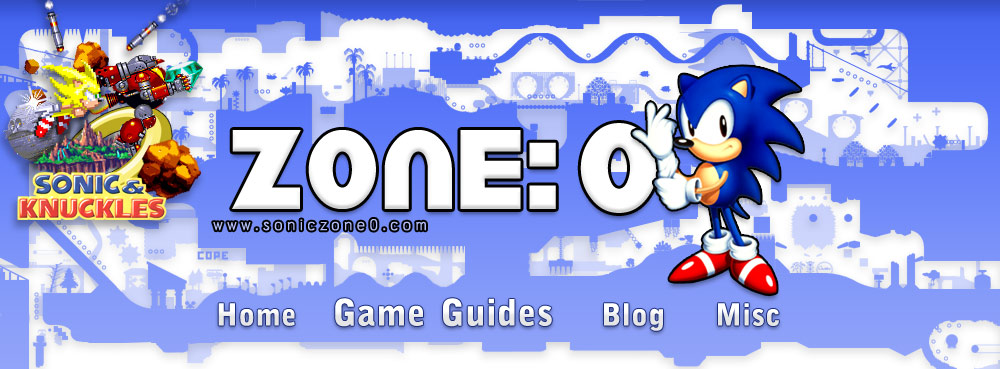
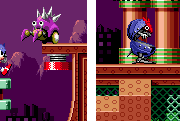
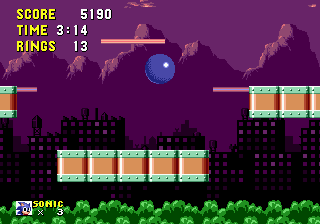
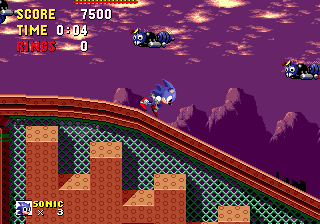
Welcome to the first ever, what is technically known as, pinball or "bouncy" stage. Seemingly set just on the outskirts of a city, this slightly bizarre and loosely casino-themed arena will throw Sonic around, and introduce him to the bumpers and moving blocks that will make this type of level one of the most common in the series. "COPE"!
Game: Sonic the Hedgehog
Stage Number: 3
Level Division: 3 Acts
Boss: End of Act 3
Playable Characters: Sonic
Difficulty Rating: 

Music: ..contributed by guest writer Flint
This one's got some grooove. And there's something very... casino-y in this one, isn't there? Brings images of the neon glitter of Vegas into your mind. Maybe it's just association with the level itself... Anyway, this
particularly groovy track has got the beat to make your feet tap rhythm
while you enjoy those gorgeous synth "horns". On the chorus the song turns
lighter, all twinkly and jingly whilst still retaining the funky bass line. Splendid stuff. Same music for all 3 acts.
Typical Length:
Act 1: 1 minute, 30 seconds - 2 minutes
Act 2: 1 minute, 30 seconds - 2 minutes
Act 3: 2 minutes, 30 seconds - 3 minutes
Available Items:
|
 |
 |
 |
 |
 |
 |
 |
| Act 1 |
167 |
2 |
2 |
1 |
1 |
1 |
1 |
| Act 2 |
221 |
1 |
0 |
1 |
1 |
0 |
1 |
| Act 3 |
164 |
2 |
3 |
3 |
3 |
1 |
1 |
Spring Yard Zone Downloads:
Top Tips
- Be careful when using the series of large blocks that move up and down the long pits. It can be really easy to get crushed between their edges, so make sure you make you move when they're moving away from, and not towards each other. Stand in the middle of them and take your time, ensuring you have plenty of space to jump or step into before you do so.
Each section of this page allows users to add their own notes to fill in any missing details or supply additional research etc.
View general notes for Spring Yard Zone (10)

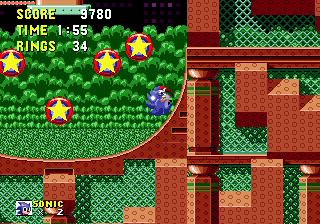
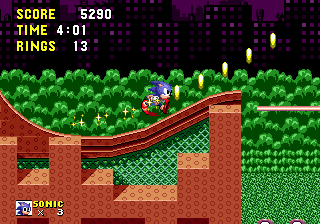
The typical "weird" stage in the Sonic legacy has its origins here, in the bizarrely designed Spring Yard Zone. Set at late evening/dusk, the zone seems to take place in a kind of park, in or very close to the city. The background is illuminated by the purple glow of the urban environment, of which the silhouettes of building tops, complete with water towers and air vents on top, are visible. Looking over the city are tall, rocky mountains, and thick green bushes and grass are located beneath the buildings, indicating the park aspects of the level. The sky is purple with sunset-yellow clouds dotted around.
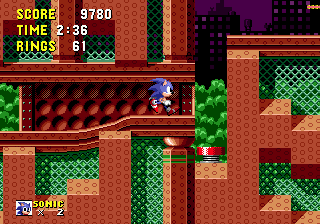
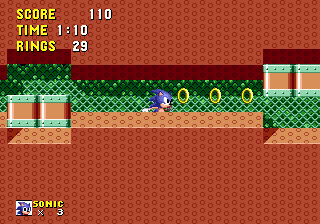
The immediate surroundings are far more arena-based though, and the ground below you is a big mix of a variety of structures and surfaces, including 3D-ish orange blocks in different shapes, and decorated in a pattern of tiny circles, plus pillars and transparent green meshing. Internal corridors around the bottom of the stage feature a background pattern of circles carved into the maroon wall, and the plain pathways of the same colour are decorated with abstract-looking pillars on top. Some purple, some blue, and their sizes vary. Angled chunks of ground near the tops of the acts are supported by brown pillars, and appear almost casino, more specifically, "Caesar's Palace" inspired. Rows of flashing neon lights are laid above straight areas of the ground, and usually in pinball bumper areas, you'll see completely random illuminated words. Look out for such words as "COPE", "ON", "UP" and "CPU" just sitting in the air, sparkling away in bold capital letters. Why in the hell are they there? As for many things in the series, no one really has a damn clue, but it's a wacky trait that hasn't really been used enough since, in my view. There are also basic lines of flashing neon lighting and glass blocks with a bright light rotating inside them.


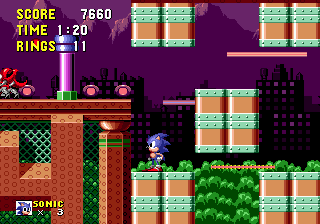
Spring Yard is a lot more open than the maze-like structure of the previous Marble Zone, with huge, wide areas along the top of the stage, often sprinkled with platforms and moving blocks to jump across. The ground below this is quite unique in its layout, and tends to be separated into thin chunks, leaving long, wide gaps between them. This means that you'll find yourself going up and down alot as you drop or run down the sides of these sometimes very deep pits, formed between the areas of stable ground. Some have rounded bottoms, and contain bouncy pinball bumpers and platforms in the middle. Running speedily down one of the walls and hitting the rolling spin attack at just the right time, the rounded base of these pits allow Sonic to zip straight back up the other wall when he reaches the bottom. The right wall will usually contain a couple of different exits along it, and so which one you take depends on your speed. On the other hand, some of these long pits are instead filled with a series of large blocks that move in a certain pattern, to allow you to slowly make your way up or down the long shaft, by carefully stepping from one block to another. Usually below all this you can also access much narrower internal passages that feature several spiky traps and steep slopes on the entrances and exits.
In the open areas, pathways on the stable ground are smooth, with a number of straight patches, but it also contains a few very long, steep slopes that are fun to run down, but very tricky to climb back up. There are plenty of curves too, including shallow curved pits on the roads that usually have a platform in the middle and spikeballs circling round them. The great variety in level structure means that brief multiple routes can be taken, where for example you can take the lower road through the internal passageway, or the higher, open path involving a lot more platform hopping. There aren't usually more than two possible routes at a time though, and all roads lead to the right. There are a fair number of hidden bonuses, found either on high up platforms or inside small internal rooms, with secret entrances in the walls. The collections of bumpers make this a fun pinball zone, and it's not too difficult either, with only one section at the end where you can fall off the bottom of the level.

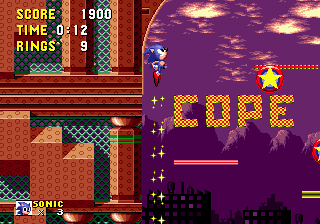
Obviously springs, both horizontal and vertical, are common in this zone. Red ones are more powerful than yellow, and the bottoms of some of the aforementioned deep pits are lined with them, sometimes introducing you to the standard Sonic bumpers. These circular plates, decorated with a yellow star will send Sonic bouncing off of them upon forceful contact and clusters of them can equal some serious back and forth bouncing. Each one also gives out 10 bonus points every time you hit it, for up to ten times per bumper. Moving platforms are also a feature that Spring Yard holds dear, and they come in all shapes and sizes. There are typical long ones, sometimes only moving when you step on a nearby button, plus groups of smaller square platforms which take certain formations. One being a vertical line, moving back and forth appropriately to create alternating diagonal formations, the safest place to stand being on the top block. They can also be aligned horizontally, moving towards and away from the central block to make it appear as though the line is compressing and expanding.
In some of the long pits described in the Level Structure section, groups of large squares move up and down in rows of three, with the middle one and the two on the outside moving in opposing directions. You have to wait for a big enough space between them to squeeze through and make your way down or up. There can be several rows of them and it's easy to get crushed between their edges as they grind together, so take your time. Another recurring feature you need to be careful with are the more shallow curved pits, with a platform in the middle and spikeballs swinging around it. If there's only one, it'll be moving fast, so run down the curve after it's gone past you. If there's two, they'll be moving slower, so use the platform to get across instead.
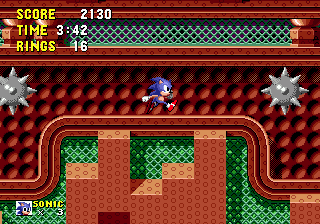
In the internal passageways of the level, you can encounter large spikeballs moving slowly either up and down or sideways. Slopes leading into the sections feature two of them on either end, moving up and down oppositely, so jump over/run underneath these accordingly. Also expect to find lines of small spikeballs swinging clockwise around a central point in the ground, with small patches of low ceilings on either side. Stand under the first low ceiling, wait for the spikes to swing across, then quickly move forward before they come round again, jumping over the step in the middle.
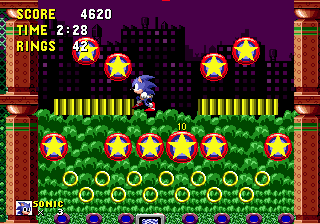
Badniks include Crabmeats and Buzz Bombers, and also a heavily spiked purple snail-like robot (who may or may not have an English name, but Japanese fans should call him "Yadorin"). Don't attack him from above, roll into him, or hit him from below when he's on the edge of a platform. The armadillo-esque Roller is a very unique enemy that is not to be mistaken for a robotic Sonic. He literally curls in a ball, and rolls down one of the steep slopes of this zone. You can only kill him when he briefly stops and opens up, and ring loss is almost inevitable unless you know exactly where each one tends to strike.

Crabmeats can frequently be found in small groups throughout the level.

If you drop into the last pit before the end, you can press the button, then use the spring to head straight through to the end for a small shortcut.
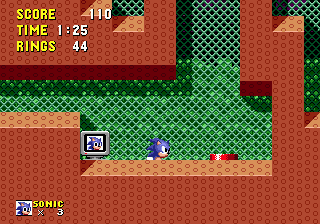
After the first sloping corridor, you'll find this platform suspended in the air, which will take you up to the higher route. It'll only move though when you stand on that button next to it, and you've got to be pretty quick, because the thing will rise very soon after pressing the button, and it won't wait for you or come back down afterwards. Do not approach the button from the left, jump over it, take a small run up coming from the right, and leap from the button to the platform nice and fluidly.

These lines of blocks expand and contract out from the central one.

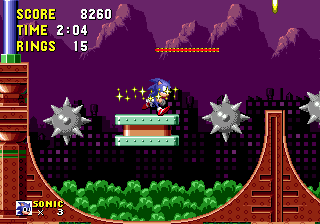
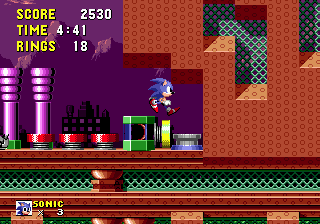
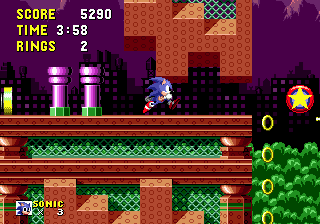
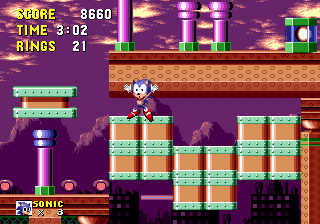
Spring Yard Zone Act 2, shortly before the end.

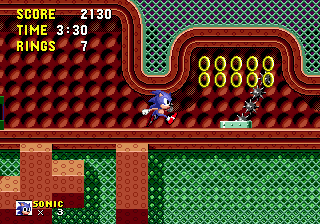
There's only one set of these moving blocks down a long pit in Act 2, at about a third of the way through, but they lead up, not down. There's an arrow made out of rings that's pointing upwards at the bottom of the pit, in order to indicate this, so if you're approaching from the top route, ignore it, and carry on to the right ledge across the other side. This is only to be used by players coming up from the bottom route, otherwise you'll be wasting your time.
While we're on the subject of this lower route, it actually carries on into a top secret passage into the wall on the right, as an alternative to progressing upwards with the ring arrow. Use the red spring on the floor and keep your thumb on the right D-pad button to squeeze into the invisible entrance. Along this route in the wall, you'll find plenty of extra rings and an extra life at the end, but it's a bit slow moving as there are a few crushing blocks on the way that you'll have to slip past carefully. At the end, a spring brings you back up to the small area filled with bumpers on the main route.
Strangely, Spring Yard Act 2 has two possible endings, and they depend on how you exit this slope here. The traditional ending is achieved simply by dropping off the side and continuing to the right, but the second one is positioned above it, and is accessible by launching off of this curve to a hidden ledge on the upper right, as the position of the rings indicate. You can do this by running down it speedily, but rather than hit the rolling spin attack as you might think, you just need to jump off to the right at the very tip of the curve. It's quite hard, but if you do it with enough momentum behind you, you should reach the higher ledge. Through here, the act's ending looks exactly the same as the lower one, but it contains a load of extra rings.

Head down the long slopes at the start with speed, to avoid the wrath of the Buzz Bombers.

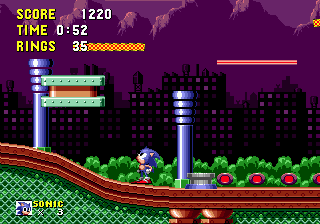
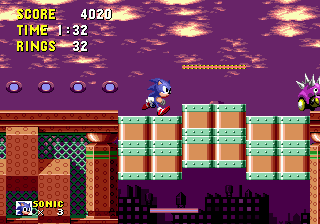
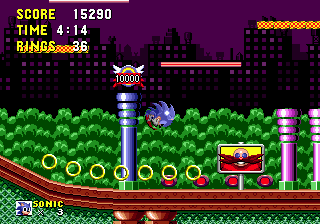
Spring Yard Zone Act 3.
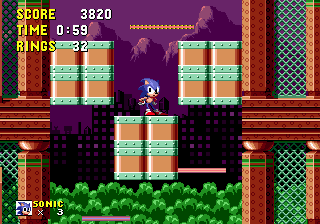
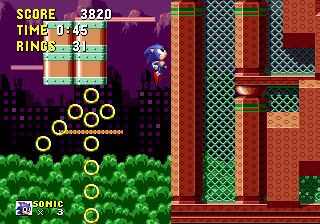
In Act 3, you'll see that in a couple of instances, the moving series of blocks in the long pits actually reach up to a ceiling at the top now. If you get up to the very top, on the middle block close to the ceiling, you'll see that when they move down, the two blocks either side of you only leave you a tiny space in which to walk over and drop down to the left side. There's a high risk of getting crushed into the ceiling here when that left block moves up, so if I were you, I'd stay on the left block that's directly below it, where Sonic is in the screenshot on the right. You can see that when the upper left block has moved up, there's ample room to jump up to the next ledge from there, thus avoiding any of that nastiness.
Press the button to make this unusual block move along to the right, and out of your way. What this one does though is carry on moving to the right, until it reaches another tight gap like this on the other side, which it'll plug up. If you want a quick shortcut, what you have to do is get through that other tight gap before it does, by navigating past the spike traps in the passage and ignoring the spring, which leads up to the normal route. If you make it there in time, you'll also be rewarded with a shield and 20 rings, plus you will have avoided a more enduring section above.
This section follows the final checkpoint of Act 3, and leads to the boss. Tread carefully, because if you slip on these moving blocks, sliding in a series of vertical formations, you'll fall to your instant death. Stay on the top blocks, and progress along them until you see the top of a pillar at the bottom of the screen, where it's safe to drop down. Just before the checkpoint, there's an invincibility at the bottom of the nearby pit, and above the bumper area, some platforms will take you up to a shield and an extra life. Make sure you come back down safely.
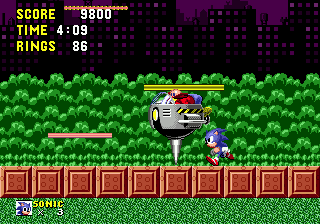
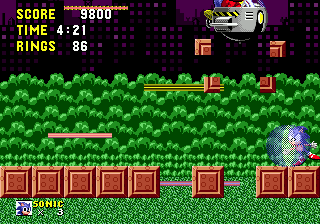
You'll find yourself standing on a row of ten orange blocks. The doctor enters from the right and starts flying around the top of the screen. You can hit him from this position, but if you stay directly underneath him long enough, a long, single spike will appear from the bottom of his machine and he'll make his descent. This is where you can land more hits, but watch out.. Robotnik's spike will latch onto one of the blocks and pull it right up and break it in the air, opening a hole in the floor. Fall into it, and it's back to the checkpoint for you, my friend. 8 hits to complete, as usual, so make sure you get them all in before you run out of places to stand. If you die, there are no rings between the last checkpoint and this boss, so you'll have to head left a little bit to get some.

- In screenshots of early beta versions of Sonic 1, the Spring Yard Zone's appearance is different, and it seemed to originally be known simply as the "Sparkling Zone".
Each section of this page allows users to add their own notes to fill in any missing details or supply additional research etc.
View general notes for Spring Yard Zone (10)