


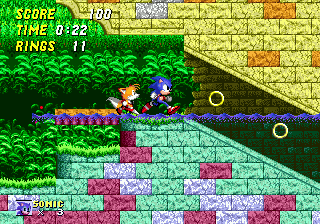
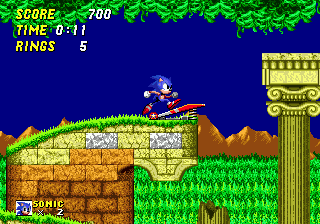
A cheerful little water level set around crumbling ruins in a small lake, hidden within a thick forest. The water divides the stage right along the middle, and one main route (filled with intertwining roads) lies above it, while the other is submerged below, where things can get much more tricky. As long as you stay on the high road, you should have few problems with this brief stage.
Game: Sonic the Hedgehog 2
Stage Number: 3
Level Division: 2 Acts
Boss: End of Act 2
Playable Characters: Sonic & Tails, Sonic, Tails. Knuckles is playable when connecting Sonic 2 to Sonic & Knuckles.
Difficulty Rating: ![]()
![]()
![]()
![]()
![]()
Music: Same music for both acts. Light, and happy. Not unlike Emerald Hill in that sense, but with more of an aquatic and slightly ancient feel to it.
Typical Length:
Act 1: Around 1 minute (above water)
Act 2: 1-2 minutes (above water)
Available Items:
| Act 1 | 176 | 3 | 7 | 3 | 1 | 1 | 1 |
| Act 2 | 213 | 4 | 12 | 0 | 3 | 1 | 2 |
Aquatic Ruin Zone Downloads:
| Level Maps: |
Act 1 map (.png) Act 2 map (.png) |
| Art: |
Official badnik art (.jpg) Unofficial level artwork for Zone: 0 (.jpg) By artist Ricky Earl |
Top Tips
- The key strategy is simply to try and stay above the water, which is harder to do in Act 2, thanks to the more open, loose structure employed by the routes at the top. If you do fall in, always head right, and grab every large air bubble you come across, because it's likely you may be down there for a while, especially if you fall in near the beginning of the act.
- The bubble clusters aren't particularly scarce, but they can be quite easy to miss sometimes, so be observant. If you get stuck on a certain bit down there, make sure you know where the nearby bubble cluster is, and return to it regularly while trying to get past the problem.
- Bushes, particularly around the water surface, can obstruct your view of what's going on, making them the perfect place for enemies to make sneak attacks before you even know they're there. Unless you're super careful, expect to lose rings quite often.
Artwork by Ricky Earl, for Zone: 0.
Each section of this page allows users to add their own notes to fill in any missing details or supply additional research etc.
View general notes for Aquatic Ruin Zone (9)
#1. Comment posted by andy on Tuesday, 2nd November 2010, 4:01pm (GMT)
#2. Comment posted by Bazzinga on Wednesday, 14th March 2012, 9:22pm (GMT)
#3. Comment posted by Michael on Tuesday, 14th August 2012, 2:17pm (BST)
#4. Comment posted by Michael on Sunday, 19th August 2012, 7:52pm (BST)
#5. Comment posted by Michael on Saturday, 25th August 2012, 8:52pm (BST)
#6. Comment posted by Anonymous V on Sunday, 25th November 2012, 8:43pm (GMT)
#7. Comment posted by nawkitty on Sunday, 14th July 2013, 1:11am (BST)
#8. Comment posted by Tricky_E on Monday, 30th December 2013, 3:34pm (GMT)
#9. Comment posted by DarkRedScorpion on Wednesday, 17th September 2014, 5:26pm (BST)
Hide Notes

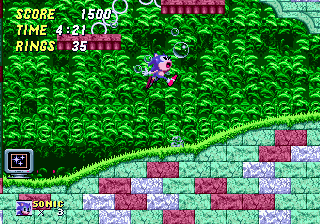
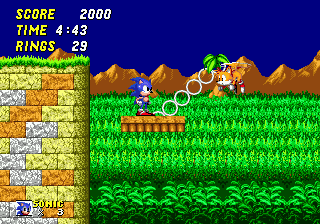
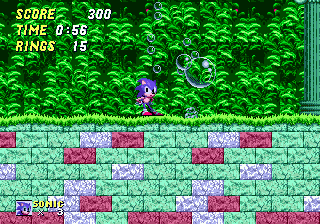
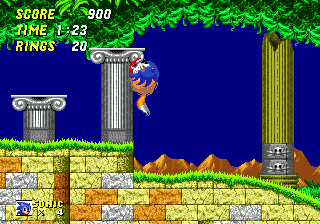
In this lake, you can see for miles across a great, light coloured forest, with some tall, rocky orange mountains in the distance, below an oddly dark blue, plain-looking sky. The backdrop for the underwater sections at the bottom of the level are simple green bushes with a few little red berries here and there.

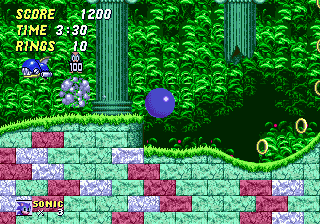
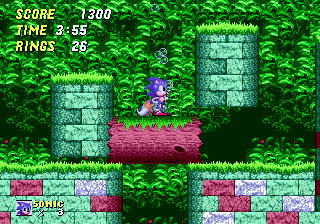
Everywhere around this lake you'll find all sorts of old, crumbling ruins of a forgotten society. The ground Sonic and Tails stand on is an old, cracked brick pattern of big yellow, orange and grey stones, with grass on top. The stones get darker coloured as you move in front of them, supporting a path above the one you're on, and they appear more green and red when seen from underwater. Long stone pillars are in abundance, either holding up some ground above you, or just standing crumbled and broken, and wide waterfalls drop gently into the lake below. Big hollow tree trunks are used for bridges in some areas, which you can either pass through or over, and loads of bushes hang down from the very top of the level, or rest on the water. Rustling noises are created when you make contact with some, shaking down loose leaves too. You'll find that there's a lot that often obstructs your view of the character, be it chunks of ground, bushes, logs, pillars and all sorts of things in this busy little forest. Usually having a lot on-screen in any one place, this is a bright, cheerful zone with lots to see.

View Notes(1)
Go to..
#1. Comment posted by Anonymous on Saturday, 17th November 2012, 6:37pm (GMT)
Hide Notes

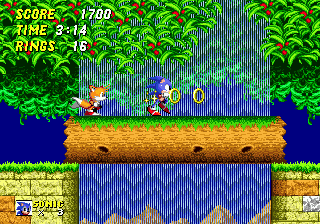
When it comes down to it, this zone has two main areas; one is straightforward and lies above the water, and the other, far more difficult one runs parallel to it, completely submerged under the lake. Both routes head in a fairly basic rightward direction, and the water occupies the whole bottom half of both acts. If you fall in it, you'll end up somewhere in the parallel, underwater route below, where you'll be forced to resume the act from there, so the idea is to try and stay on the top route. In this way, it is possible to get through this water level without even touching H2O. The top route is made up of multiple paths, sometimes two or even three at a time, above and around the surface of the lake. You can switch between these quite regularly, but the thing about them is that they tend to be very intertwined, sometimes going behind or through each other, or switching vertical positions, leading to a bit of a tangle at times. This makes for quite a cramped layout up there, in Act 1 at least, and the bushes along the top of the stage, plus the vertically-thin nature of the map make this part quite enclosed, and not particularly open. Act 2 on the other hand is a bit bigger, and there are more gaps in the path, meaning that you can fall into the water more easily. These upper paths are pretty bumpy, and filled with slopes, curves, hills and taller-than-normal loops, making it quite a speedy area, plus there are platforms to jump across. They're mostly based on fairly thick chunks of ground that sit on top of the lake, but they often become thinner as one path intertwines with another or travels along above it. This is quite a unique, interesting structure.

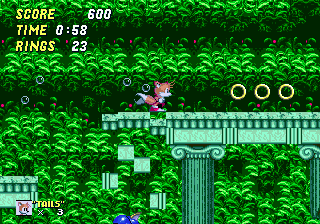
Meanwhile, the lower, submerged route is based much more on one, solid path across, and besides the occasional diagonal passage, cut into a large block of ground, it's actually more open down there, with long single rooms spanning across the act. The water makes your movement a lot slower, and as with all water levels, Sonic and/or Tails need air to stay alive during the long periods of time which they'll be down there for. Your air runs out in 30 seconds, unless you can top it up by grabbing a large air bubble, which are produced by small bubble clusters sitting at various points on the ground. In the last 10 seconds before you run out of air, a countdown will start on the screen, accompanied by that scary music. If a countdown starts with no music accompanying it, that represents Tails' need for air if you're playing as Sonic & Tails, so don't worry about that. The paths in the underwater portion are a bit less bumpy, and obviously a lot slower, and you normally have to hop between platforms or avoid obstacles to progress. Usually, you're not able to get yourself out of the water until the end of the act, where you have to hit the edge of a springboard to catapult yourself upward a fair distance. Be ready to grab every air bubble you see, in order to stand a good chance of getting through. You'll pretty much always be heading right, so you can't really get too lost, and there aren't many hidden areas or shortcuts around. Fortunately though, there are no death drops to worry about at the bottom of this lake.
View Notes(0)
Go to..
No notes have been posted in response to this section.
Hide Notes

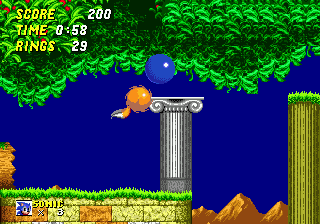
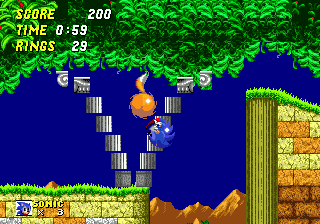
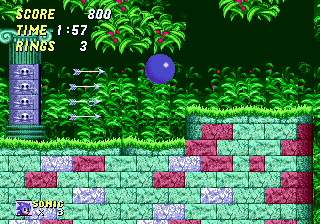
Platforms to jump across come in a variety of flavours here. There are typical ones based on the stone ground design, which stay still or fall when you land on them, or move in the usual basic vertical or sideways motions. Grey pillars with flat tops and broken bottoms float on or in the water and will usually fall when you land on them, and sets of three thin brown platforms will rotate slowly around each other, attached by circular chains. You can also get singular ones that swing 180 on the chain like a pendulum, one of which actually gets thrown off its chain and onto the water surface. Both above and below the lake, some grey pillars on the ground rise up when you get close, and stand in your way. Jump up nice and high and land on the top, letting your lethal spinning body shatter the pillar into pieces. Because of his weaker jump, this may be more difficult if you're playing this level as Knuckles, in Sonic 2 + Sonic & Knuckles, so use another platform or take a run up at it. Located on other, scenery-only pillars, you'll spot an occasional arrow launcher, which are small grey blocks with Eggman's face on them. When you get close, the eyes will start flashing red, and when you actually step past it to the right, the side will open up and an arrow will fly out, hoping to catch you in the back. These can be found in one, two, or even four to a pillar, in later areas.

Thin stone ledges aren't very stable in some places, and will crumble under your weight, so if you need them to re-generate in order to get to the next platform, leave the area and come back. More dangerously, bottom ends of pillars that hang above a path may fall down when you get close. They're heavy, so if they happen to catch you as they fall, they'll either squish you into the ground, or, in a glitch, force you below the path, where you'll either fall off the screen or be lucky enough to get away with it and land on a lower section. There are alot of red Sonic 2 springboards around the level too. These aren't as powerful as regular springs, but can be used to fly across a large distance if you hit them with enough speed, from the left side. In order to get the best height off of them, for use at the end of the long underwater routes where you need to get back up to dry land, be sure to jump on them at the far tip of the board. While underwater, extra air comes in the form of small bubble clusters which, as always, pump out a large air bubble every once in a bit that can be sucked up by one of our heroes for an additional 30 seconds worth. You'll probably be needing a fair few of them.
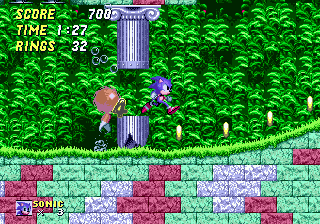
Badniks here ensure a very regular loss of rings and patience. You've got Grounder; a digging badnik on treads that bursts out of discoloured walls in some chunks of stone ground behind you, when you get close. Like Burrowbot, its relative from the Labyrinth Zone, it then wanders around until you kill it, and can survive underwater aswell as above it. Some of them patrol certain areas anyway, without the need for a surprise attack through the wall. Whisps are bothersome flies that hang out in groups of two or three around the bushy areas along the surface of the lake, or the very top of the stage, and fly over to you when you enter the vicinity. Similarly, Chop-Chop are blue piranha bots that swim slowly in the water until they see you, at which point they dive in your direction, gnashing madly.
View Notes(4)
Go to..
#1. Comment posted by Anonymous on Saturday, 17th November 2012, 6:49pm (GMT)
#2. Comment posted by Anonymous on Saturday, 17th November 2012, 6:50pm (GMT)
#3. Comment posted by skittycat on Monday, 18th November 2013, 12:25am (GMT)
#4. Comment posted by dinosaur202 on Saturday, 16th April 2016, 11:55pm (BST)
Hide Notes


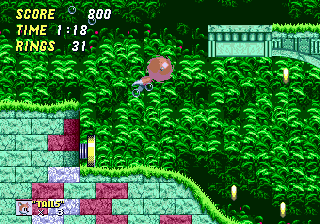
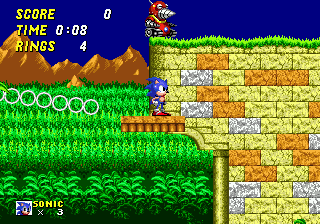
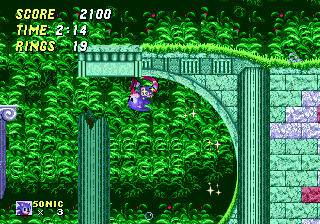
Shortly after the start, this is where routes begin to separate, but upper ones still mingle together quite closely throughout.

These falling platforms, at two different points, can lure you down onto the submerged path below.
View Notes(2)
Go to..
#1. Comment posted by Sonicfan32 on Saturday, 7th August 2010, 7:49pm (BST)
#2. Comment posted by Anonymous on Thursday, 23rd June 2011, 1:47pm (BST)
Hide Notes
At about halfway through the underwater section of Act 1, you'll find this one-off little bit down at the bottom where these two tall platforms are moving up and down either side of a small log bridge. You don't have to mess around with this section at all, but there is an extra life hidden inside that log, if you're interested. Be careful not to get crushed by one of the platforms as you walk underneath it, and either spin dash or hit the down button while moving through the log to roll into the 1-up, then be just as careful on the way out.
View Notes(0)
Go to..
No notes have been posted in response to this section.
Hide Notes
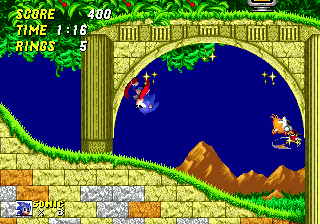
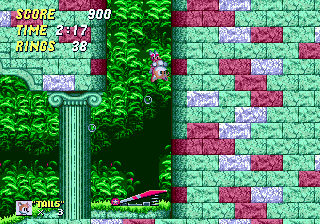
At the end of the submerged route in Act 1, you have to jump over to this ledge with a fair bit of momentum, which will crumble when you land on it. If you miss and the ledge goes down too, you may find yourself a bit stuck. Use the spring on the left to speed your way up the curve on the right, but with the ledge gone, you won't be able to continue, so you need to make it regenerate. Head back left a little way, and then come back and it should reappear. There's a bubble cluster on the way there, and another one on the next ledge, when you get there. Carry on to the springboard at the end, and jump on the far right tip of it to spring your way up to the surface.
View Notes(0)
Go to..
No notes have been posted in response to this section.
Hide Notes


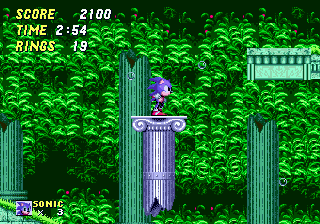
These springs cannot be reached from below, you have to drop down on them off of the swinging pendulum platform above. The reason? They allow access to the very top route.
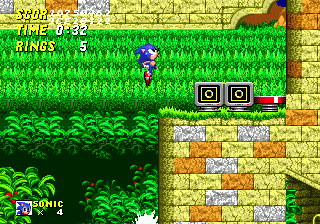
An abnormally powerful yellow spring sends you right up past these ring boxes straight to the upper route. If you want the rings, there's another red spring on that route above, just to the left. You have to aim towards it and touch the bottom of the spring to cause your character to drop back down, then land on this ledge.
If you failed to get onto the small ledge that contains the hidden goodies in Point #5, these rising pillars directly below prevent you from trying again, as they're on a step.
A well hidden life in the left hand wall just as you come up out of the water using the final springboard at the end.
View Notes(3)
Go to..
#1. Comment posted by Reckoner on Friday, 18th July 2008, 9:03pm (BST)
#2. Comment posted by Sonic Master on Thursday, 23rd June 2011, 3:54am (BST)
#3. Comment posted by philipawalker on Friday, 21st February 2014, 5:33am (GMT)
Hide Notes
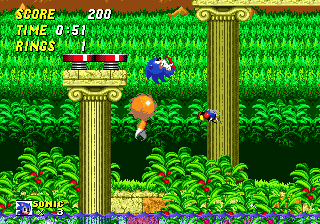
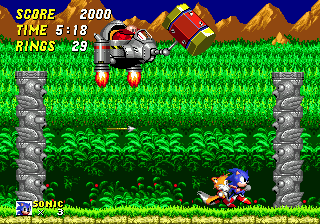
If you don't want to land in the lake, take the start of Act 2 nice and slow. There are two swinging pendulum platforms that you need to hop across carefully in order to stay on the safe, high up dry land. If you fall, you may land on a series of floating grey pillar platforms on the water below. Jump across them to the right to find another route above water, but do so quickly, before they begin to sink under your weight. Below that is the start of the submerged route, which becomes difficult to get out of once you're on it. One of the more hidden little tidbits is that the platform of the second swinging pendulum actually swings off of its chain when you're standing on it while it reaches its furthest extent to the right. The platform will fly off and onto the surface of the lake, on which it safely floats along, eventually delivering you to a tunnel that, while leading downwards, will actually take you to one of the high routes afterwards.

View Notes(0)
Go to..
No notes have been posted in response to this section.
Hide Notes
This is another one of those somewhat tricky underwater spots with a curve, near the end of Act 2, this time. If you fall down here, you have to spin dash up that curved wall on the right (or use the spring over on the far left of the area), but then carefully control your speed so that you land on, or at least touch the top of that pillar, using the right and left buttons to bring yourself to a halt. If you landed on it, hop up to the crumbling ledge on the right, above the curve to resume the level. If you didn't manage to stay on it, and it dropped down to the floor, it's still tall enough for you to leap onto from the ground, and then get up to the ledge from there. You have to make quite high jumps though, by holding the jump button for longer. If you need it, there's an air bubble cluster on the left, before the spring.
View Notes(0)
Go to..
No notes have been posted in response to this section.
Hide Notes
This powerful red spring towards the end of the highest route provides access to a small ledge over on its far right side containing 20 rings and a 1-up. Come at it from the left and then keep that right button held as you ascend through the bushes, but you won't make it to the ledge on that alone. You need to carefully reduce your momentum to land on top of a grey pillar first, then hop to the ledge on the right. If you miss, you'll more than likely fall on the right side of two other rising pillars on the ground below, which are positioned on a step that makes them too high up to break, i.e, you can't get back to the spring to try again.


View Notes(2)
Go to..
#1. Comment posted by Reckoner on Thursday, 17th July 2008, 11:56pm (BST)
#2. Comment posted by Monty Eggman on Tuesday, 7th September 2010, 4:44pm (BST)
Hide Notes
Boss


The boss of Aquatic Ruin is a good one. Stand in the middle of the arena, and two massive pillars, each adorned with four bird-head statues facing inwards, will slowly emerge from the ground, on either side. As they're rising, I'd suggest jumping on the top of the right-hand one, as it'll be too high to reach from the ground, afterwards. Dr. Robotnik will drop in from the top/middle with a massive mallet on the front of his machine. Jump and land a hit on him as soon as you see him, and then use him to bounce back to the top of the right-hand pillar. Repeat for as long as you can. Eggman's pattern will be as follows: He'll move back and forth across the top of the screen only and hit the tops of the pillars with his mallet when he reaches them. This will cause one randomly selected statue head on that pillar to spurt out an arrow, which lands in the mouth of the bird on the opposite side. When you're back on the ground, you can use these landed arrows as ledges to hop back up to the top of the pillar, or just hit Eggman from there. They'll fall out when you jump off them or when another arrow lands in their pillar. Land 8 hits, and just be careful not to let any moving arrows hit you, or to get knocked by the mallet. Bear in mind also that Knuckles' jump is too weak to get anywhere when an arrow is shot out from either the top or bottom statue head, when playing Sonic 2 + Sonic & Knuckles.
View Notes(8)
Go to..
#1. Comment posted by Sonicfan32 on Saturday, 7th August 2010, 7:55pm (BST)
#2. Comment posted by DSBthunder on Thursday, 7th July 2011, 3:42am (BST)
#3. Comment posted by hypermario13 on Saturday, 29th October 2011, 3:22pm (BST)
#4. Comment posted by hypermario13 on Saturday, 29th October 2011, 3:25pm (BST)
#5. Comment posted by hypermario13 on Saturday, 29th October 2011, 3:27pm (BST)
#6. Comment posted by philipawalker on Friday, 21st February 2014, 5:32am (GMT)
#7. Comment posted by Anonymous on Wednesday, 4th May 2016, 2:25am (BST)
#8. Comment posted by Anonymous on Wednesday, 22nd February 2017, 4:33pm (GMT)
Hide Notes

- In the incomplete beta version of Sonic 2 (a ROM available to download for emulators), the Aquatic Ruin Zone is the first level, and is actually called the "Neo Green Hill Zone". Much later on, this name was to be used for the first level in Sonic Advance, instead. In this version, badniks have yet to be placed, and pretty much the whole submerged bottom half is missing, meaning regular death drops near the water surface.
- Though his colour was changed from red to green, Aquatic Ruin's badnik Grounder earned himself a role in the first American Sonic cartoon show, "Adventures of Sonic the Hedgehog" as a regular lackey to Dr. Robotnik.
- Though his colour was changed from red to green, Aquatic Ruin's badnik Grounder earned himself a role in the first American Sonic cartoon show, "Adventures of Sonic the Hedgehog" as a regular lackey to Dr. Robotnik.
View Notes(1)
Go to..
#1. Comment posted by Anonymous on Wednesday, 17th May 2017, 3:18am (BST)
Hide Notes
Each section of this page allows users to add their own notes to fill in any missing details or supply additional research etc.
View general notes for Aquatic Ruin Zone (9)
#1. Comment posted by andy on Tuesday, 2nd November 2010, 4:01pm (GMT)
#2. Comment posted by Bazzinga on Wednesday, 14th March 2012, 9:22pm (GMT)
#3. Comment posted by Michael on Tuesday, 14th August 2012, 2:17pm (BST)
#4. Comment posted by Michael on Sunday, 19th August 2012, 7:52pm (BST)
#5. Comment posted by Michael on Saturday, 25th August 2012, 8:52pm (BST)
#6. Comment posted by Anonymous V on Sunday, 25th November 2012, 8:43pm (GMT)
#7. Comment posted by nawkitty on Sunday, 14th July 2013, 1:11am (BST)
#8. Comment posted by Tricky_E on Monday, 30th December 2013, 3:34pm (GMT)
#9. Comment posted by DarkRedScorpion on Wednesday, 17th September 2014, 5:26pm (BST)
Hide Notes
- Origin
- Storyline
- Comments
Gameplay - Basics
- Items
- Common Objects
Stages and Story - Level Design Notes
- Emerald Hill Zone
- Chemical Plant Zone
- Aquatic Ruin Zone
- Casino Night Zone
- Hill Top Zone
- Mystic Cave Zone
- Oil Ocean Zone
- Metropolis Zone
- Sky Chase Zone
- Wing Fortress Zone
- Death Egg Zone
- Ending
Other Modes - Special Stage
- Super Sonic
- 2 Player Versus
- Options
- Knuckles in Sonic 2
Miscellaneous - Ports and Compilation Appearances
- Sonic 2 Beta and the Lost Zones
- Cheats
Downloads
Last Updated
Content for this page last edited:
31st December 2013
Files last uploaded for this page:
31st December 2013
31st December 2013
Files last uploaded for this page:
31st December 2013
Recent Notes
Miscellaneous Notes
Posted by Anonymous on 17th May 2017
Boss
Posted by Anonymous on 22nd February 2017
Boss
Posted by Anonymous on 4th May 2016
Features and Obstacles
Posted by dinosaur202 on 16th April 2016
General Notes
Posted by DarkRedScorpion on 17th September 2014
30 notes posted on this page in total
Posted by Anonymous on 17th May 2017
Boss
Posted by Anonymous on 22nd February 2017
Boss
Posted by Anonymous on 4th May 2016
Features and Obstacles
Posted by dinosaur202 on 16th April 2016
General Notes
Posted by DarkRedScorpion on 17th September 2014
30 notes posted on this page in total